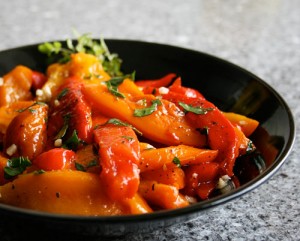
 [ Roasted Peppers – image from Google Images ]
Bet you didn’t know how easy it is to roast your own peppers at home. It is. And I do this often. I love roasted peppers. They are the perfect burger and sandwich topper in my books. I eat them all year long. Over chicken, over beef, over pork, over turkey — there is nothing that can’t be improved by being topped with roasted peppers. Nothing.
This is my method for roasted peppers done bare bones style, but certainly you can store the finished roasted peppers in a jar with some mild homemade oil-based brine if you like. I wouldn’t fill the jar with the brine until after all the peppers have been placed inside it. And even then, I wouldn’t fill the jar more than a third of the way with the brine because, as the roasted peppers rest in the fridge, they will release liquid from the cooked meal. That typically fills the jar up about half way.
Okay, here’s how I do my roasted peppers:
First turn your oven on to its broiler setting, then wash, dry and cut up the peppers into manageable sections so the peeling stage isn’t a huge mess and risky (since I’m klutzy and have a habit of dropping everything I come into contact with).
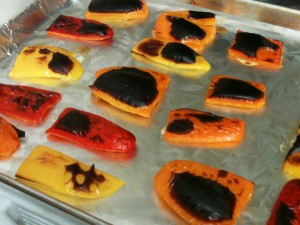
From there, I place the peppers flesh down on a lined baking sheet. I use parchment paper, but when I run out, I use tin foil and it works just as well. You’ll want something on the baking pan because the charring goo tends to burn and stick to your pans, and trust me – no one has time for that kind of cleaning nightmare!
When you have all the peppers on your lined baking pan, place it on the middle rack and leave the door ajar about 1-2 inches. Set your oven timer for 15 minutes and wait. And try not to panic when you see the skins turning black. All of them. All over. This is what you’re after. It’s totally normal, and ok.
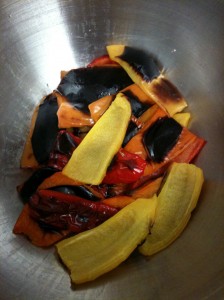
After they’re done broiling, take the baking pan out and immediately move the peppers to a waiting bowl or dish you can cover with plastic wrap. Cover the bowl and let the heat sweat the skin off of the meal for 5-10 minutes. When you can hold them in your hand without needing burn cream, you’re ready to get down to business. 🙂
After 15 minutes, grab a small bowl and pull back the plastic wrap, and prepare to get your hands dirty. And wet, and sorta icky. The fun’s about to get started, kids! 😀
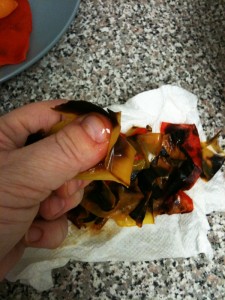
Holding a section at a time in your hands, start pushing the skin away from the flesh. You should be able to do this with complete ease. If you get a few peppers with some attached skin, put those peppers back on the baking pan and roast them another 5 minutes before sweating them again for five minutes. Don’t panic, this happens to me once in awhile, too. It’s no big deal.
You should be able to get your thumb or finger under the skin and push, pull or pinch the skin away from the pepper meal when the roasting is completed. Discard the skin into the small bowl before green binning it during your clean up.
When the whole lot has been skinned completely, carefully place them into a glass jar with a tight fitting or sealing lid. Let the full jar rest 10 minutes on your counter until you can hold the jar without it feeling too hot to handle. At that point, you can put it into your fridge to stop the continued cooking process. Ideally you’ll want to place this on a shelf away from any dairy that can curdle for the first 12 hours. After that, I tend to store mine in the fridge door because they never last long enough to spoil anyway.
Pick the peppers out of the jar with tongs or a fork to enjoy without the juice. If the peppers are too wet for your liking, dab them with a paper towel before consuming them. When serving the roasted peppers to a crowd, strain the whole jar into a bowl with a small mesh strainer in it to catch the peppers. Reserve the juices in the jar for the leftovers, if there any.
Enjoy liberally as part of your next antipasto plate, or on top of meat, in and on top of a veggy dip, as part of a rice skillet, or in a deli or panini sandwich!


