Orange Julius Tweak

OrangeJuliusRedone

So, the other day I blogged about Mel’s lovely Classic Orange Julius, and mentioned in that post that my friend Lisa wondered on Facebook whether she could make this without adding sugar. I said I would play with it and see what’s what.

I am happy to say that taking the sugar and the vanilla out and adding in vanilla flavoured Greek yogurt did the trick. And it also killed a few birds with one stone. It not only pared down the number of ingredients to use, but it also added a great creaminess to the drink that my husband said was missing for him (and I agreed) – all done without any flavour loss or sacrifice!

Here is my version that makes enough to fill two 16 oz tumblers:

Auntie Stacey’s Orange Julius:
1 C Milk
1 C Water
2 Tbsp Vanilla Greek yogurt
4-6 oz Orange Juice concentrate
4-6 Ice Cubes

My Summer Salad & Dressing Love Affair

summersalad

This is going to be my new Summer salad dressing jam this year. It’s a riff on a poppy seed dressing I found online. I added, subtracted, and of course, divided to get to this perfect equation of creamy goodness, and I’m sharing it with all of you.

Creamy Summertime Poppy Seed Dressing:
1/4 C Mayo
1/4 C Sour Cream
1/4 Tsp Sugar
1/4 Tsp Lemon Juice
1 Tbsp Vinegar
1 Tbsp Poppy Seeds
Dashes of Salt & Pepper

Combine all of the ingredients in a mason jar with a tight fitting lid so you can shake it up, or in a small bowl using a whisk. It will yield enough for 4-6 salad servings.

Enjoy this over the following salad I put together tonight. It was so tasty, I couldn’t stop eating it even after I finished everything on my plate and my stomach screamed, “I’m full. You can stop now!!”

Summertime Salad:
1/4 Sm Red Onion (finely diced; tempered in a bowl of water for 15 mins)
1 Med Zucchini, peeled into ribbons (until you see seeds; then dice core into medallions)
Sea Salt
1/4 Yellow Pepper (rough cuts are fine)
1 Med Carrot, peeled into ribbons
6 C Loose Leaf Lettuce (washed 4 times and dried off completely)

Fine dice the red onion and drop it all into a small bowl of water to temper for 15 minutes while you peel the fleshy portion of the zucchini into ribbons. Place the ribbons in a salad spinner basket sitting in its reservoir bowl and sprinkle sea salt all over them to draw out excess moisture; let this stand for 10 minutes. While waiting, dice the pepper and zucchini core, and then peel the carrot into ribbons.

Place the diced pepper, the zucchini medallions, the carrot ribbons and the loose leave lettuce in large salad bowl. When the 15 minutes are up, dump the onions over the zucchini ribbons and rinse them well under the tap. Run them through two passes in the salad spinner to get rid of all the water to avoid diluting the dressing in the final salad presentation.

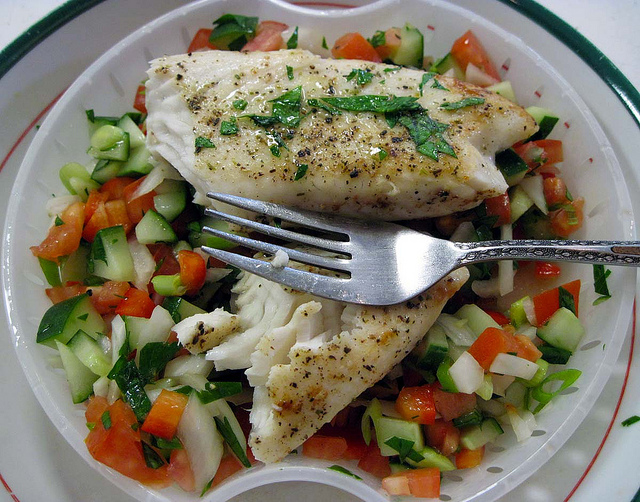
Add the onions and the zucchini ribbons to the main bowl, top with all of it with the dressing, and toss to coat all of it well. Serve immediately. By the way, I served this salad with baked fish in case you were wondering.

Have fun stuffing your face. I know I did! 🙂

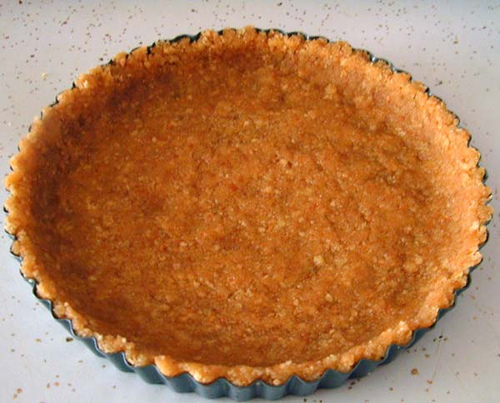
Cookie Crust – Attempt #1

CookieBase-3

The picture isn’t the best, but neither is the lightening in our dining room. Our track lighting was designed for mood and atmosphere, not food picture taking. My apologies.

I pressed 3oz of my Old Fashioned Oatmeal Cookie dough in each of the mini springform pans when making this butter tart torte and the accompanying yogurt cheese cake. I blind baked each crust for 8 minutes before cooling them down and then filling them up for the full bake.

I really liked this crust alternative. It turned out quite well and I’m happy with the results. The crust was crunchy enough to need my fork to pierce it, but not too crunchy to be hard to chew. It was the perfect kind of base for a yogurt cheese cake given the crust provided a lovely sweetness that complimented the unsweetened (for the most part) yogurt filling to this cake. This is going to be my new go-to crust for cheese cakes!

However, when it came to the butter tart, I found the crust’s sweetness compounded with the butter tart filling’s sweetness just made it overpowering. I’m not a fan of overly sweet desserts to start with, but after eating one piece, aloud I counted down to the onset of my first ever diabetic coma. And I don’t even have diabetes!!

Needless to say, I believe the husband’s family will love this butter tart tort with my cookie crust. It’s just the perfect amount of everything they love: butter to goo ratio, fruit to nuts ratio, and sweetness in the crust ratio. I think this will be hit with them because it isn’t with me. We tend to have differing tastes in desserts right across the board historically. 😉

Summer Drinks – Iced Coffees

TPW_icedCoffee

[ Photo by Ree Drummond, ThePioneerWoman.com ]

There are few things I love more in the wickedly hot Summer months than iced coffee. Sometimes I crave it during the winter, but that’s when I know my hormones are out of whack and I dutifully warn my husband about the rough week that’s ahead of him with me. I’m a considerate wife like that. {ahem}

I have done all the iced coffee brews out there that start with hot coffee and found them all too painstaking and warm, and for awhile I was even using the powdered Starbucks VIA packets (which I recommend if you’re stuck at work – just add cold water and ice if you can get it, and you’ll be good to go!), but I have never made time to try the cold brew methods so many have sworn by.

I’m dumb. Really dumb. And possibly pathologically stubborn. (Don’t ask my family or husband to verify this statement. Please.)

So, here are a few recipes for cold brewing coffee I have been trying out recently that, if you love iced coffee like me, you will want to check out, too. Seriously. Do yourself this favour. Don’t ignore this idea any further. This will complete your life. I swear on my father’s grave!

1. The Pioneer Woman‘s dead easy recipe for brewing a month’s worth of cold coffee. I love her recipes; she never lets me down. And my husband’s eyes light up like a Christmas tree anytime I mention her infamous “crack noodles.” Anyway, I just realized something. She blogged this coffee gold in 2011, and I’m just now getting around to it. Clearly I need life coaching.

I like that her recipe is for the straight brew because that gives me a lot of options for add-in ingredients. I’m experimental when it comes to my coffee drinks, given enough time to think about what I have on hand and how I want it to taste. I don’t always have the time, though. I’m thinking this would be a great weekend brew. Especially if I want to do a great Thai iced coffee drink (with the sweetened condensed and regular milks) idea Ree mentions at the end of her post.

2. Food 52 had posted a great cold coffee recipe that is very similar to Ree’s but it adds all of the sugar and ground cinnamon upfront, so it can stew overnight with the coffee grinds.

This was the first one I tried, and I have to say, it’s perfect. Nothing like pouring the already sweetened strained brew into a glass over ice and being able to drink it immediately. No fussing around with other ingredients because you’ve already added them the night before. This one is a no-brainer on those hot, sticky mornings where you just want to fill ‘er up, and rush out the door to work!

Food52

[ Photo from Food52.com ]

So, there you have it. Your two essential cold coffee brew ideas. Enjoy, and feel free to hit me in the comments with your own suggestions or recipes to add to this post. 🙂


Summer Drinks – Orange Julius


Orange-Julius-Pour-jpg

Mel, from MelsKitchenCafe.com, has been kind enough to blog about her homemade knock-off version of the mall drink my husband loves so much, the Classic Orange Julius. I said the other day on Facebook I would be testing this drink recipe in the days ahead to see if it needed any changes or if it was solid as a rock the way it is. I’m looking to make this drink lots over the coming hot days of summer, so the recipe has to be perfect.

And it is!

But, me being me, I made the executive decision to kill two birds with one stone and do away with the use of milk and vanilla extract by using Vanilla flavoured Earth’s Own Almond Milk (the only brand I will ever drink from now on because it’s so damn good and doesn’t spoil as fast as the other brands do).

As suspected, the almond milk blended beautifully and the flavour didn’t suffer one iota. In fact, it probably improved upon Mel’s recipe a smidgen. I hope she won’t mind my tweak.

The only other tweak I want to try out is for Lisa. It’s an idea I have for eliminating the sugar as she asked about on Facebook. I want to see if I can make this using the vanilla almond milk as well as vanilla Greek yogurt.

My reasons for using Greek yogurt is to thicken the drink up a bit, to see if it will blend a bit more towards a smoothie or milkshake type of drink. Sometimes I’m just in the mood for a milkshake, you know? And the extra hit of flavour from the second source of vanilla hopefully will make up for the omission of the powdered sugar. Well, in theory it will, right? We’ll shall see. {crosses fingers}

And naturally, I will report all of my findings back to all of you here on my blog. 🙂

Pico de Gallo Salsa Dip

PicoDeGallo

[ Click picture to embiggen ]

Pico de Gallo Salsa Dip
2C diced up tomatoes of choice (I used grape, but you can use Roma)
1 small red onion chopped fine
1C chopped up flat leaf parsley or cilantro (if you have it onhand)
1/2 – 1 tea minced garlic
1/4 tea cayenne pepper (this & hot sauce are substitute for finely diced jalapeno pepper)
1/4 tea hot sauce (I use the Chinese hot pepper mix I use in my Asian dishes)
Freshly squeezed juice from one lime (more if you like it stronger)
S&P to taste

Mix well together in a large bowl and refrigerate in a mason jar for at least 24 hours so all of the flavours marry. (Though, at this point it will be rather tasty so you could serve it immediately if time isn’t on your side.)

Auntie Stacey’s Carrot Cookies

Auntie Stacey’s Carrot Cookies
1/2 C (1 stick) unsalted butter, melted
1/2 C brown sugar, packed
1/4 C white sugar
1 egg yolk
3/4 C flour (your choice – I use all purpose)
1/2 teaspoon salt
1 C teaspoon rolled oats
3/4 C carrots, shredded
1/3 C dried fruit or chocolate chunks (your choice)

Preheat oven to 350 degrees.

1. Cream your butter and then mix in the sugars; add the yolk and mix till all is moistened.
2. Stir the flour and salt together; spoon into the mixing bowl with the machine running on its lowest setting.
3. Carefully spoon the last three ingredients into the mixing bowl while the machine is running on its lowest setting till everything is blended nicely.
4. Drop and flatten spoonfuls onto parchment lined cookie sheets and bake for 15-20 minutes per batch.

Dip part of cookies into melted chocolate when cooled if PMS’ing.

‘For Two’ Recipe Blog

ButteredPecanSconesforsite

[ Click picture to embiggen ]

I keep meaning to tell Ellen and Wendy about a blog that serves up recipes for two single servings. The blog is called Dessert For Two, and it’s run by the lovely and friendly Christina. She goes by @DessertForTwo on Twitter so if you ever have a question, that’s probably the best place to grab her attention.

I love this blog. Often I will want to cook or bake something out of the blue but I don’t want a million bits of leftover kicking around going stale after we’ve satiated our hankerings. This site fits the bill because Christina has probably already taken the time to figure out the reduced ingredient increments for whatever we want to make into a micro batch.

For example, today I was thinking I would make some scones for breakfast tomorrow, and not just any scones, but bacon infused scones. I went to her site, searched “scone” and a few recipes came up. I really like this one for Buttered Pecan Scones. Yummy. (See her picture above for what they look like.) All I have to do is follow one and sub out the flavour ingredients for the bacon, and I’ll be off to the races.

I will post my results tomorrow if they turn out as well as I think they will. Stay tuned.

Old Fashioned Oatmeal Cookies

Cran-OatCookies-2
[ Click picture to embiggen ]
Old Fashioned Oatmeal Cookies:
1 cup butter, softened
1 cup packed brown sugar
1/2 cup granulated sugar
2 large eggs (room temperature)
1/4 cup milk
1 tablespoon vanilla


4 cups rolled oats (the 5-minute kind)
1+1/2 cups cups all-purpose flour
1 cup finely crushed graham crackers (about 15)
1 teaspoon baking soda
1 teaspoon baking powder
1 teaspoon ground cinnamon
1/2 teaspoon salt

OPTIONS:
7oz marshmallow creme (Fluff) topped with 45-50 Hershey Kisses, unwrapped (S’Mores)
1 to 1+1/2 cup dried cranberries (Craisins)
1 to 1+1/2 cup chocolate chips

1. In a medium bowl whisk the oats, flour, graham crackers, baking soda, baking powder, cinnamon and salt together until well combined. Set aside.
2. In a large bowl beat the butter on medium speed for 30 seconds the beat in both sugars, scraping down the side of the bowl.
3. Beat in the eggs, milk and vanilla just until combined.
4. Beat in as much of the flour mixture as you can with the mixer, if it gets too thick for your mixer stir by hand until just combined.
5. Cover the bowl with plastic wrap, or roll the dough out into logs in wax paper, and chill at least 1 hour but no longer than 4 hours.
6. Preheat oven to 375 degrees F. Line cookie sheets with parchment paper or lightly grease.
7. Scoop up slightly rounded tablespoonfuls of dough and lightly roll into a ball, or cut up your logs into dough slices. Place each about 2 inches apart on prepared cookie sheets and bake 8 minutes.
8. Remove from oven to cool off on wire racks. Note: If making the S’mores version use the back of a measuring spoon to make a small indent in the center of each cookie before dropping teaspoonfuls (use another spoon to scrape it off the measuring spoon) of marshmallow fluff into each one and then push a kiss down into the center of that.
9. Store in one layer in a tightly covered container up to one week – although truth be told, they’ve never last that long around here.

I make these cookies almost weekly now. I routinely split the dough up into six measured out 10-oz blobs which I then roll into 2″ thick logs in sheets of waxed paper to create small bake batches. I twist the ends of the wax paper like a bon bon candy would be to seal the logs up, and chill them in the fridge for close to 2 hours before baking. Oh, and with my bench scraper (or the blade of my big chef’s knife) I flatten each end of the logs so all of the cookies are even and uniform when I cut them.

The husband loves when I add dried cranberries (Craisins) into these cookies, but I’ve also added other stuff like chocolate chips, nuts, Fluff & Hershey Kisses, etc. Be as creative as you like. There are some suggestions above at the bottom of the recipe listing. You can even wait till after you measure each blob out to add your extra ingredients to make six different cookie logs in one go as long as you’re organized enough to do so.

Conversely, these cookies are delicious enough to stand on their own without any extras added. Just the bare bones cookie dough, all on its own. Try it. You’ll see what I mean.

Normally I split the batch of dough rolls to give three away to my in-laws, and reserve the other three to bake up small batches of a dozen bite size cookies for us to enjoy. I tend to bake one roll every other day to replenish our cookie stash. These cookies hold their soft, chewy texture really well, too. The proof of that is I left one cookie out all night by accident (OOPS) and the next morning it tasted just as fresh as it had the day before we made them.

This dough can also be frozen if you’re planning to use them at Christmas. I would recommend making these no longer than 3 months in advance if you so inclined to have your freezer that stocked up. I find making doughs and baking so many different cookies at Christmas stressful, so I like to start stockpiling around the last week of November and make one new cookie batch to freeze every week as time permits. In the end, all I have to do is cut, bake, cool and decorate as I wrap gifts. Saves me loads of time on doing dishes and fridge space as the doughs require chilling.

And finally, the logs should each yield at least 6 healthy cookies, or if you are modest or want to stretch the dough as far as you can make it go, you can probably make close to 16 thin cookies (but not paper thin — no one likes that!). I approach cutting up the long as I do cutting up sushi rolls. (Cut the log in half; line up those halves side by side and cut in half, and cut outward from there until all log sections are uniformly sliced up.)

Enjoy!