Butter Tarts

choc-butter-tart-with-bite

Thinking about making butter tarts tonight, but I’m holding myself back because I made some many oatmeal chocolate chip and oatmeal cranberry cookies this morning. I’m sure the husband won’t mind, though. He never does. 🙂

I’m trying to figure out which of these two recipes I want to test drive if you’re at all interested in making your own:

VidalButterTart

The difference between them is the use of light corn syrup. I’m not a fan but I have been known to use it in my Rice Krispie squares, so I already have some on hand. I’m also a bit puzzled by the comment left on the recipe using the corn syrup that the butter tarts came out runny. I’m not sure how that would happen with a strong binding ingredient like corn syrup. Odd.

I’m using store bought tart shells because my hands are too hot to work with cold butters while forming pastry doughs. Oh, sure I’ve tried the dip-your-hands-in-cold-water-then-quickly-wipe-them-dry trick, but it never works for more than 30 seconds before the dough starts to mush out in my hands. It doesn’t matter how cold I can get my hands, either. Butter + my hands = disaster. I can’t even hold a chocolate bar for long because I can feel it sink into my fingers. I have to get my husband to hold it while we walk from the aisle to the checkout. Pathetic.

Alas, this is the reason I never became a baker. It’s a curse no baker wants to have. (le sigh)


Peanut Butter Cookies

OPCPeanutButterCookies

Something about today is just breaking my brain. Or, perhaps my brain isn’t quite awake like the rest of me? Not sure. But, I’m fairly certain only simple things will get done today, like this simple 3-ingredient recipe for Peanut Butter Cookies. All it requires is one egg, 1 cup of sugar and one cup of peanut butter. (Ratio: 1:1:1)

Or, if you’re running on full steam unlike me today, and you like a bit of jazz hands with your Peanut Butter cookies, you can always try this version from Tasty Kitchen. You can’t go wrong with anything from that site!

Giada’s Nonna’s Lemon Ricotta Muffins

Lemon Ricotta Muffins by Giada

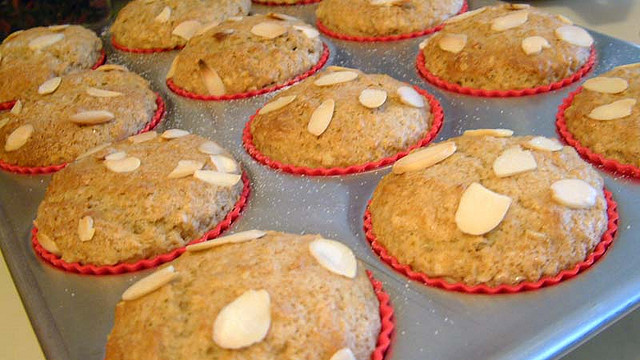
Giada’s Nonna’s Lemon Ricotta Muffins recipe. If you haven’t tried or tasted these, you MUST. This one is a favourite of my husband’s. I didn’t toast the slivered almonds on top, but I bet if I had, that would have simply added another dimension of flavour to these babies. And believe me, they’re already bursting with amazing flavours and sport a texture that will think you’re eating part of a cloud.

Why are you still reading this post? Go make these muffins. NOW!

Ice Queen’s Starbucks Pumpkin Scone Clones

Pumpkin Scones Recipe [pic courtesy Career In The Oven]

Pic courtesy of Career In The Oven. Pumpkin scone recipe comes courtesy of Ice Queen. Susan runs a cooking school. And she’s funny. Consider stalking her. She likes stalkers.

FYI, I send a batch of these to my brother and to a dear friend in the mail. They held up well if you seal them first and pack them in bubble wrap or styrofoam popcorn.

INGREDIENTS:
2 cups all-purpose flour
7 tablespoons granulated sugar
1 tablespoon baking powder
1/2 teaspoon salt
1/2 teaspoon ground cinnamon
1/4 teaspoon ground ginger
1/2 cup canned pumpkin
3 tablespoons half-and-half
1 large egg
6 tablespoons cold butter

PLAIN GLAZE:
1 cup plus 1 tablespoon powdered sugar
2 tablespoons whole milk

SPICED ICING:
1 cup plus 3 tablespoons powdered sugar
2 tablespoons half and half cream
1/4 teaspoon ground cinnamon
pinch ground ginger

INSTRUCTIONS:
1. Preheat oven to 425 degrees F.

2. Combine flour, sugar, baking powder, salt, 1/2 teaspoon cinnamon and 1/4 teaspoon ginger in a large bowl.

3. In a separate medium bowl, whisk together pumpkin, half-and-half, and egg.

4. Cut butter into cubes then add it to the dry ingredients. Mix with your hand, rubbing the butter in until it is the texture of cornmeal or coarse sand.

5. Fold wet ingredients into dry ingredients, then form the dough into a ball. Pat out dough onto a lightly floured surface and form it into a 1-inch thick disk. Vut it into eight triangles, like a pizza, and separate them a bit so they can spread.

6. Bake for 14 to 16 minutes on a baking sheet that has been lightly oiled or lined with parchment paper. Scones should begin to turn light brown. Watch them, they burn quickly near the end!

7. While scones cool, prepare plain glaze by combining ingredients in a medium bowl with an electric mixer on medium speed. Mix until smooth.

8. When scones are cool, use a brush to paint a coating of the glaze over the top of each scone.

9. As that white glaze firms up, prepare spiced icing by combining ingredients in another medium bowl with an electric mixer on medium speed. Drizzle this thicker icing over each scone and allow the icing to dry before serving (at least 1 hour). A squirt bottle works great for this, or you can drizzle with a whisk.