
I sorta can’t wait for the hot summer months just so I can drink this on the regular. It’s so good. Try this Froze Strawberry Lemonade and tell me what you think, please.

I sorta can’t wait for the hot summer months just so I can drink this on the regular. It’s so good. Try this Froze Strawberry Lemonade and tell me what you think, please.

Here is a smoothie I found on Pinterest. I have tried it and it’s very close to the taste of the candy bar. Just without all of the chewing. (Sometimes my jaw gets tired. LOL) Anyway, I would recommend this for when you are bored or need a sugar fix. It’s really good so it would appeal to kids in small amounts, too.
Try this one and tell me what you think of the Snicker Smoothie.
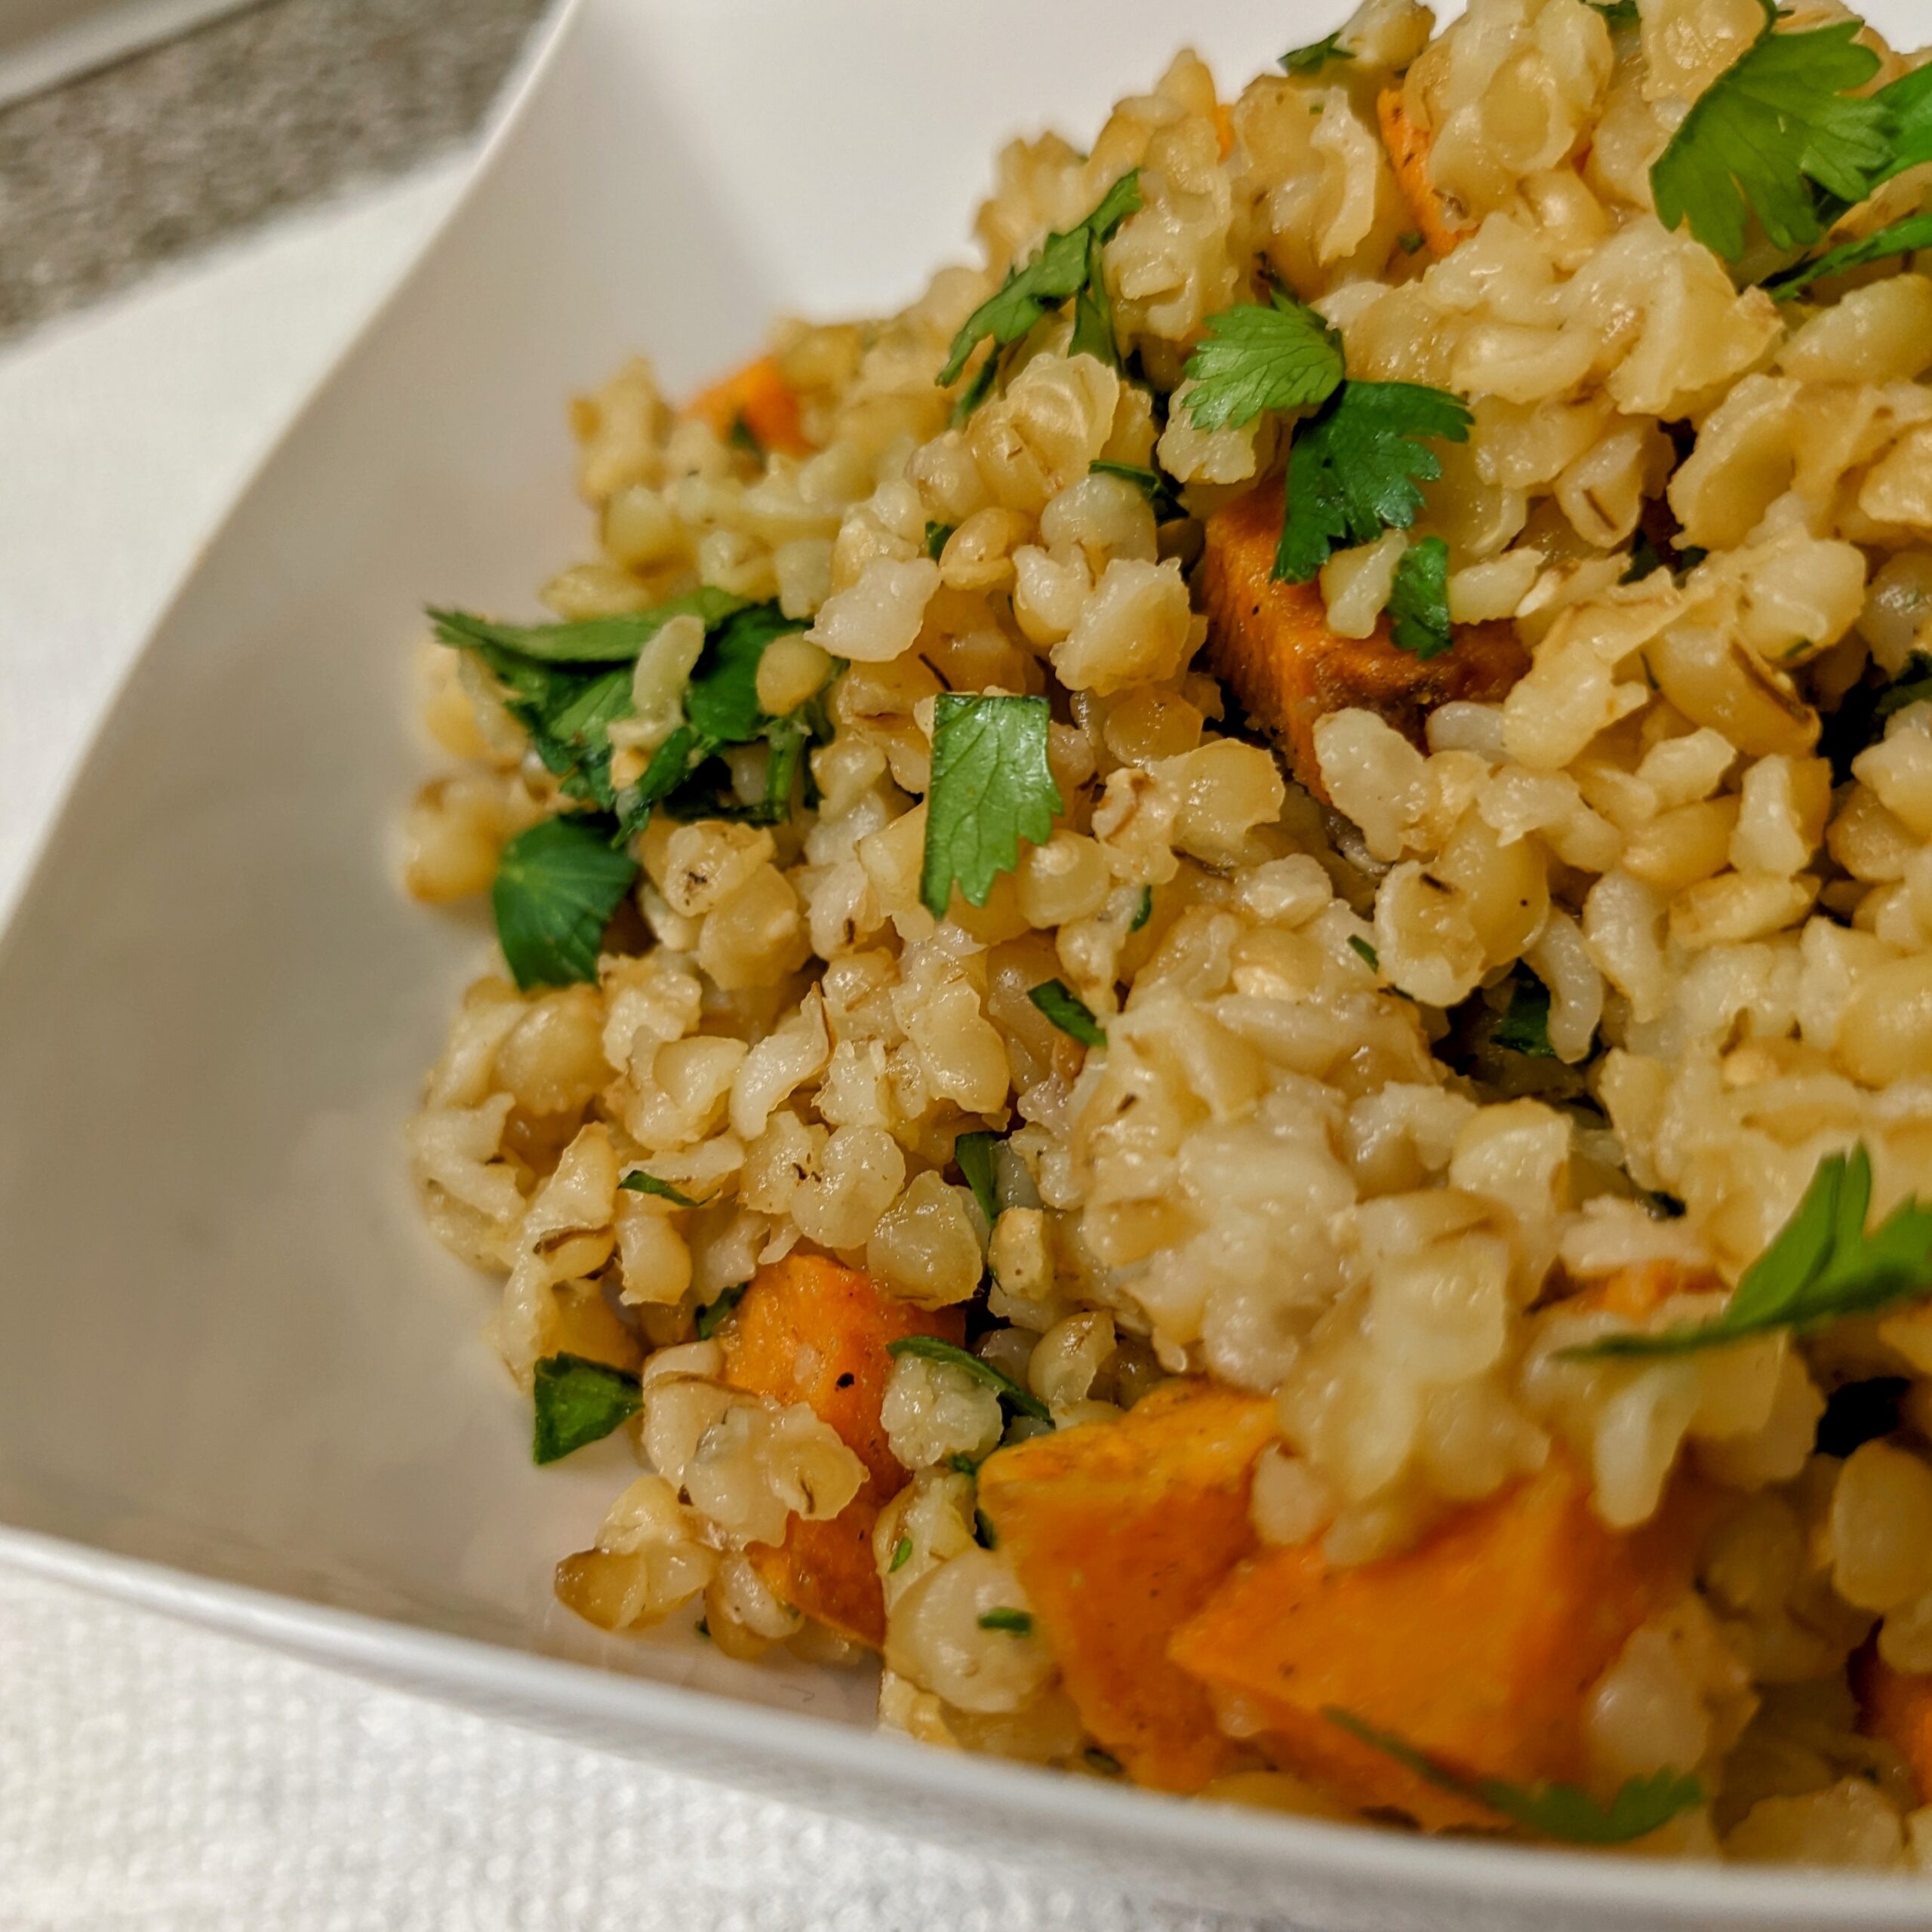
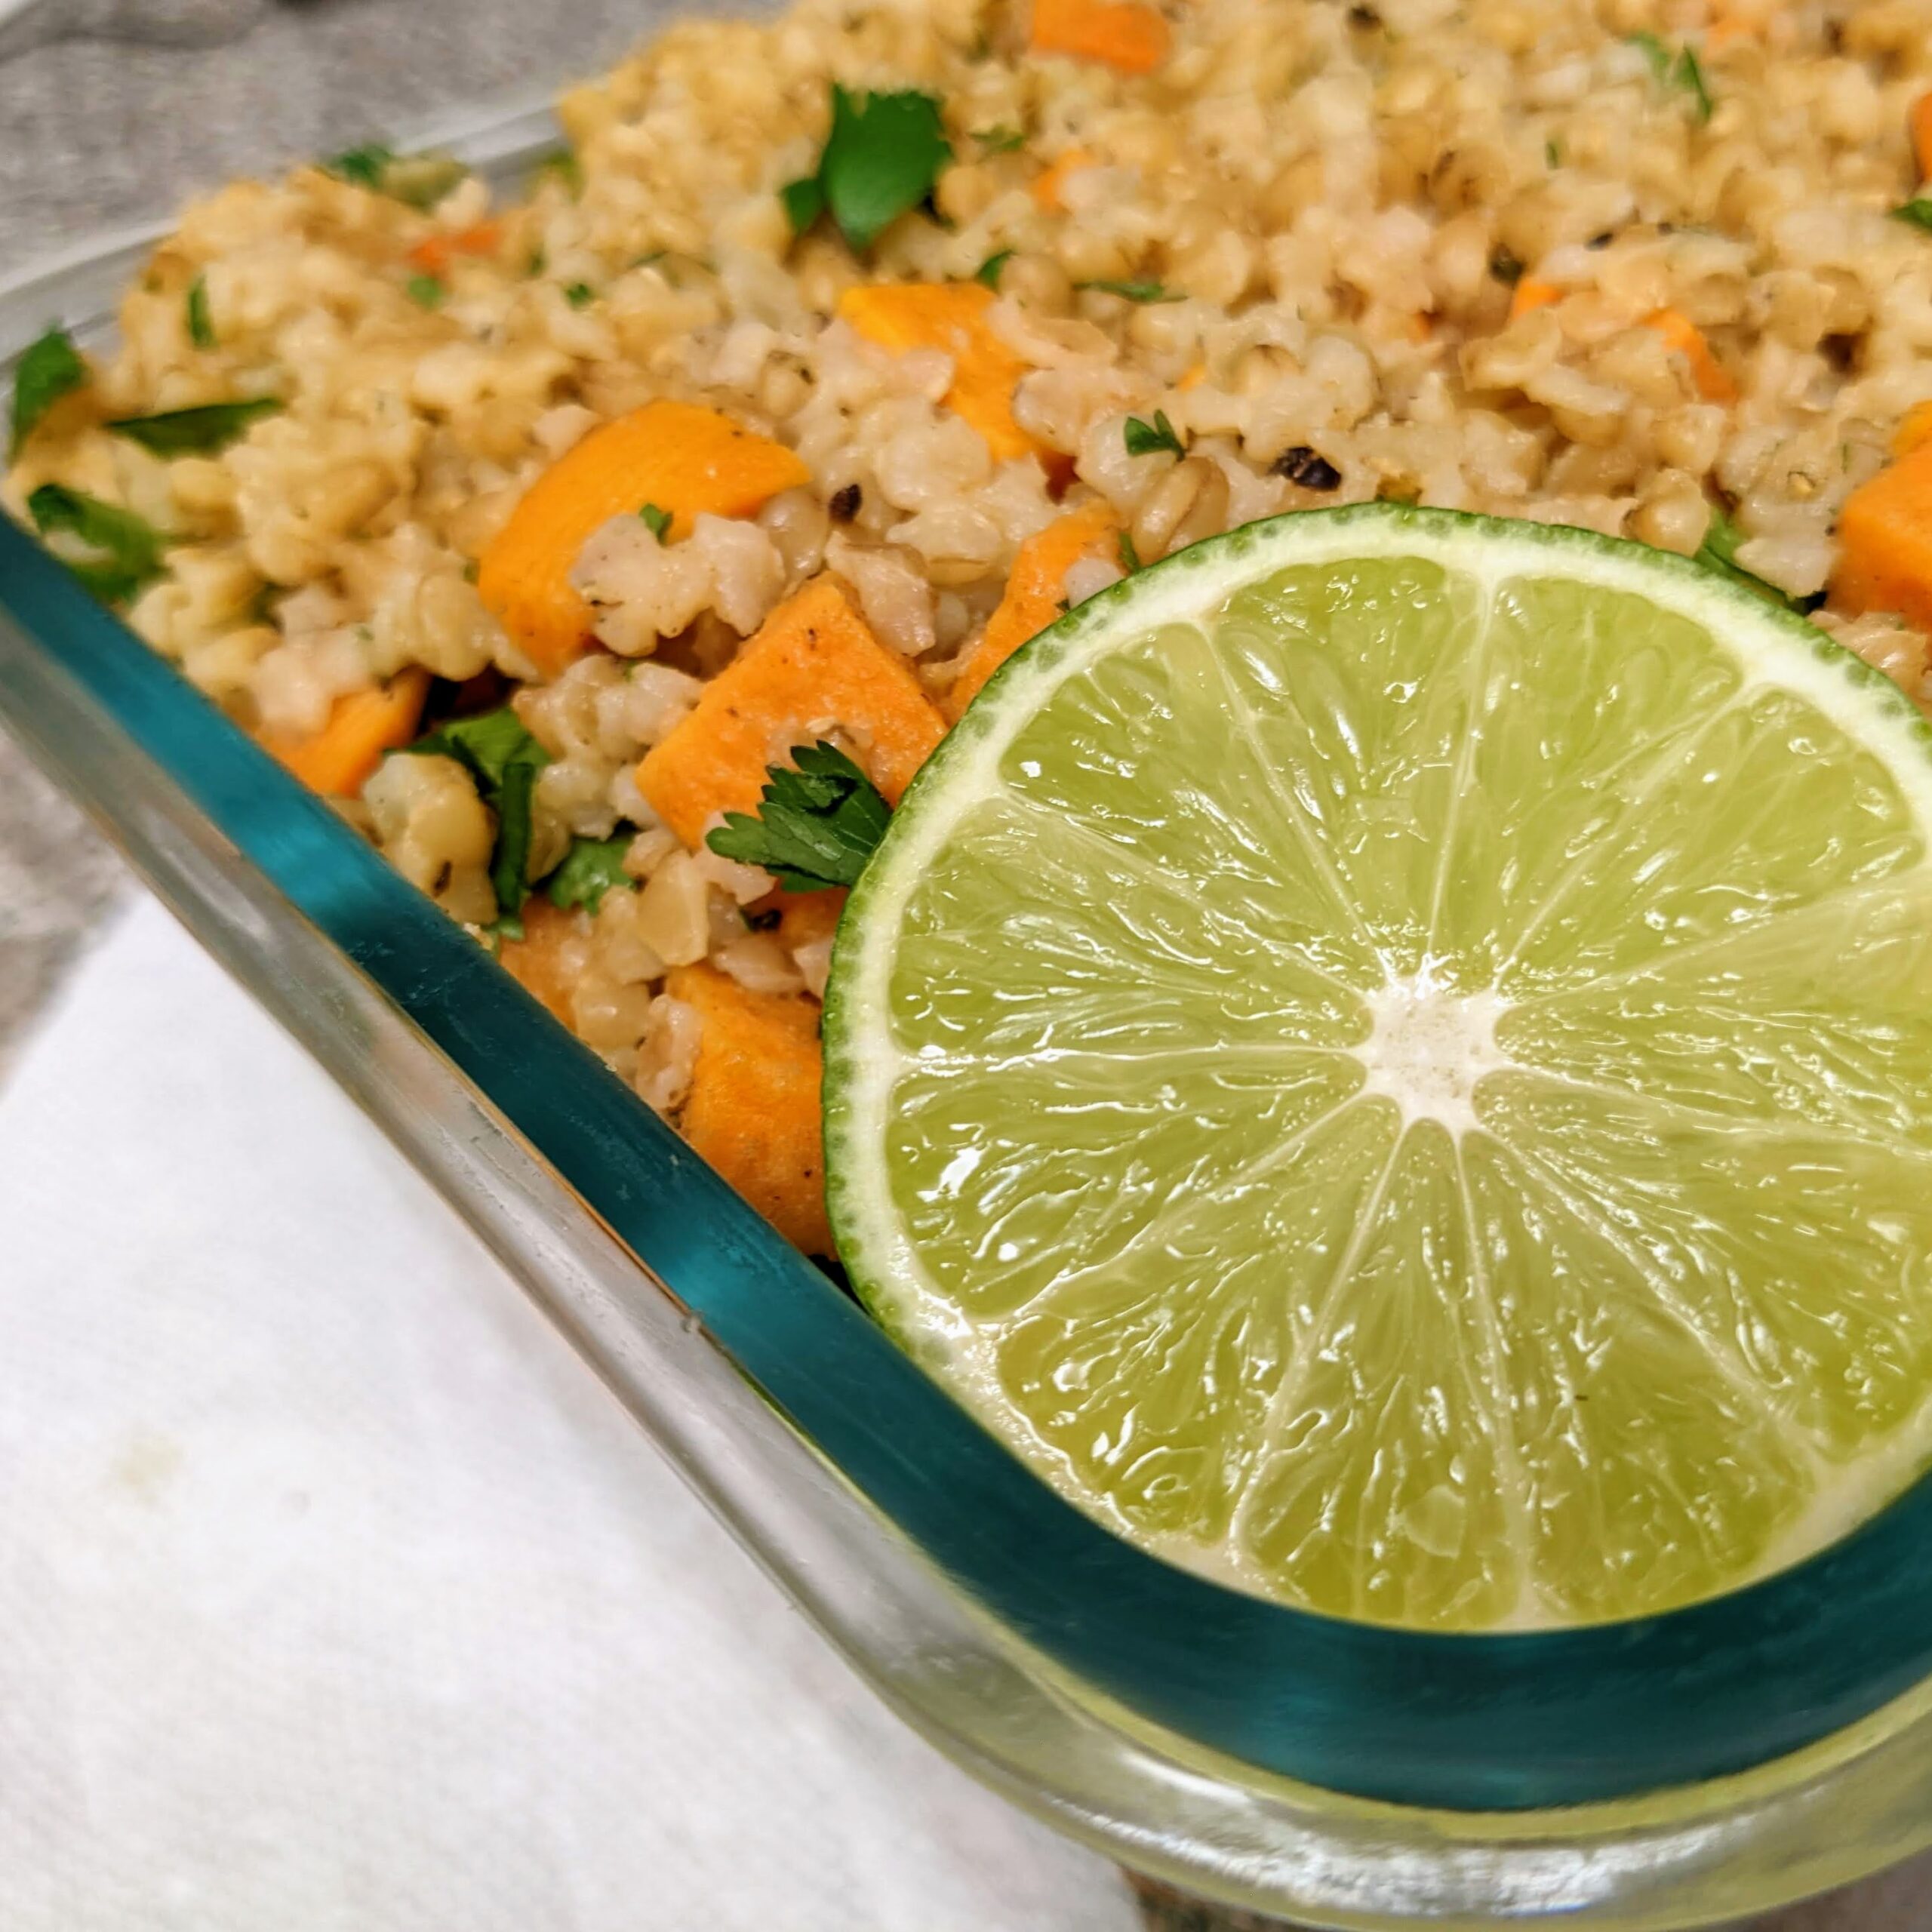
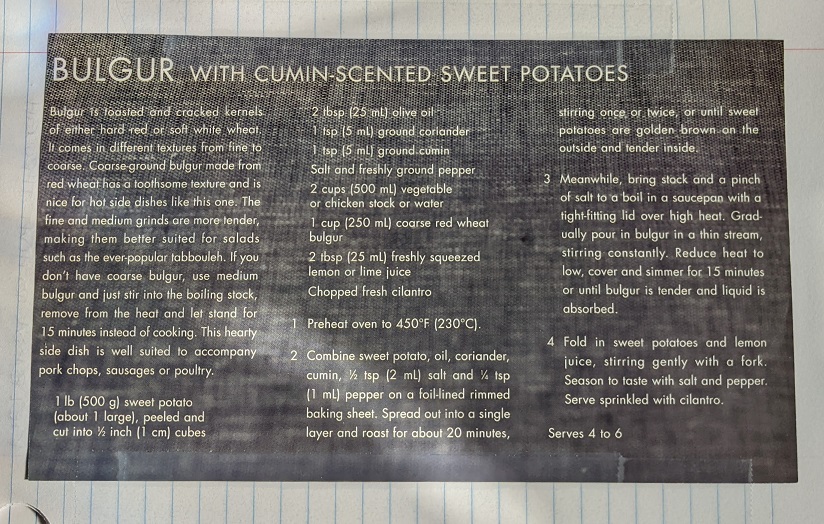
I love this bulgur salad recipe I found in a grocery store magazine some years back. I renamed it my Harvest Bulgur Salad. I think it’s more apt. I also deviate from the recipe where produce and spices are concerned since I’m not to big on cumin. I just don’t like it as much as everyone tells me I should. Meh.
I can easily adapt for all four months with a simple swap of the sweet potato for other vegetables that make sense at the time, for whatever is in season at that time. I did a summer version using corn that I smoked on the cobb in my backyard. That was so delicious.
For the Spring version, I use apple chunks or dried cranberries. And for winter, I might use pomegranate seeds or something else that catches my eye.
I love to roast the sweet potato chunks in my air fryer after rolling it around in a bit of oil, s&p, and smoked paprika.
I sent this to my husband’s office pot luck where more than half of the staff are hardcore vegetarians, and it went over well. Give it a try in its base form, and tweak it from there. It’s a lovely, filling meal. One I love to make over and over.
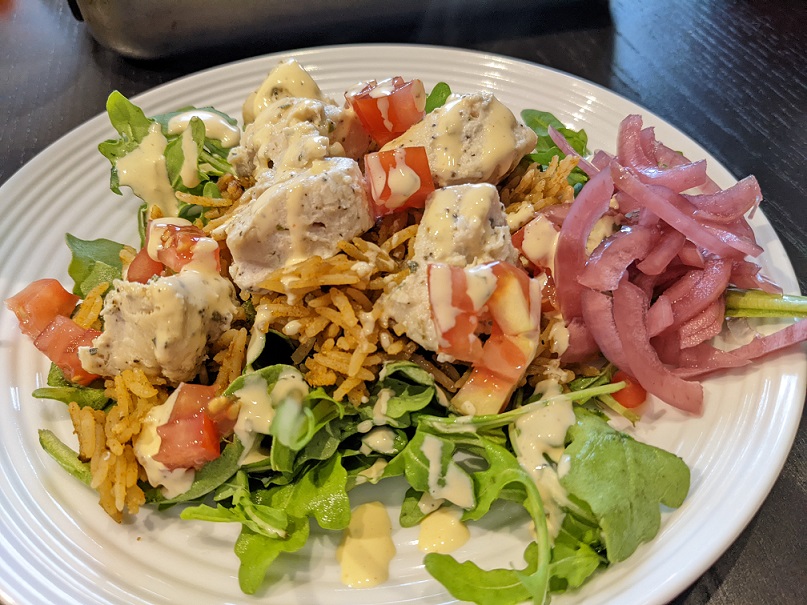
I ordered a Chicken Sharwarma on the Rox from Osmosa’s awhile ago, and they added a salad portion in the corner of the takeout box, so when I moved it over to the plate, I set up the salad first, and then scooped the rice over top and dropped the shawarma overtop as I pulled them off the skewer sticks. I think I some kind of garlicy salad dressing over it, but I can’t recall which one at this point. And of course I dropped some of my beloved pickled red onions on the side. It would be a crime if I didn’t. 🙂
I think this is a very pretty salad plate. I think about it often. And it was good and yummy.
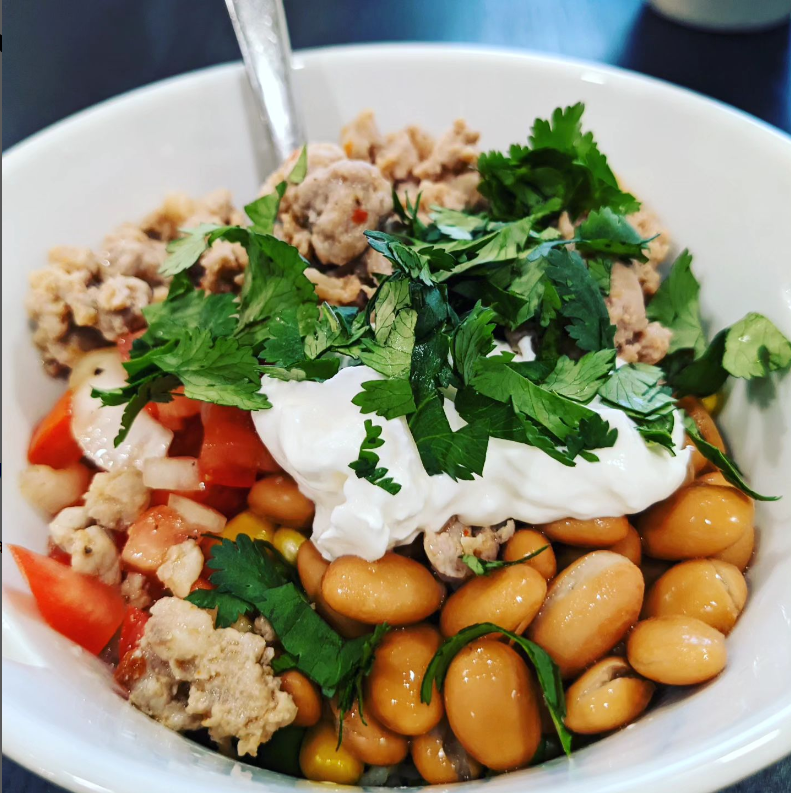
So, the other day I made this lovely quasi Tex-Mex rice bowl for our Taco Tuesday dinner. The next night I still had so many materials leftover, plus all of the other ingredients I forgot to prep and add (salsa, cheese, deep fried onions), so I made another better version to make the true taco rice bowl I envisioned all week.
Both looked great, but the second one worked better because it had some moisture and heat the first attempt didn’t. Oh, and I found a squeeze bottle of some cheesy chipotle sauce I bought specifically for this taco meal and had forgot all about, the following Friday in my pantry. D-oh!
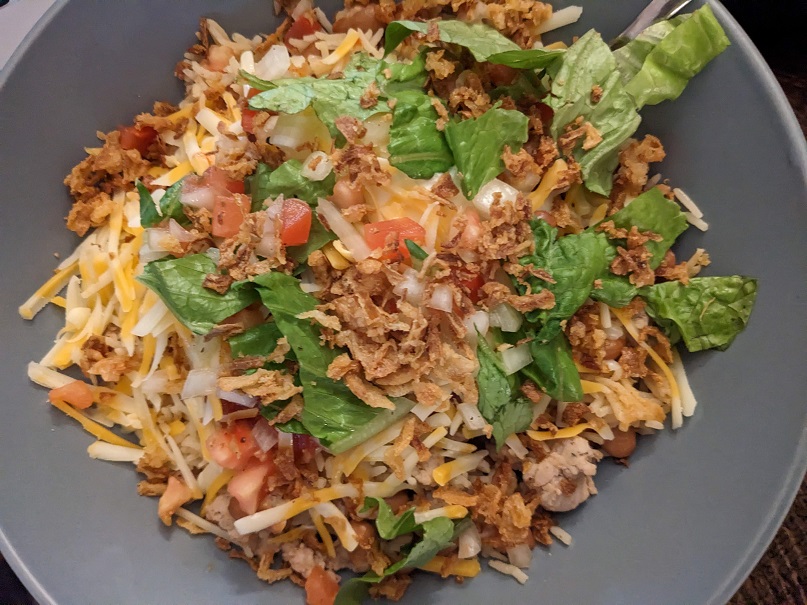
So, what was in my taco bowls?
Rice
Lettuce shredded up
Ground Chorizo Meat
Pinto Beans
Homemade Pico de Gallo
Sour Cream
Cilantro Leaves
Lime Juice squeezes
Cheese shredded up
Deep Fried Onions
That’s just a list of what I had on hand prepped to use in them. Your list might be different, and that’s ok. Cooked chicken shred or cooked ground beef also works, as does pickled onions and pickled jalapenos. You can use some Mexican cheese if you have it, as well as some broken up tortilla chips if you like.
Go crazy, or keep it pared down to five items. It’s your bowl, your way.
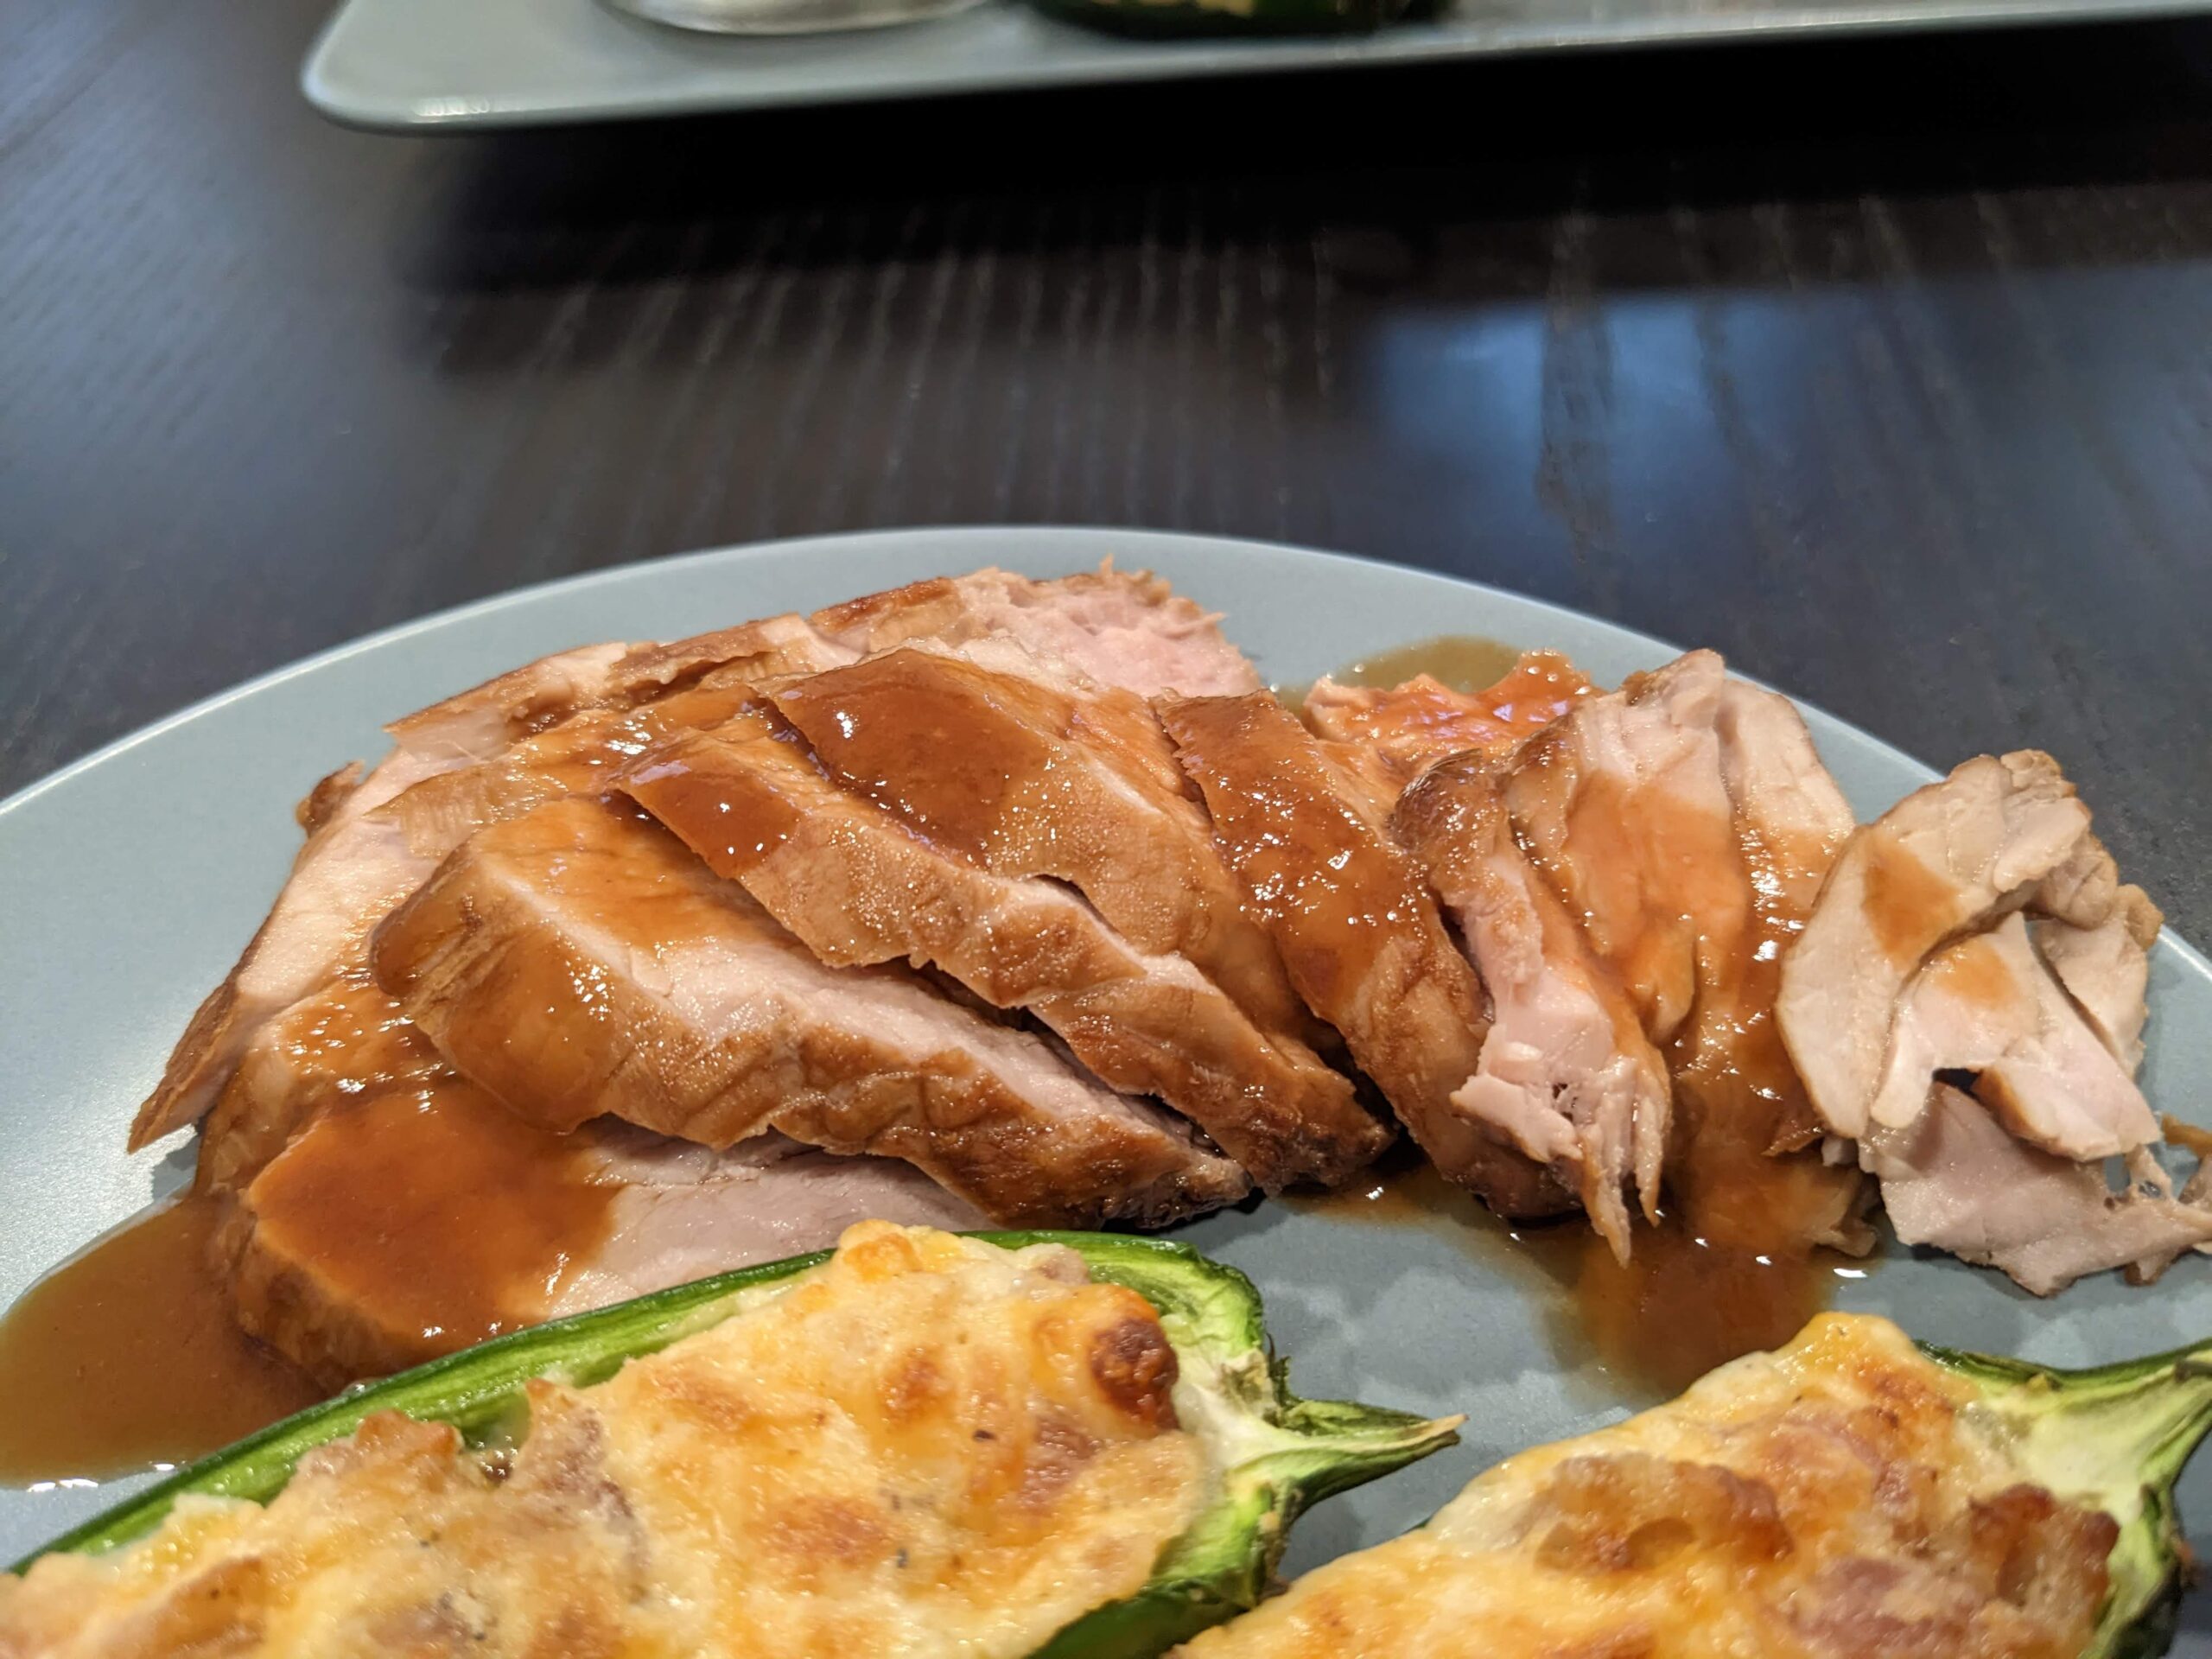
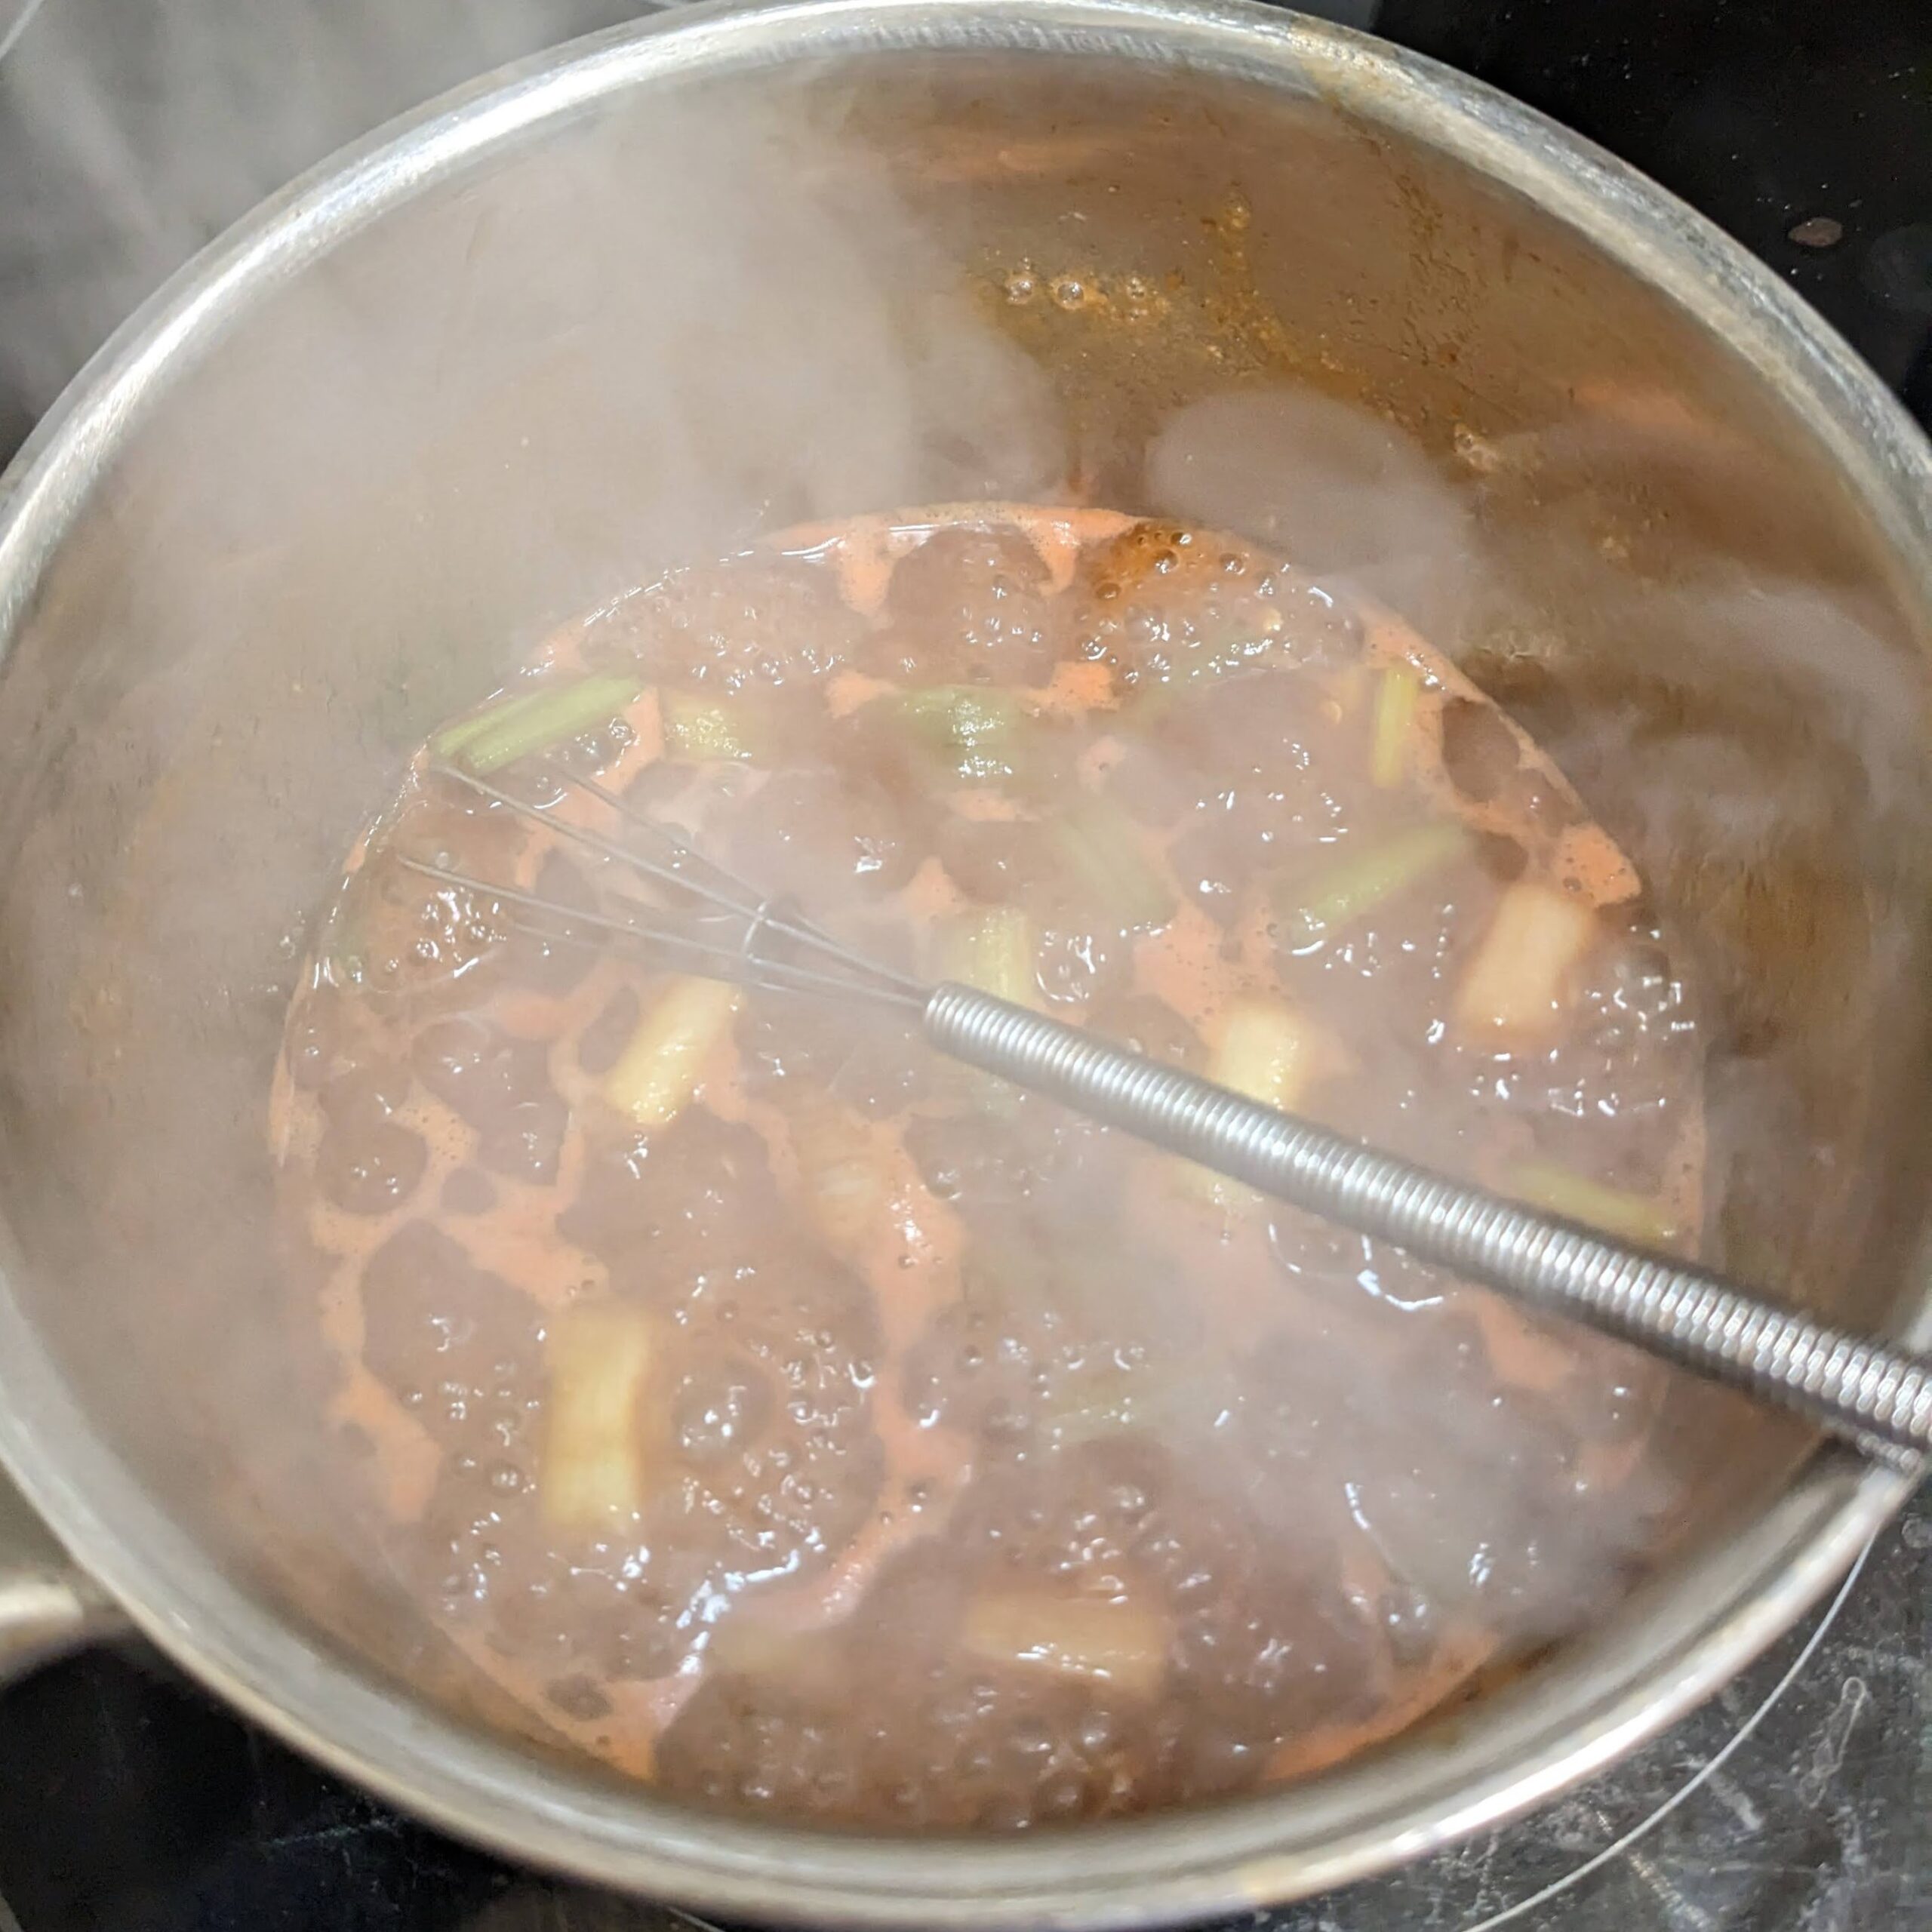
I tried air frying some pork loin the other night. It came as a two pack, so I marinade both at the same time and cooked them at the same time. They were, *chef kiss*, fabulous. This is my new go-to pork marinade.
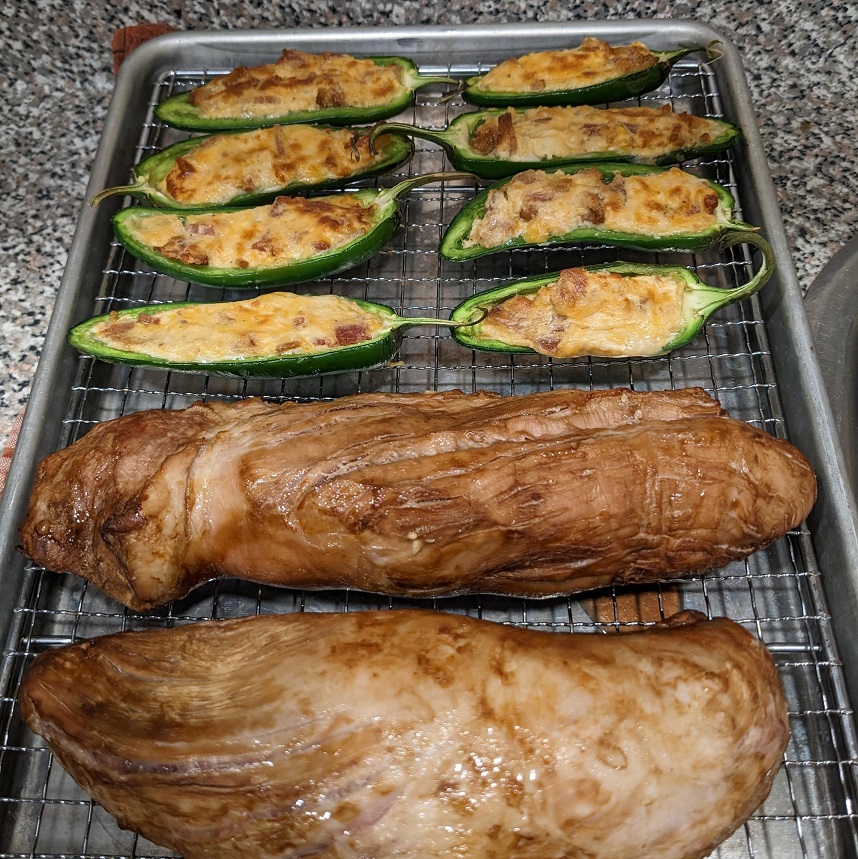
My biggest gripe about pork is that it’s bland without any a quasi brining step before cooking it. I have tried a lot of marinades for pork, but none of them were worth repeating. This one is. I’ll be using this one again and again.
Pork Loin Marinade:
1/4 C Soy Sauce
2 tbsp Ketchup
1 tbsp Fish Sauce
This was enough for both of the loins. I rested them in the fridge for 4 hours before dripping the marinade off before dropping the meat in the air fryer. While they were cooking, I poured the marinade out into a small sauce pot and heated it up and let it roll boil until it thickened up. I poured this sauce over the meat that I cut on the diagonal.

So tasty, so easy, and so cheap to pull together. I love hearty meals that aren’t a million dollars to put together. I know this marinade is simplistic and pared down, but when you hit the right ratio of a few ingredients that really gets the job done, why overdo a recipe?
The saying, ‘Less is more,’ exists for a reason. Simple is better when it comes to meat.
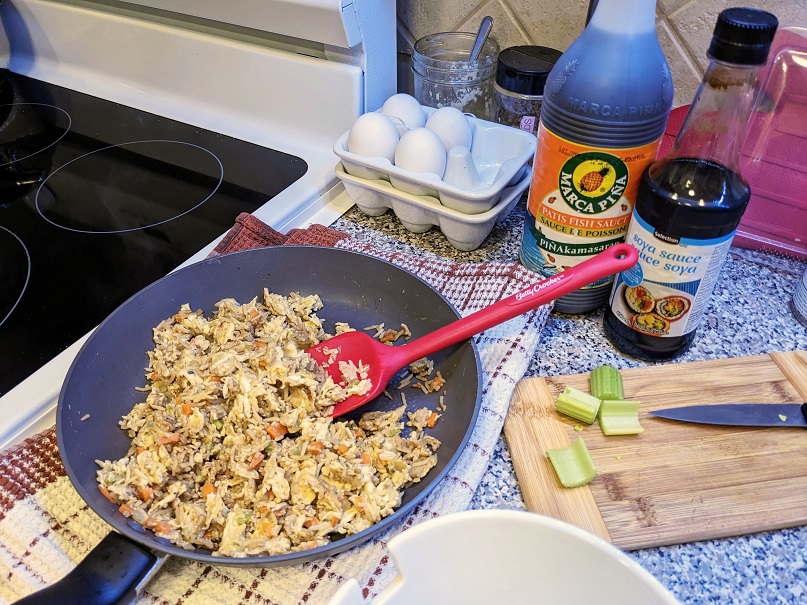
Yesterday was my day off. On my days off, I like to linger in front of the open fridge looking at items I have in there that may be on the verge of turning. And I like to turn some or all of these items into a completely new meal. I hate food waste.
Yesterday’s upcycled meal was a fried rice breakfast dish. I used up the last of the cooked rice, and some of the bits and bob veg I had in the crisper drawer (a bit of yellow onion, a bit of a carrot, some celery chops). This was the holy trinity that would be the base for my dish. I threw it in the frying pan with bacon fat and got it going.
I found a container with egg whites in the back from the last time I separated yolks to make the husband a lovely pasta carbonara. I added whisked in another egg and dumped the rice in to combine it all.
When the veg mix was softened enough, I added the rice-egg mixture and moved it all around in the pan, picking up the veggies as I fried up the egg to a solid state. That was long enough for the cold rice to heat all the way through.
I added a splash of soy sauce and a dribble of fish sauce, rolled it around, and then scooped it into a bowl. I also sprinkled sesame seeds on top for good measure. So good.
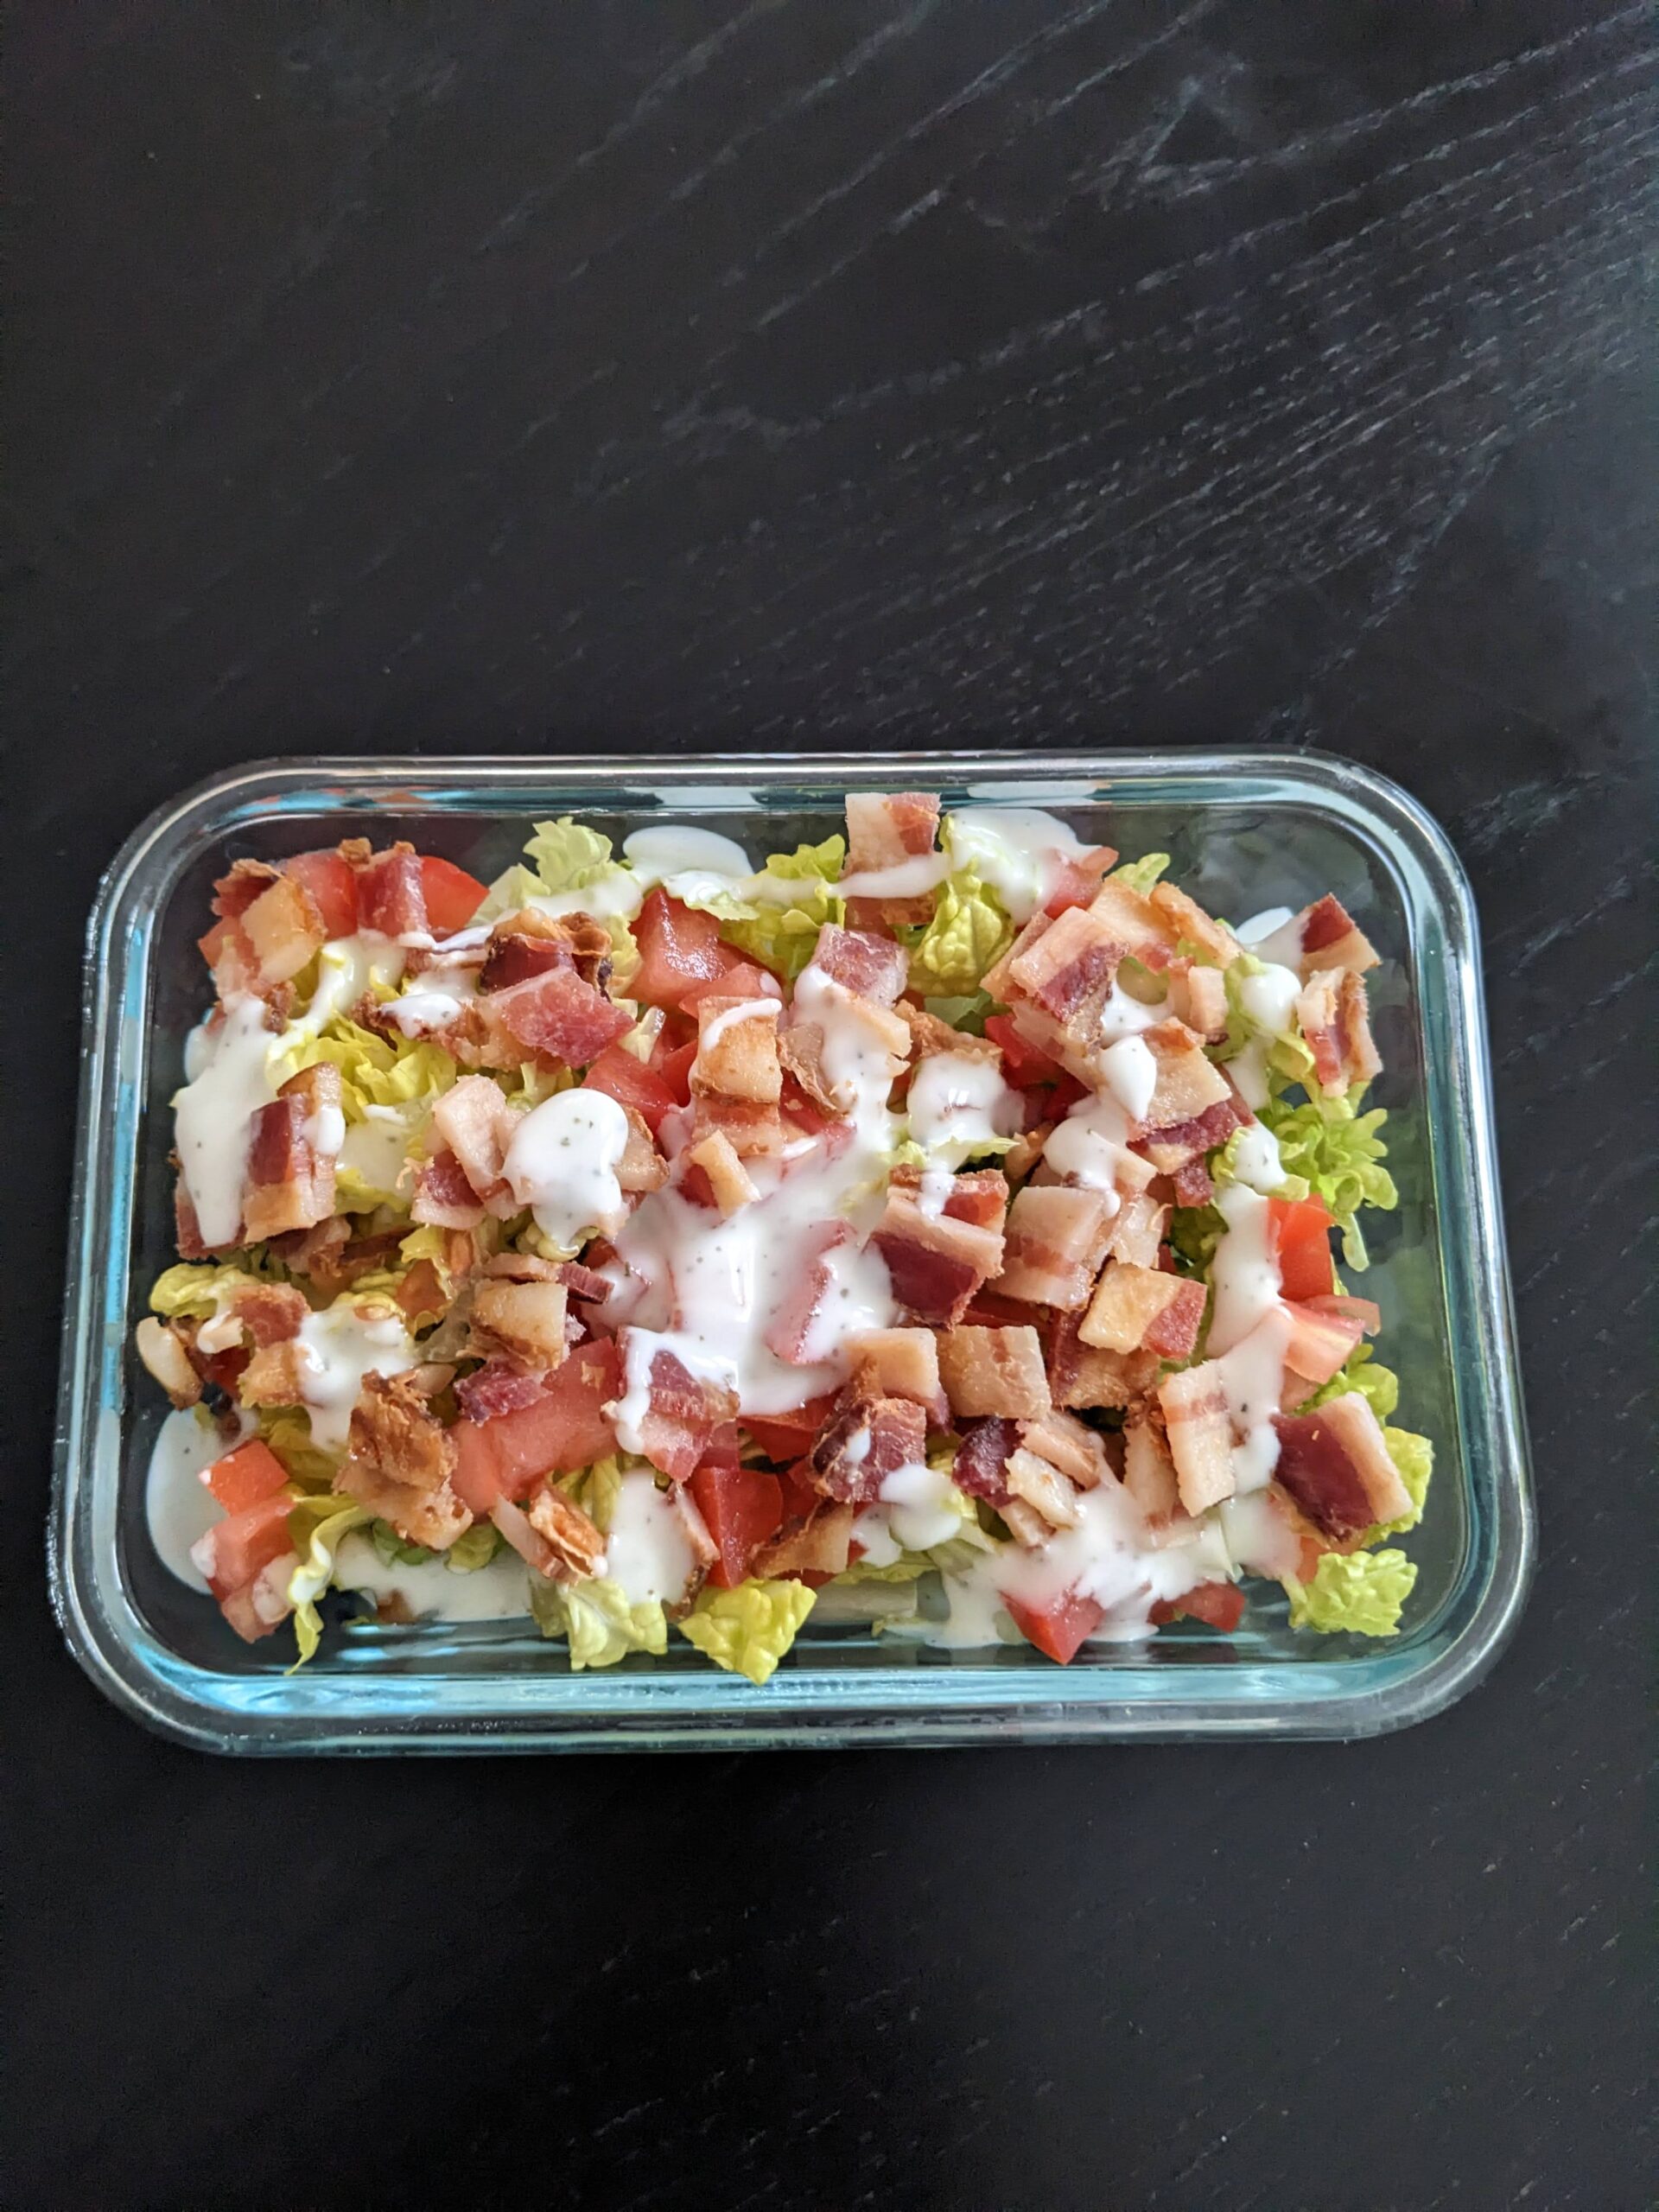
There was a time where all I ate was this salad at work. I got away from it when tomatoes were out of season, but we are getting close to being right back in that saddle, kids. Giddy-up!
It’s a simple salad made using shredded lettuce, diced tomatoes, chopped bacon, and grated cheese (when I have it). I top mine with Ranch, but I’ve also used a few other creamy dressings from my fridge as I needed to use them up.

I made these lovely ‘baked’ jacket potatoes in my air fryer. It took way too long, but that’s because I should have pricked and microwaved the potatoes for 3-5 minutes before spraying the outsides with oil and S&P, and stuffing them in the air fryer.
I really love how crispy the skins turned out. It was really enjoyable to eat, and the meal inside was perfectly cooked.
It was baked on 400*F for far too long, but if you do the 3-5 microwave trick, you can shave off a lot of time. I would check yours after 15 minutes of air frying. Go from there. Stop when you can stick a knife into one and it comes out with almost zero resistence.
I filled each one with sour cream, shredded marbled cheese, bacon crumble, and diced tomatoes (salsa or Pico de Gallo would work well instead). I think this was the best baked potato I’ve eaten in a very long time. I’m still thinking about it a month later.
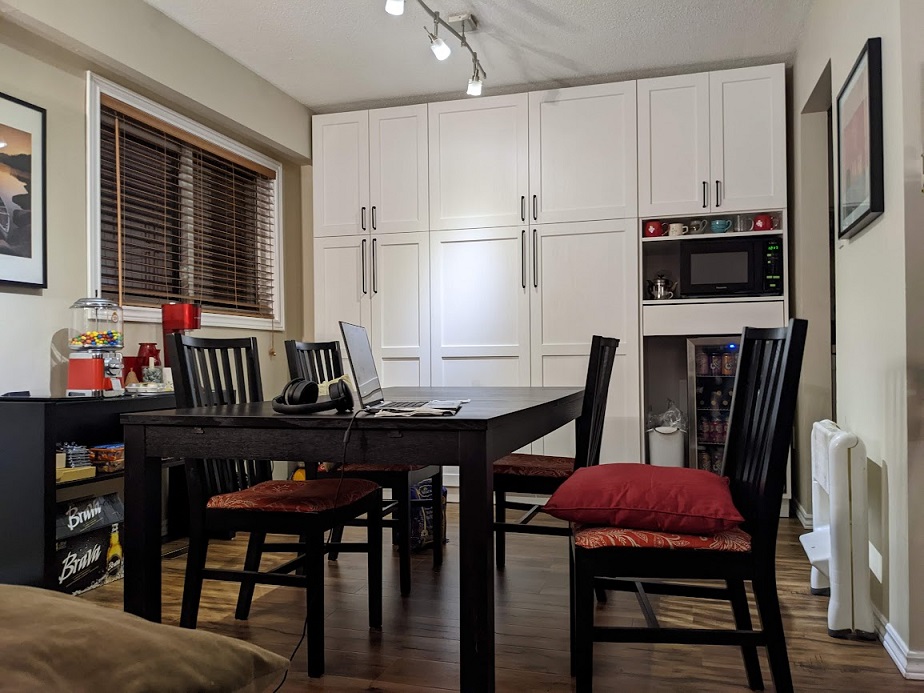
Since we installed our wall of pantry storage cabinets, we have made some tweaks. One of them I had to be convinced we needed by the husband. But, in the end, I am grateful for it when I use it from time to time.
I’m talking about a pullout wood block I can use to drop hot foods from the microwave above it. I can also use it to lay hot trays of food on from the oven steps away in the kitchen. And, as I discovered after I woke up one day with hip pain and couldn’t sit to use my computer, it works as a lovely standing desk area.
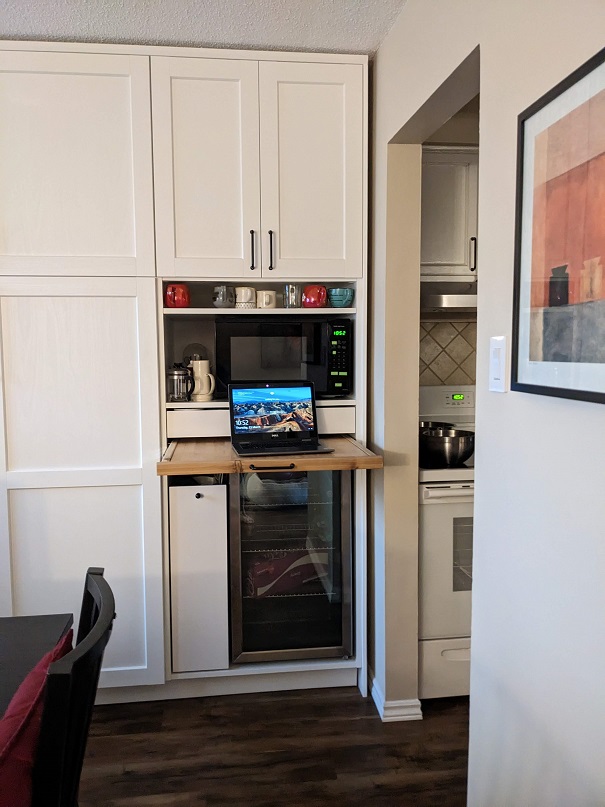
Originally we both envisioned me making fresh pasta on that board, but I haven’t had time to use it that way yet. I hope to rectify that in the near future. 😀
Oh, and he hated the small area I had a tiny garbage can sitting in that was also exposed, so he built a pullout tall can drawer with a door panel to hide the can.
Lately I have been working on the organization of my canned goods. Since the drawer I store them in rolls out and hits the middle of my thighs, I find picking up cans to see if it’s the one I need while I’m rushing around to make dinner on the fly just unworkable for me.
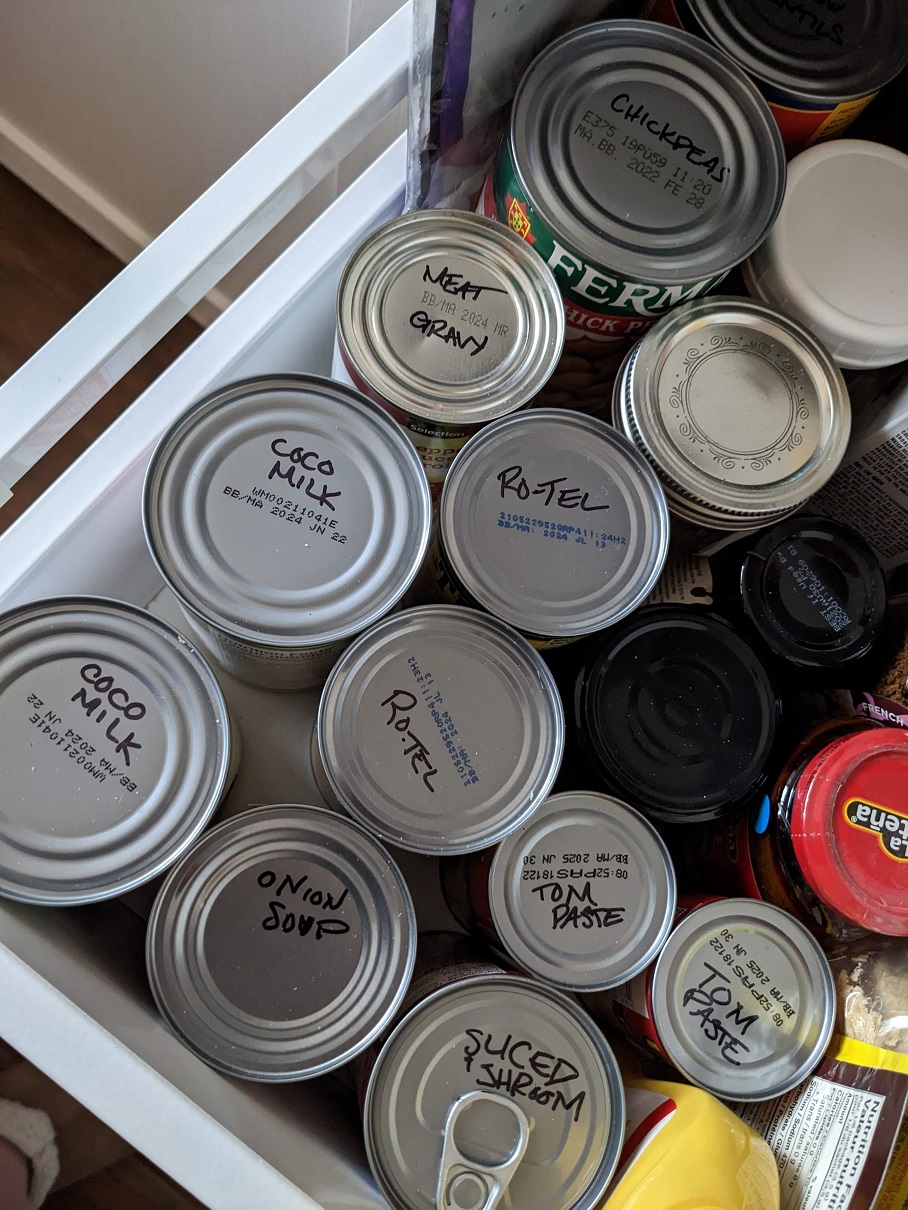
I came up with a solution. It isn’t Pinerest worthy, but it works for me. More importantly, now I can ask the husband to grab me a can of something-something quickly. He often asks how he can help, and I can’t deal with him in there rooting around. That’s frustrating given how many cans I store. I’m hopeful this is the low-tech solution we’ve been seeking.