I need to make another ricotta cheesecake and use this brilliant hack to turn it into a zebra cake. OMG. This looks so amazing. And so easy to do. Can’t wait.

I need to make another ricotta cheesecake and use this brilliant hack to turn it into a zebra cake. OMG. This looks so amazing. And so easy to do. Can’t wait.
(From the archives.)
Ricotta cheese pies are a favourite pastime of mine to make. If you’re like me, and you can’t stand the chalky taste of cream cheese based cheesecakes, ricotta cheese pie recipes are for you. I made this recipe a few months back and forgot to add the cream cheese. I didn’t realise my mistake till it was done baking, so I was nervous when I served it up at the in-laws. Much to my surprise, not only did it turn out really well, the texture was silky smooth and no one missed the taste of cream cheese!
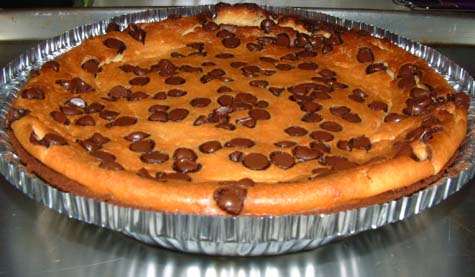
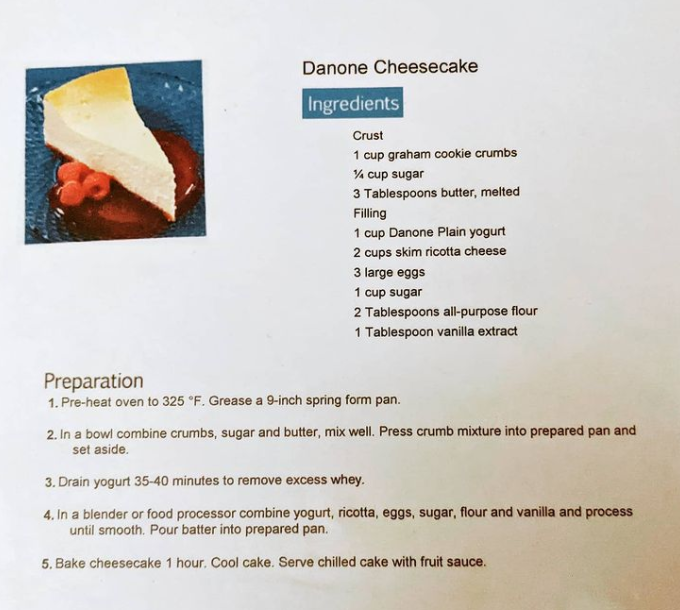
The secret to this particular presentation is a chocolate readymade pie crust and adding two small handfuls of chocolate chips on top just before you slip it in the oven. The middle is the plain vanilla ricotta filling. It’s based off of the original Danone Cheesecake recipe I found online years ago.
I really love a great cookie that isn’t too heavy or too sweet. Bonus points if it doesn’t take too much work in the process. I have started to gravitate towards recipes that don’t use butter, flour, leavening agents, or sugars. This is a cookie I baked last year for Secret Santa at work. I gave it to Lucia, a lovely older Italian lady at my workplace. She loved these! They were right up her alley, too. Give it a try if you’re struggling to find a nice Christmas gift for neighbours, bosses, or co-workers.
2-Ingredient Shortbread Cookies:
1 C Almond Flour/Meal, superfine powder consistency
2 1/2 tbsp Maple Syrup (the good stuff, not that table crap)
Add the syrup to the almond flour 1 tbsp at a time until the dough becomes clumpy but doesn’t form a ball. Adjustments: If it forms a ball, add a teaspoon more almond flour. If the dough isn’t clumping enough, add a teaspoon more syrup.
Roll the dough out between two sheets of wax paper to 1/8″ – 1/4″ thickness. Cut into shapes from here. Lay on parchment paper on sheet trays for baking.
Bake at 250 degrees for 25-30 minutes. The cookie tops should not feel soft when fully baked up.
Alt: I used Amaretto liquor in Lucia’s batch. I simply subbed out 1 tbsp of syrup for the booze. It was just a lovely little kiss for her, and it wasn’t overpowering. She could taste it easily without it being overpowering.

I like making café muffins with big, fat dome tops. The secret to achieve this effect is a 3-prong attack:
1. Overfill the muffin tin wells. Trust me!
2. Resist, at all costs, the urge to drop the muffin pan on the counter to burp the batter because you are conditioned to stop filling 2/3rds of the way up. Trust me!
3. Bake the muffins at 425 degrees for the first 5-8 mins, and them drop the temp to 350 degrees for the next 22-25 mins. Trust me!
Bring them out when the tops are no longer soft and gooey to the touch. Let them cool for at least 30 mins before diving in, lest you burn your mouth off. Ask my husband why I put this disclaimer in. He will tell you allllll about the singed skin in his mouth. 🙂
Easy Café Pumpkin Muffins:
1/2 Bag of Oatmeal Muffin mix (of choice, measuring at least 450 grams)
1 Egg
2 tbsp Veg Oil
1 tbsp Maple Syrup (the good kind, not the table version)
1/3 C each: Water / Pumpkin Puree
1 tea Pumpkin Spices, heaping
Pepita Seeds
Mix the batter until all the ingredients are happy with each other. Using a 4oz disher (cookie or ice cream scoop with trigger), place two portions on top of each other per muffin tin well.
Top each muffin batter with a big pinch of pepita seeds in the middle of each top (fear not, the seeds will spread out as the muffin grows in size to distribute them nicely).
Bake at 425 for the first 8 minutes, and at 350 for the next 20-22 minutes. Yield: 6-7.
This recipe has been around longer than my late mother-in-law was alive, but her family loved making it. BTW, Newfie (what it’s called on the recipe card) Buns are what they call scones in Newfoundland.
Newfie Buns:
3 C AP Flour
3 tea Baking Powder
1/3 C Sugar
1/2 tea Salt
1/4 lbs Butter*, cold
Preheat oven to 425 degrees.
Whisk the dry ingredients together before cutting the cold butter into it to form a coarse crumble.
1 Egg
6 oz Milk
Beat the egg in a small measuring cup. Fill with milk to the 8oz mark. Stir together. Add to the dry butter mix with a fork just to combine. Shape the dough into a ball and then flatten into a disk before cutting up in 6 or 8 scones. Bake 15 mins.
OPT: 1 C Raisins or Currants. (Add at the end along with the egg-milk mixture.)
My husband’s mother died yesterday. She was 93. She would want me to share this recipe above all of the ones she left behind. Enjoy.
TILLEY BUTTER TARTS:
Pie Pastry:
5 C AP Flour
2 tea Salt
1 lbs Tenderflake Lard
1 tbsp Vinegar
1 Egg, slightly beaten
Combine flour + salt. Cut in lard to coarse meal crumbles.
Combine vinegar + beaten egg in a measuring cup. Add cold icy water to this mix. Stop added water when egg/vinegar/water measures out to 1 cup.
Gradually add this wet mix to the dry mix with a fork. Gather combined batch up a ball. Wrap with plastic film and chill or freeze until needed, or roll out immediately into circles to make pastry shells to be placed in muffin tins.
Yield: 3 double 9″ pie crusts or 12 tart shells
Filling:
1/3 C Butter
2 tbsp Whole Milk or Cream
1 C Br Sugar
1 Egg, LG, beaten
1 tea Vanilla
Cream butter well before adding the cream. Add sugar; mix well. Add egg and vanilla. Mix to combine only.
If using raisins, drop a few into bottom of each tart shell placed inside large muffin tin wells, with sides of tart walls crimped to flatten out before being filled.
Dump filling into each pastry shell to about 2/3 full mark. Bake at 425 oven for 8 mins, drop the heat to 350 and bake tarts another 12 mins.
Yield: 12 butter tarts
 Yah, yah – I get it. Not everyone is into breads of any kind (EW, CARBS!!), or you hate bananas (Blech!), or you ate too many slices of this bread growing up (Never again!). I’ve heard all of the reasons.
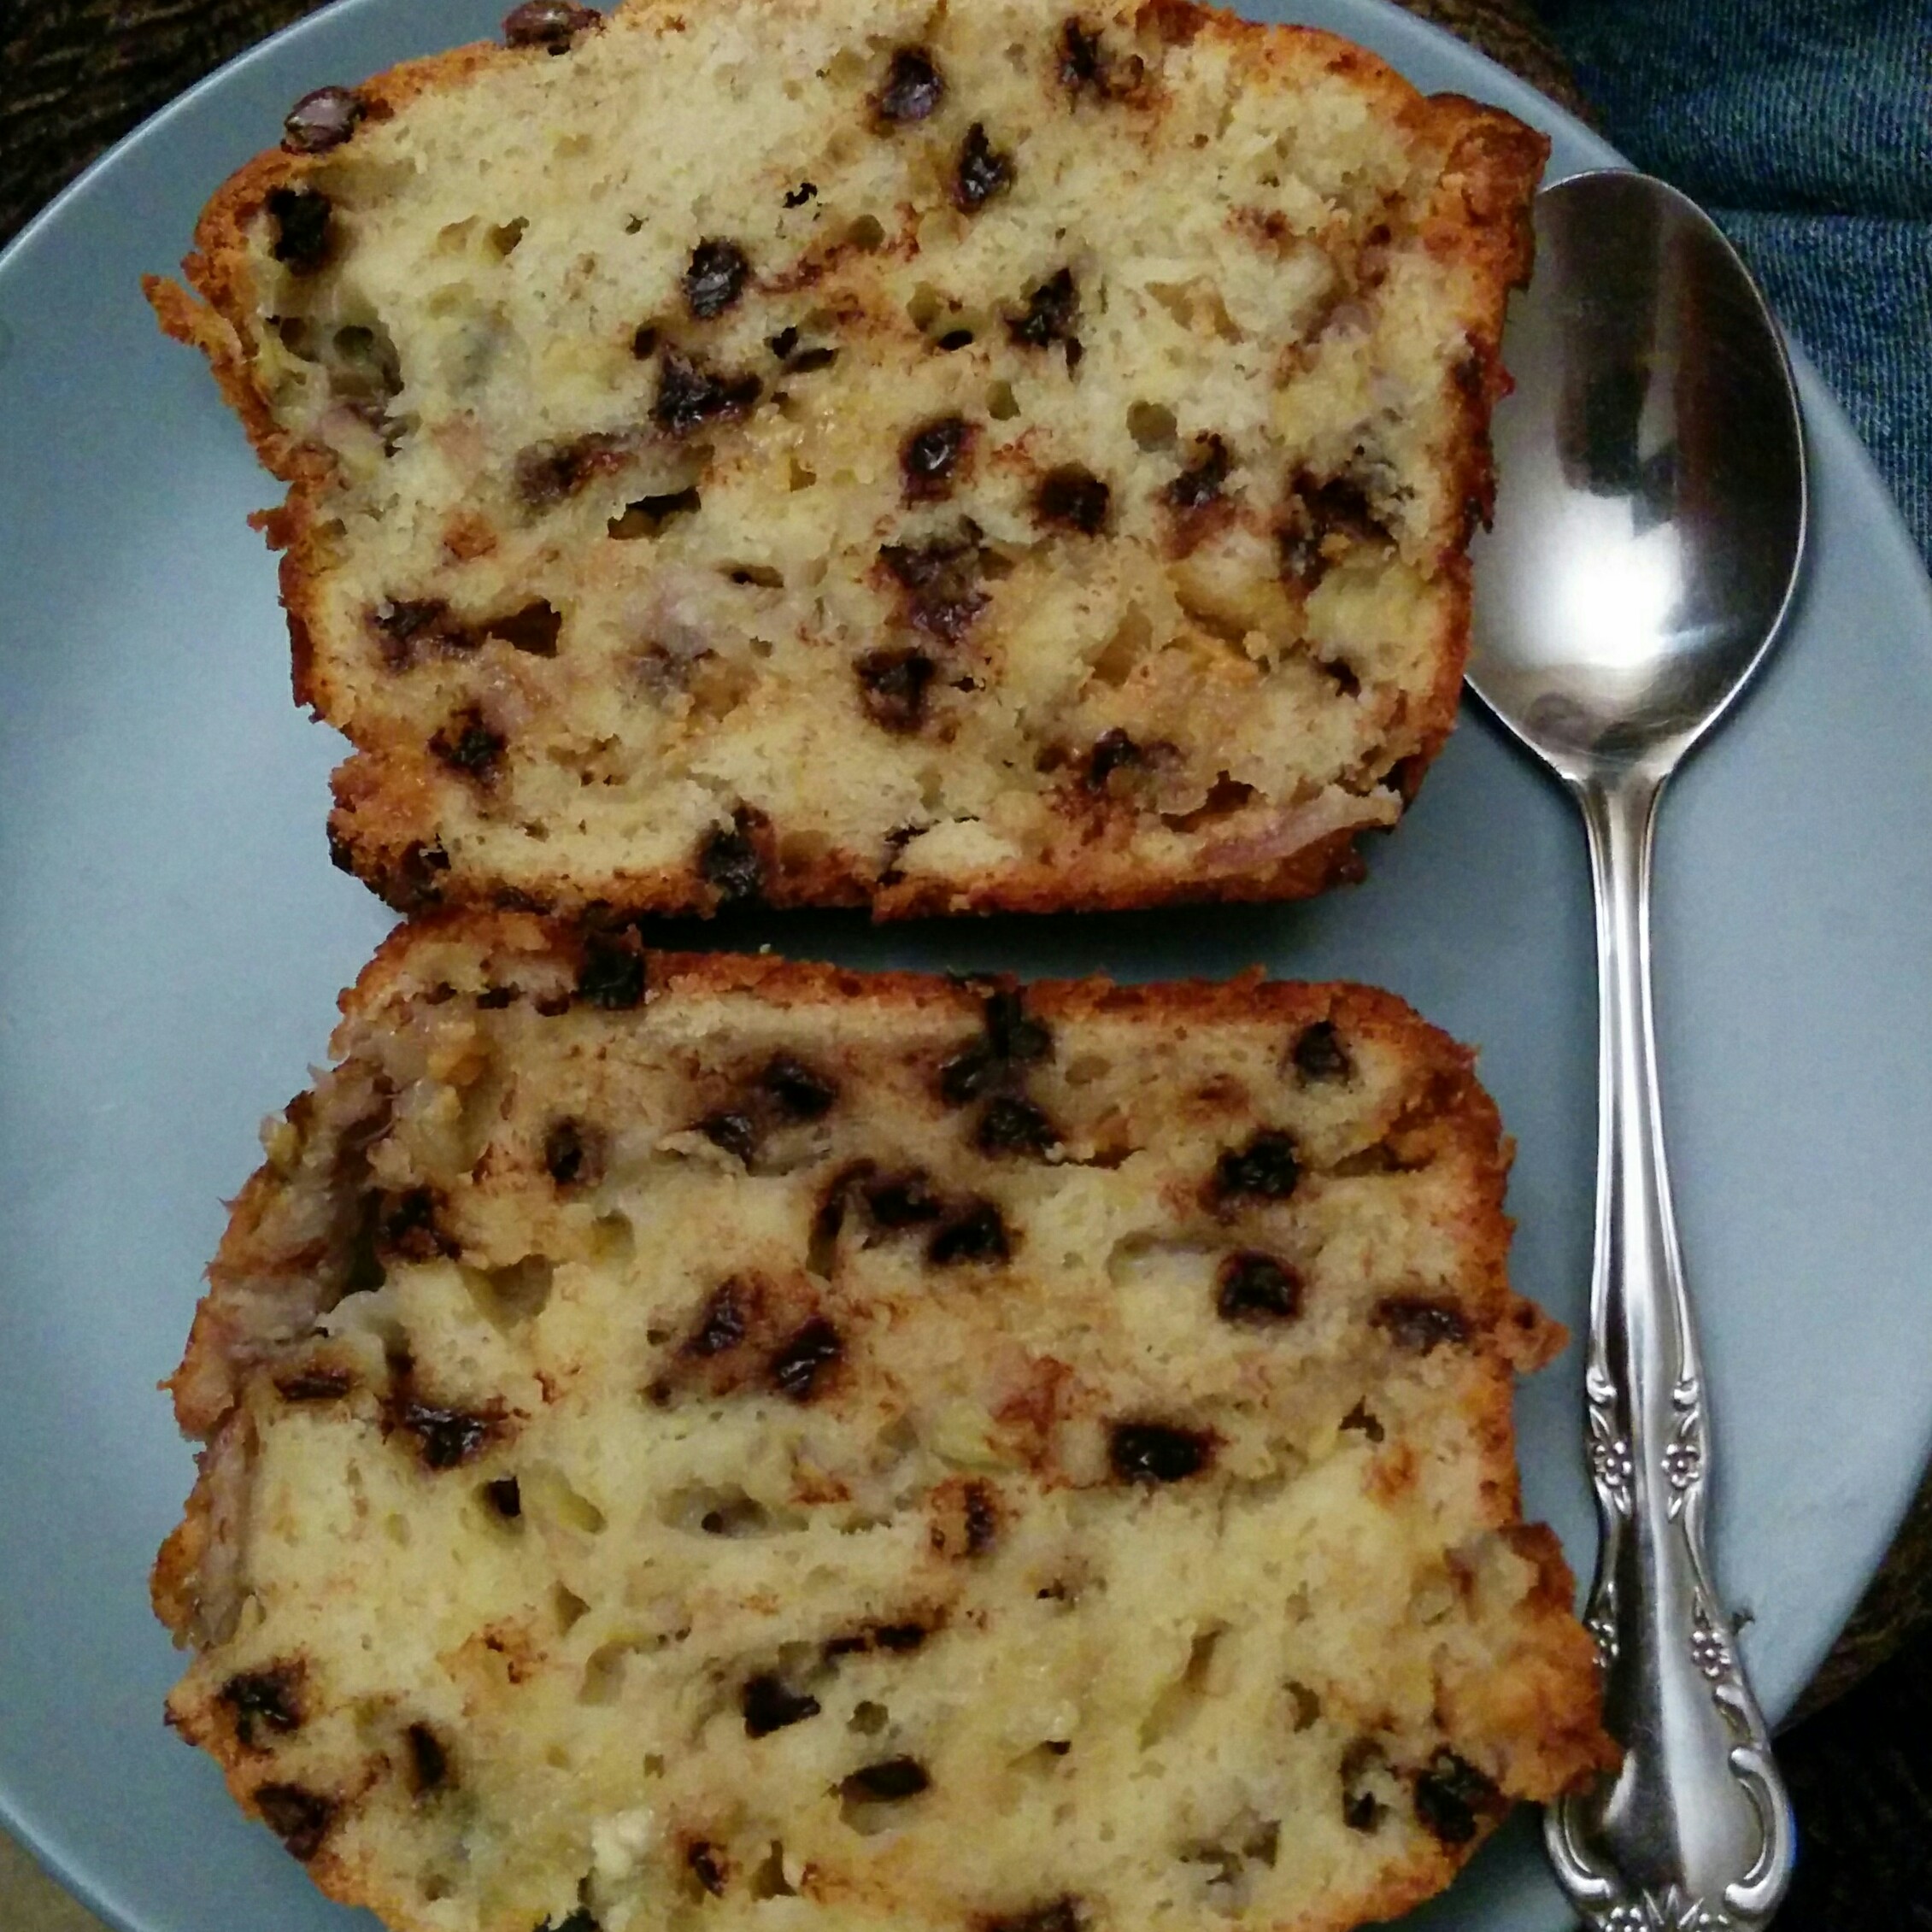
I happen to love a good banana loaf. This is the one I make in case you’re interested.
2 C Flour, a.p.
1 tea BP
1/2 tea Salt
1/2 C Sugar, white
1 oz Butter, melted
2 Eggs, r.t.
1 C Bananas, mashed
1/4 C Water, r.t.
Legend: a.p. = all purpose, r.t. = room temp, BP = baking powder
Whisk all of the dry ingredients together. Mix all of the wet ingredients in over top of the dry. Don’t overmix.
1/2 C Mini Chocolate Chips
2/3 C White Chocolate Chips
Gently fold these into the bread batter. Spray or lightly oil and dust a bread loaf pan. Drop the batter into the pan. Bake at 350 for 75 mins. Let it cool 90 mins before cutting into it at the very least, or wrap it in plastic wrap to sit out over night. Makes a great lunch snack.
Note: I threw this loaf in the oven as our main course came out. In the time it took me to cook dinner in the oven, I started and finished making this banana bread batter.
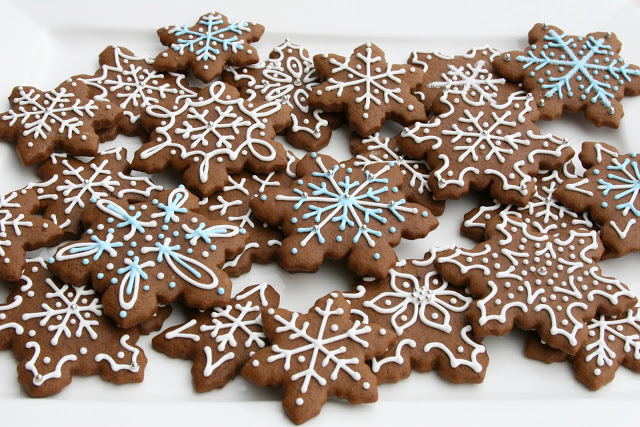
Ginger-Espresso Snowflakes
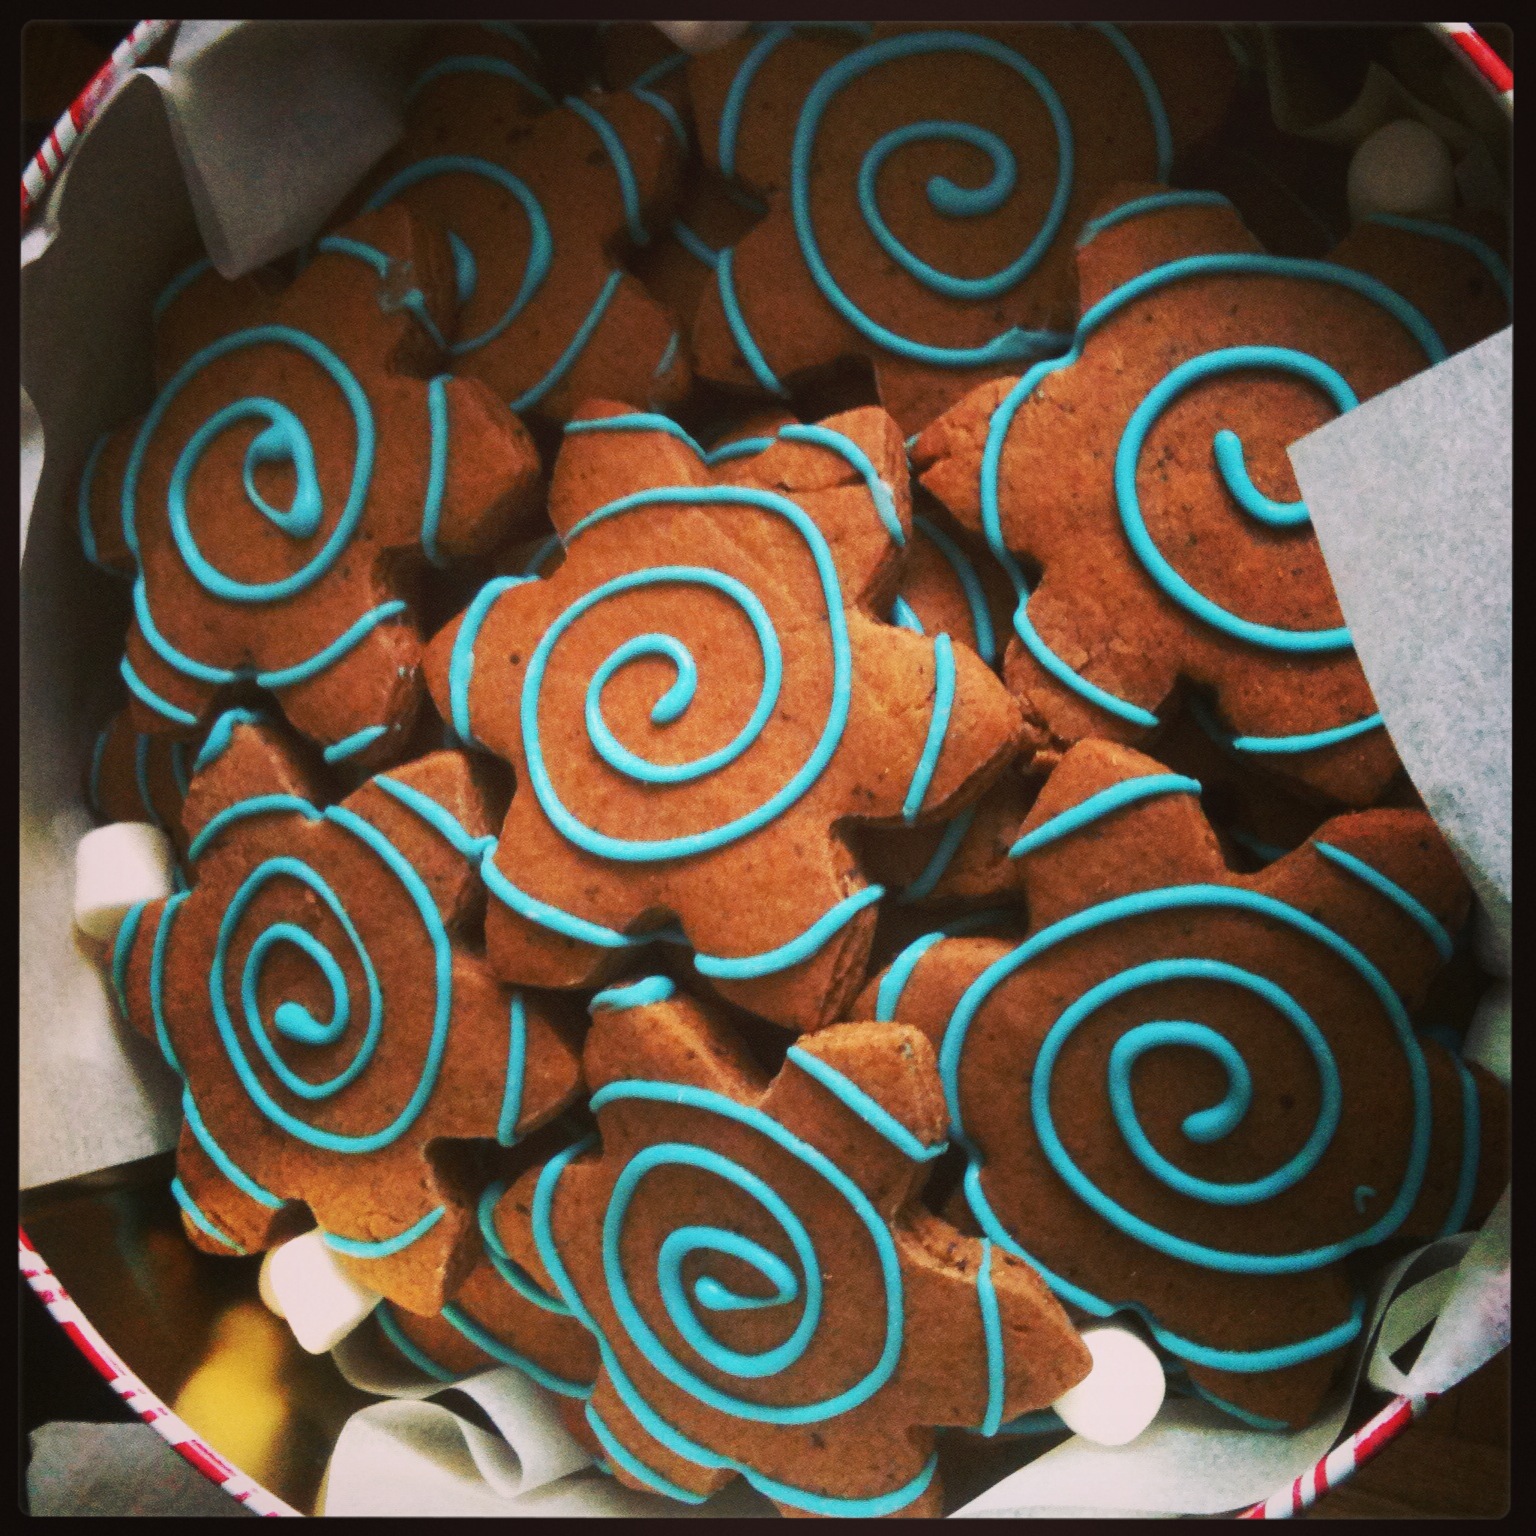
I used this gingerbread cookie recipe as the base of my cookies, and then tweaked the overall flavouring by adding 2 tbsp of fine ground coffee beans for texture. You can see the flecks the grinds create in the final baked cookie form, and you can feel the grinds as you chew them. This flavour addition lends a lovely sophisticated update on the old, somewhat tired gingerbread theme.
The other changes I made were shape (mine are gingerbread snowflakes, not gingerbread men) and icing colour (I used blue icing for a smashing pop of colour against the dark cookie base). I love this look.
Inspirational picture courtesy of Glorious Treat’s blog – gingerbread cookies
I mean, LOOK at how fabulous this colour combination is. I won’t lie, Glory’s iced cookie version utterly seduced me. When I saw that, no other colour compared!
Gingerbread-Espresso Snowflakes:
1/2 C Unsalted Butter, room temp
3/4 C Brown Sugar
1 Large Egg, room temp
1/3 C Fancy Molasses
2 /2 C All Purpose Flour (unbleached is fine)
2 tea Ground Ginger
1 1/2 tea Ground Cinnamon
1/2 tea Salt
1/2 tea Baking Soda
1 tbsp Instant Espresso Powder
1 1/2 tbsp Coffee Grinds, Fine (not used – yuck!)
In your mixer, blend the butter and sugar together till it’s pale in colour and fluffy in texture (about 5 mins).
In a medium size mixing bowl, add the flour, ginger, cinnamon, salt, and baking soda. Whisk well to combine all of these ingredients. Set near the running mixer.
On the mixer’s slowest speed, add the egg and the molasses. Blend that in a bit before adding in your dry ingredient mixture slowly one cup at a time. When the dry ingredients have been incorporated into the dough finally, add the espresso powder and coffee grinds. Quickly run the mixer enough to blend them through out the dough batch before turning the dough out of the bowl to portion it out into four balls for chilling.
I used a pair of thick chopsticks that are about 3/8″ in diameter to flank each ball of dough between two sheets of wax paper as I rolled it out flat into a circle or square. I then placed all four flattened out dough balls on a tray and let them rest in my refrigerator or about 1 hour before cutting them up into shapes.
After an hour, I pre-heated my oven to 350 degrees (I have a convection oven so I have to set mine at 375 because the oven drops the temperature down by 25 degrees automatically), and poured a bit of flour into a bowl to dip my cookie cutter into between cuts.
I made as many snowflake cookies as I could fit on my baking pans with at least 1″ around each cookie and when the oven was ready, I baked two pans at one go on the middle rack for 8 minutes. I continued cutting out more snowflakes to line my next two pans as the first batch baked up and cooled down. I continued to repeat this until all four balls of dough were baked up into cookies.
I left the cookies to cool completely for about two hours and then started my decorating process. You can use whatever icing you like, but I happen to have been pressed for time so I cheated by melting some baking chocolate waffers in a small Ziplock baggy in my microwave (about three 30 second times for a handful of waffers). As the chocolate started to harden while decorating the cookies, I would melt it some more in the microwave at 15 second intervals.
NOTE: This is a great cookie dough to make up to 1 to 3 months in advance of your Christmas bake-a-thon. Wrap the dough up as a disk in plastic film, and then again in tin foil, before storing it in the freezer. It shouldn’t take more than 15 minutes sitting on the counter for the dough to come up to temperature so you can work with it when you’re ready to get your Christmas bake on.
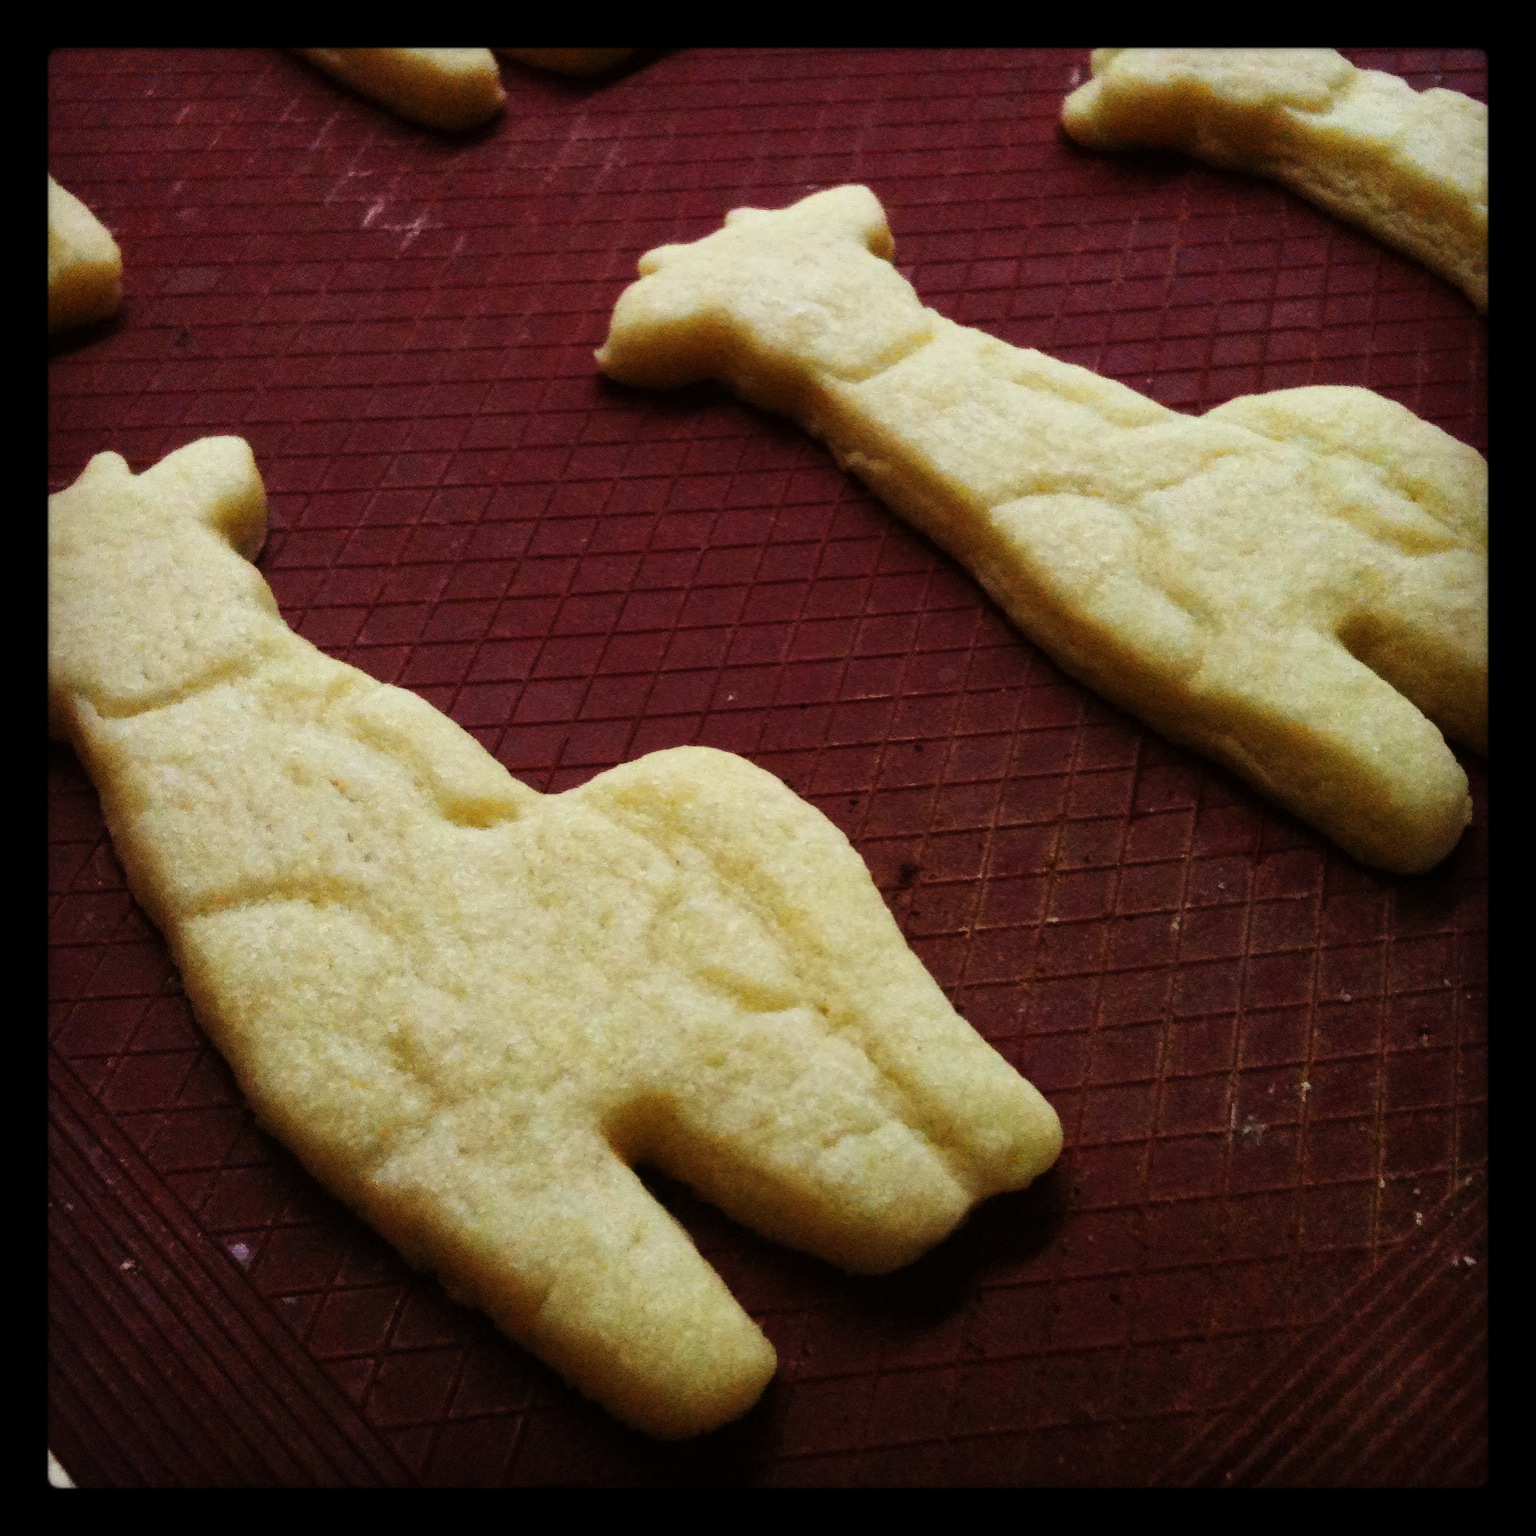 [ Giraffe sugar cookies created using a cookie cutter made in a 3D printer. ]
I brought a bunch of biscotti and sugar cookies to work for the ladies and the gent on Thursday. They were a big hit. One asked for my Auntie Stacey’s Healthy Biscotti recipe I have already posted while another asked for the sugar cookie recipe I haven’t blogged yet, so here it is. Again, another recipe I have adapted from many online over the years and, well, there wasn’t much to teak beyond the variations I have come up with in terms of flavouring the sugar cookies. The base remains the same, year after year. It if ain’t broke, y’know?
Basic Sugar Cookies:
1 C Unsalted Butter, room temp
1/2 C Powder Sugar
1 Large Egg, room temp
1 Tea Vanilla Extract
1/2 Tea Baking Powder
1/2 Tea Salt, fine grind
2 C All Purpose Flour
In a medium to large bowl, dump in the flour, salt and baking powder. Whisk to blend these ingredients well. Set aside.
Cream the butter in a mixer for 2-3 minutes till it turns pale, then slowly drizzle in scoopfuls of the powder sugar on a low speed, and let the mixer run another 2 minutes on a high speed to incorporate as much air as it can to make a fluffy butter mixture.
Drop the speed back down to low and start adding the egg and vanilla. Let that fully mix into the butter before adding the dry ingredients by the spoonfuls, allowing each drop the be mixed into the butter fully before adding the next.
By the last of the dry ingredients, the dough should be balled up and rolling around in the mixing bowl cleanly from the sides and bottom. If it’s not, run the mixer a bit longer till it comes together. It will. Just wait for it. When that happens, stop the mixer and turn the dough out onto a floured work surface to knead gently for a minute or two to form a smooth circular disk you can place in plastic wrap.
Chill the dough for one hour minimum. When ready to get started cutting the cookies, take the dough out and let it sit on the counter for 10-15 minutes to warm up a bit. While waiting, dust your work space again with flour, assemble any cookie cutters and bench scraper needed, as well as preheat the oven to 350 degrees.
Tips & Tricks: Some find rolling the dough out between two sheets of wax paper helpful, but I found I didn’t need it since the dough didn’t stick to my rolling pin. I tend to flour the work surface and rolling pin well.
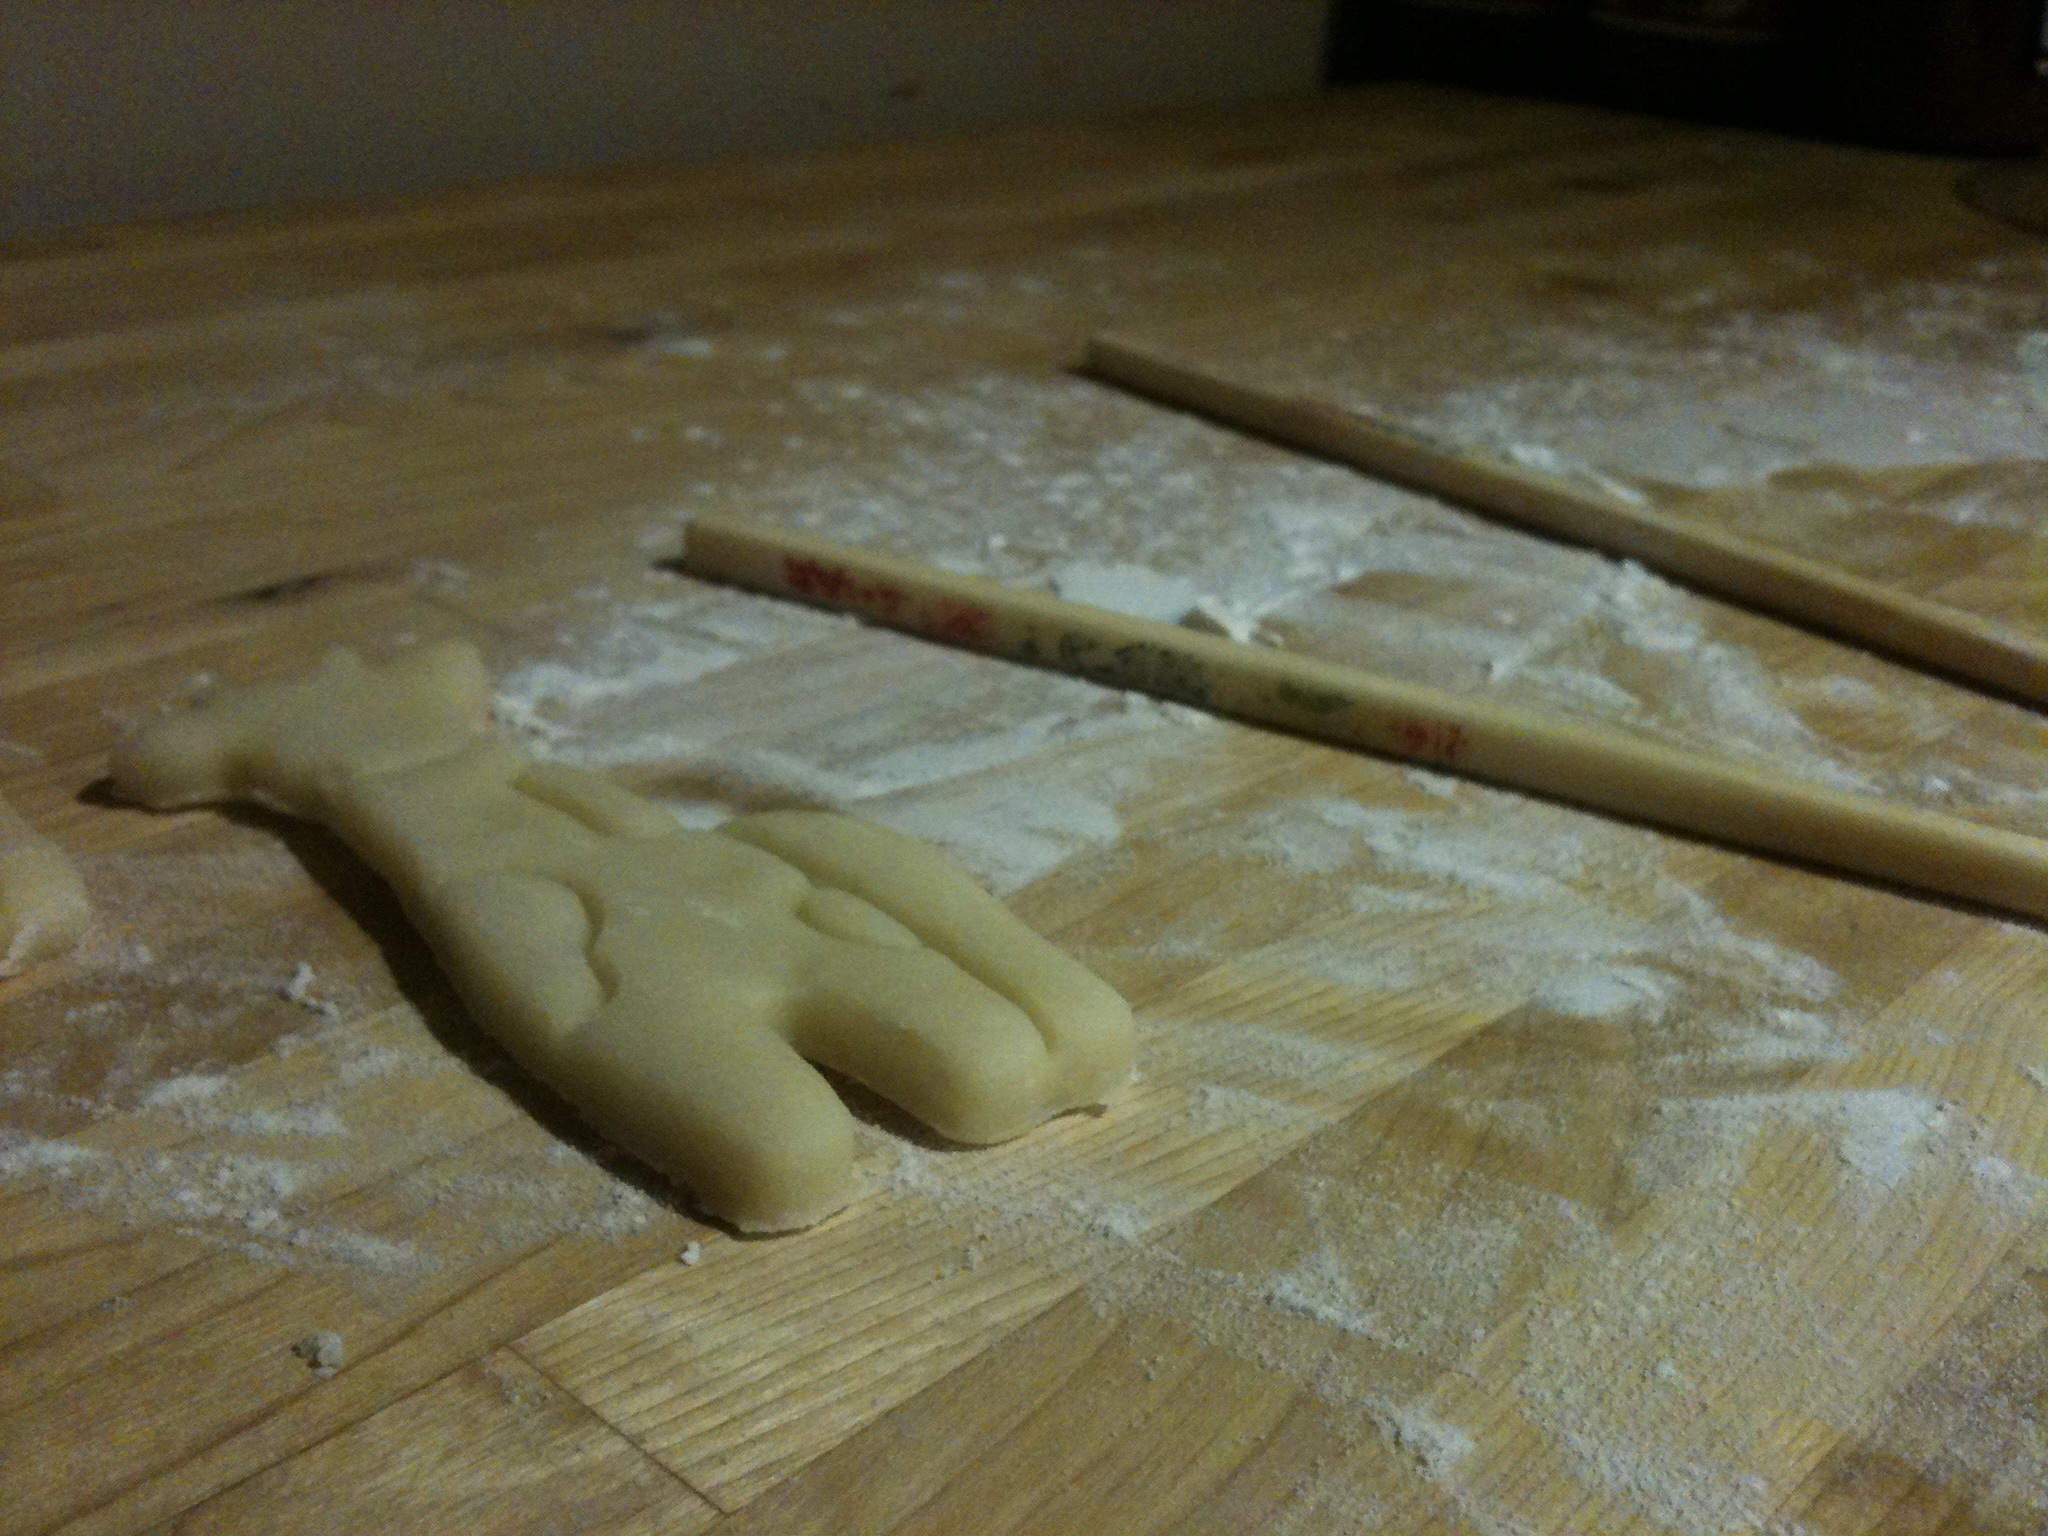 A little trick I use when working with dough that needs to be a consistent thickness across all the cookies in the same batch is to use my chopsticks that are 3/4 square from the top downward to where it starts to round out and taper. I ignore that part of the sticks, and keep the rolling up in the squared off area.
If you don’t have access to similar chopsticks, you can also use to wooden planks (think old wooden rulers we used in grade school). There are commercial versions, but they’re a waste of money if you ask me. One can easily look around their home and make do with two flat objects that have matching thicknesses to roll a rolling pin over to flatten out the dough evenly while cutting out cookies.
 Try to aim for 1/4″ thickness when rolling out the dough. I find that is the ideal sugar cookie thickness for small to medium sized cookies (like I made with my 3D printed Giraffe cookie cutter). Bump the increment up to 3/8″ if a bigger cookie is being cut, and allow for a 2-3 minute increase over the standard 6-8 minute baking times for small to medium sugar cookies.
After the cut cookies are moved from the work surface to the baking sheet, the dough can be balled up and rolled out once more for additional cookies before the dough needs to be covered and chilled for another 10 minutes between batches. My hands are always warm, so I don’t push this. If I feel the butter in the dough literally melting in my hands, I will chill it without a second rolling and cutting. I don’t chance it. The cookies wouldn’t come out with a nice crisp edge if I baked a soft cut out.
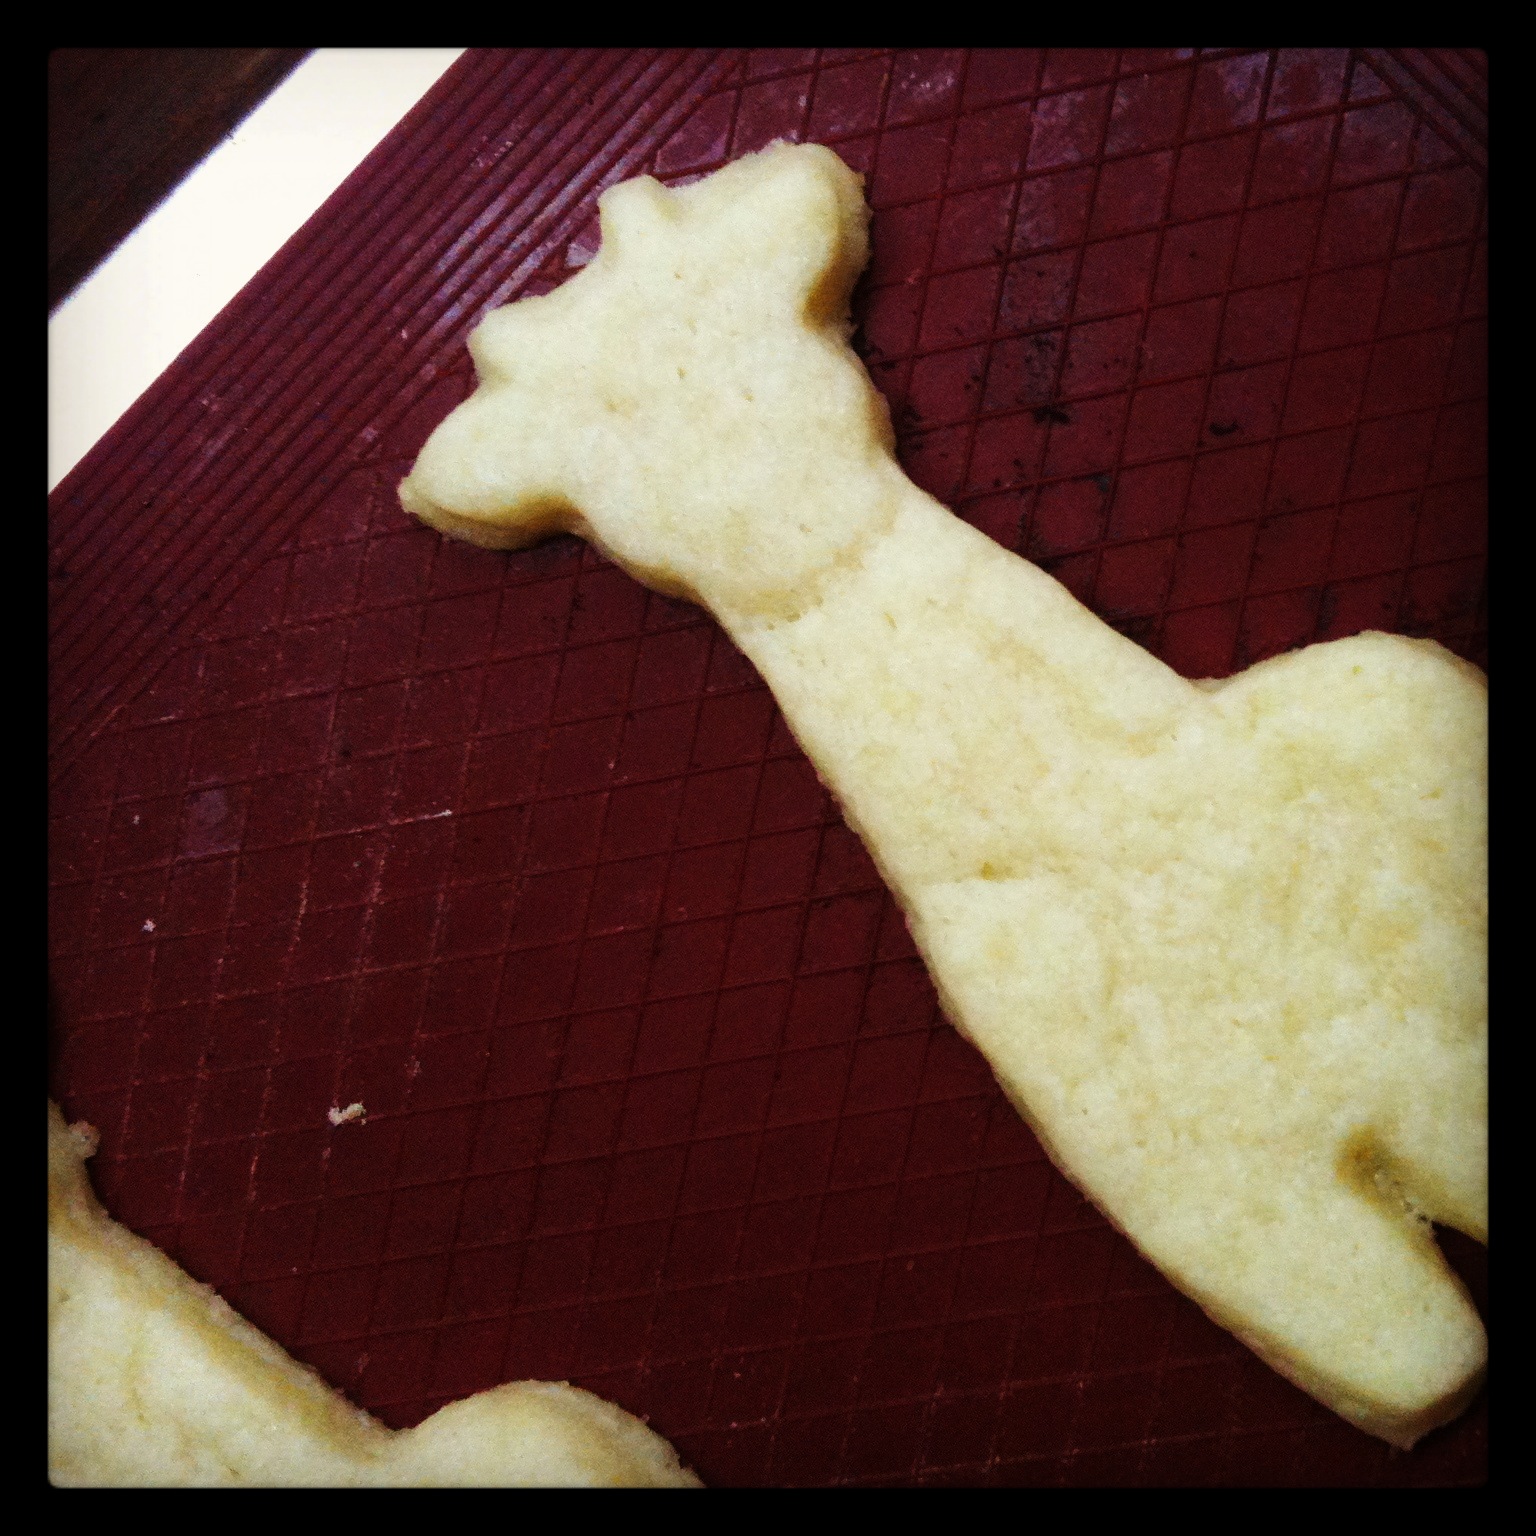 [ Total loss of giraffe detail after baking the softer dough cookie cuts. ]
If you have cold hands (oh, how I envy you all who do), you can spend more time rolling and cutting out the dough between trips to the fridge. If you do find the cookies are softening while sitting out in the hot kitchen, simply pop the cookie tray into the fridge while it awaits its turn in the oven to firm up the butter again.
Store the cookies after completely being cooled down in air tight containers. And NEVER decorate these while still even a teeny-weensy bit warm. The icing will run like an athlete in the summer Olympics.
Sugar cookies are the #1 cookie to bake during all holidays where gifts are to be given or when guests arrive for an occasion like a wedding or baby shower. Get creative with shapes and icing designs. I have seem some great ones lately. Like this batch for Chinese New Year. How gorgeous are they?! I wouldn’t want to eat them because they look like they belong in a frame in some cookie museum.. 🙂
 [ Happy belated Chinese New Year 2014 to my bff since Grade 3! ]
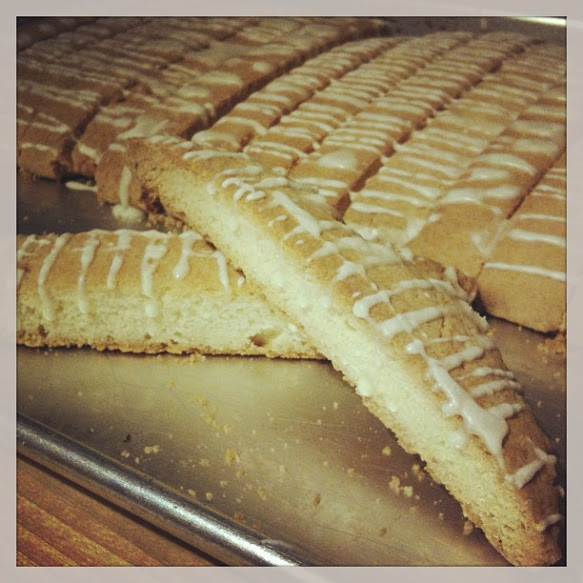
This is my own variation of a recipe I found online years ago. I had to modify it to suit my particular food tastes and baking sensibilities, but it wasn’t that hard and the taste didn’t suffer one iota. One Italian man couldn’t tell the difference. Yields roughly two dozen and total time is 3 hours.
Enjoy!
Auntie Stacey’s Healthy Biscotti:
1/4 C Margarine or Butter, room temp
1/2 C Sugar
2 Eggs
1/2 Tea Almond Extract
1/2 Tea Anise Extract (or vanilla extract)
1 3/4 C Flour (I use unbleached all purpose)
1/2 C Almond Meal
1/4 Tea Salt
1 Tea Baking Powder
1/2 C Nuts (optional, any kind)
Slivered Almonds + 1 Tbsp Egg White or Milk, for garnish (optional)
Melting Chocolate, for garnish (optional)
Directions
1. Cream the sugar until nice and fluffy, about 5 minutes, and then add the sugar and beat to combine well.
2. Add the eggs one at a time, and drizzle the extracts in as the mixture is running.
3. Combine 1 1/2 C of the flour in separate bowl with almonds, salt, nuts, and baking powder. Sift with spoon and start adding it to the wet ingredients in the mixer bowl as it runs on a low speed. Gently stir in last 1/4 C flour to complete the dough by hand.
4. Cover and chill mixture for two hours.
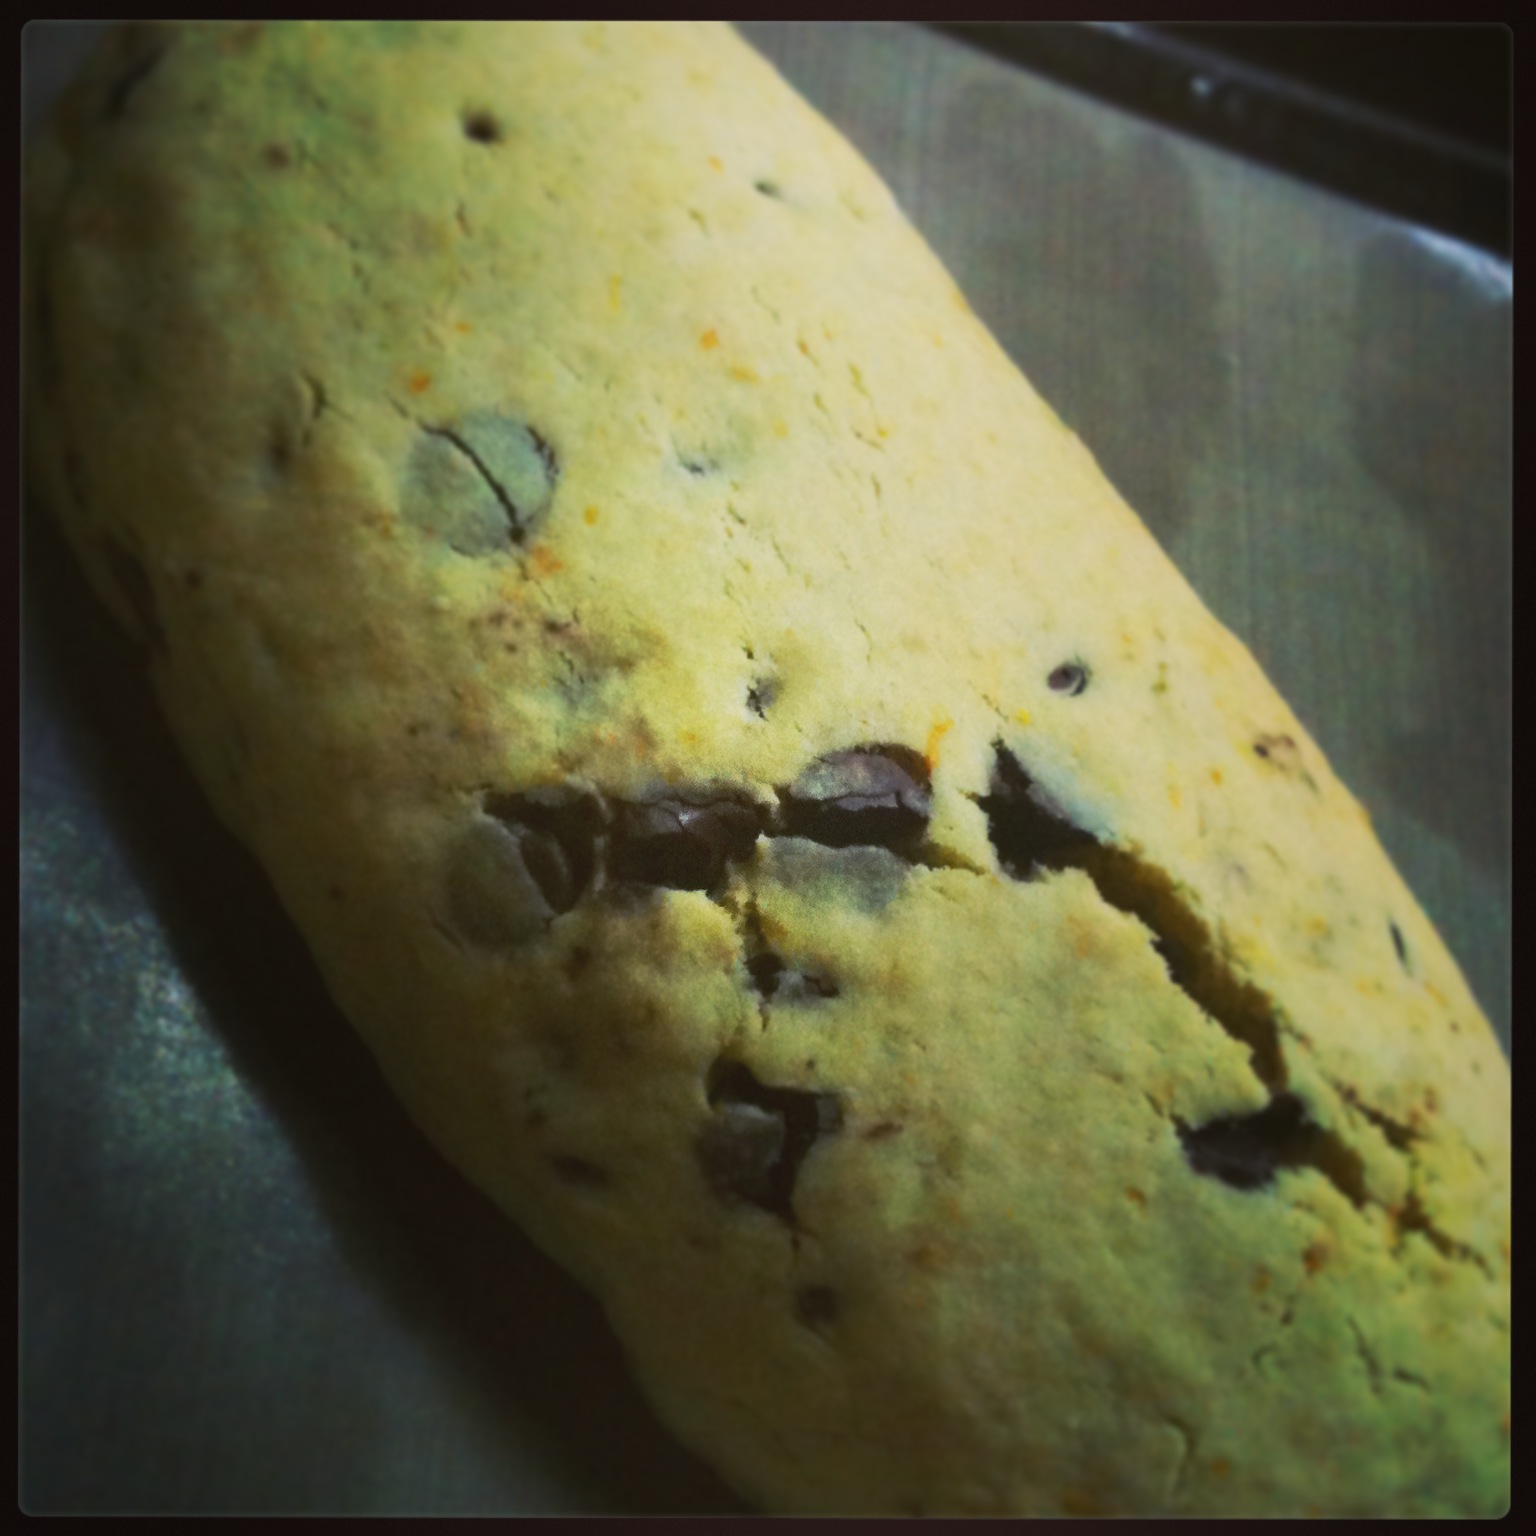
5. Divide dough into two balls and shape into rectangular logs with squared up ends, then flatten them out to roughly less that an inch in height, taking care to keep the squared off ends of the logs. Place each one of a sprayed cookie sheet or atop of foil on a jelly roll pan. Cover tops of each loaf with egg white or milk wash and slivered almonds for extra taste.
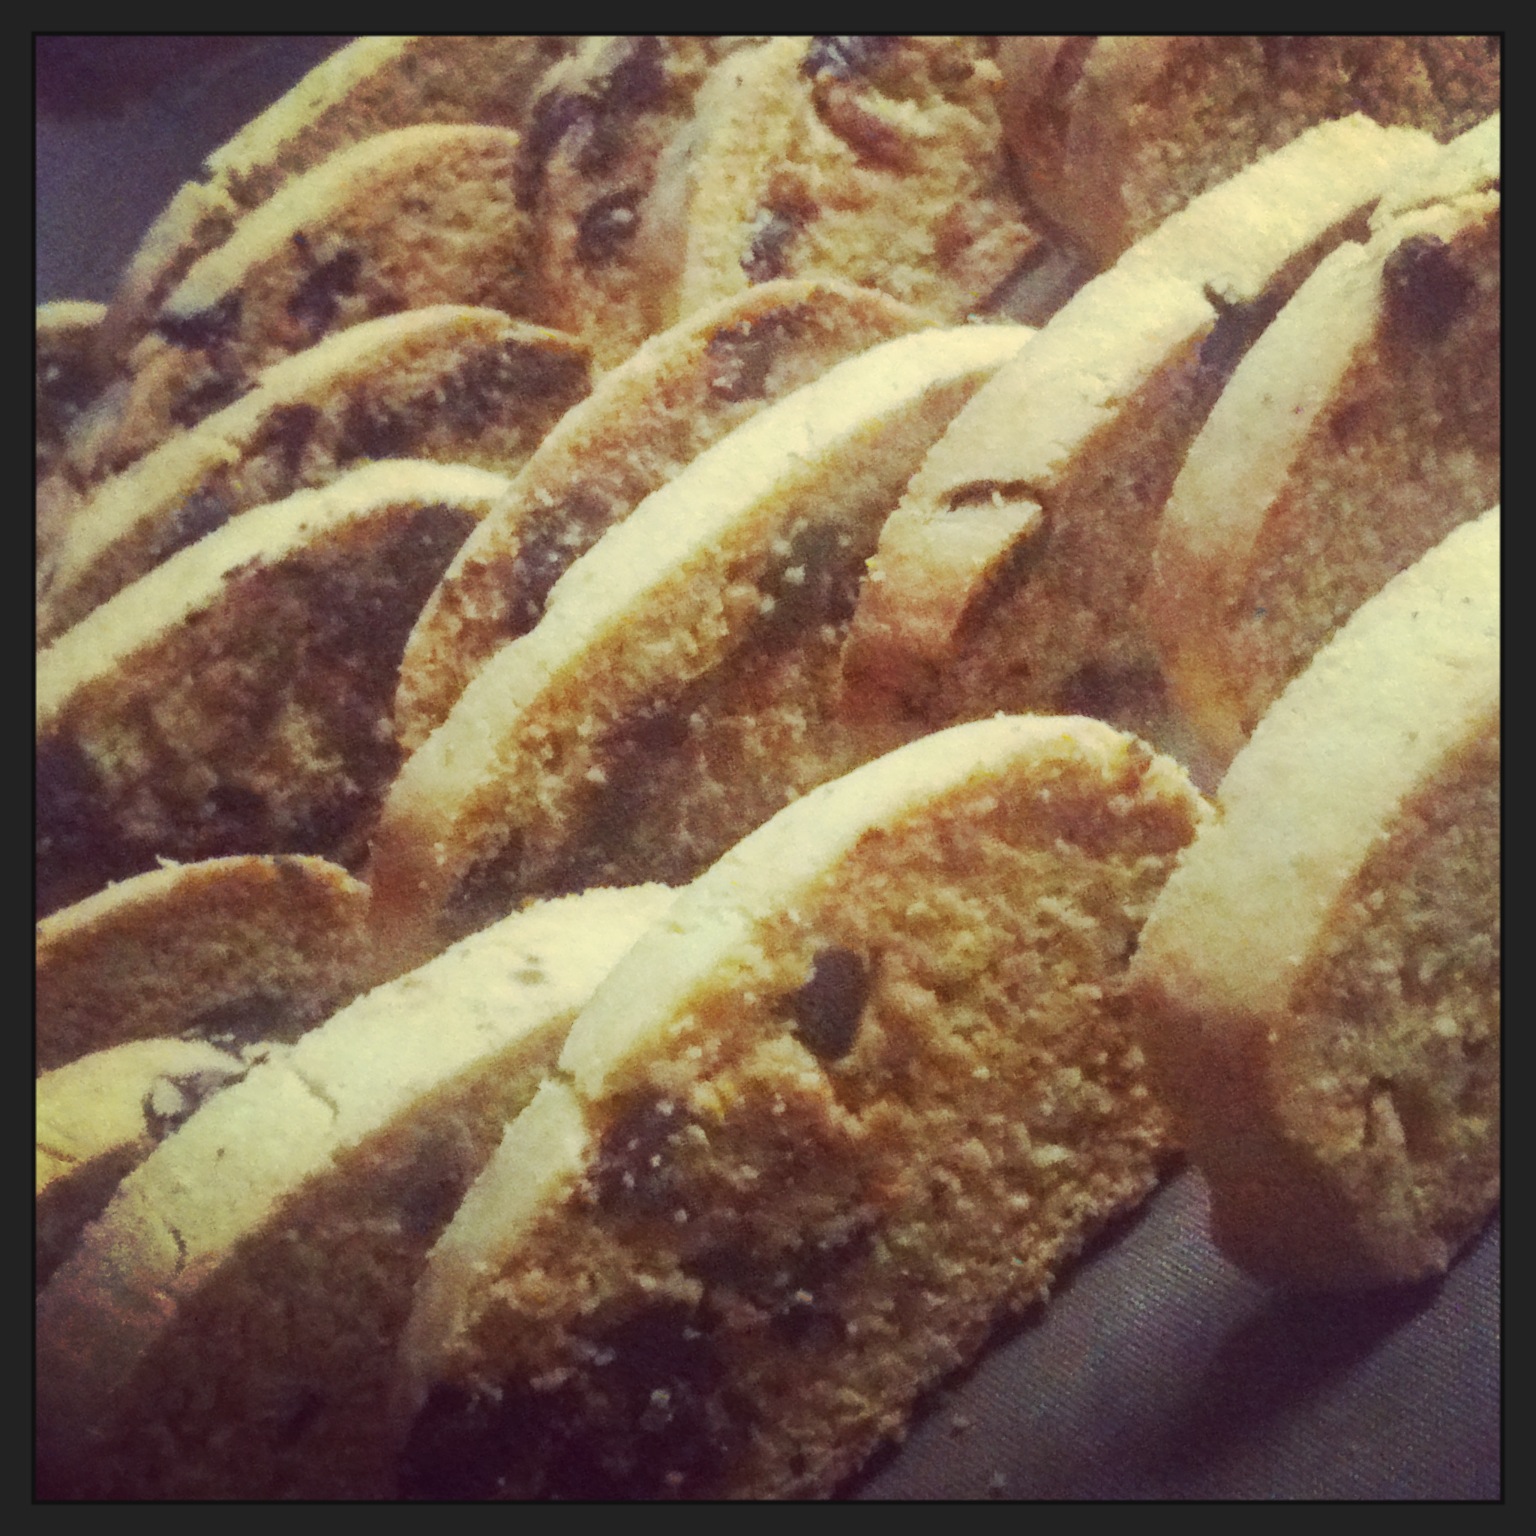
 6. Bake for 20 minutes at 350 degrees C until center is no longer sticky. Place on racks to cool down for cutting. When each loaf is cool to touch, use a long blade knife and gently but firmly press down each time to cut the loaves into clean strips.
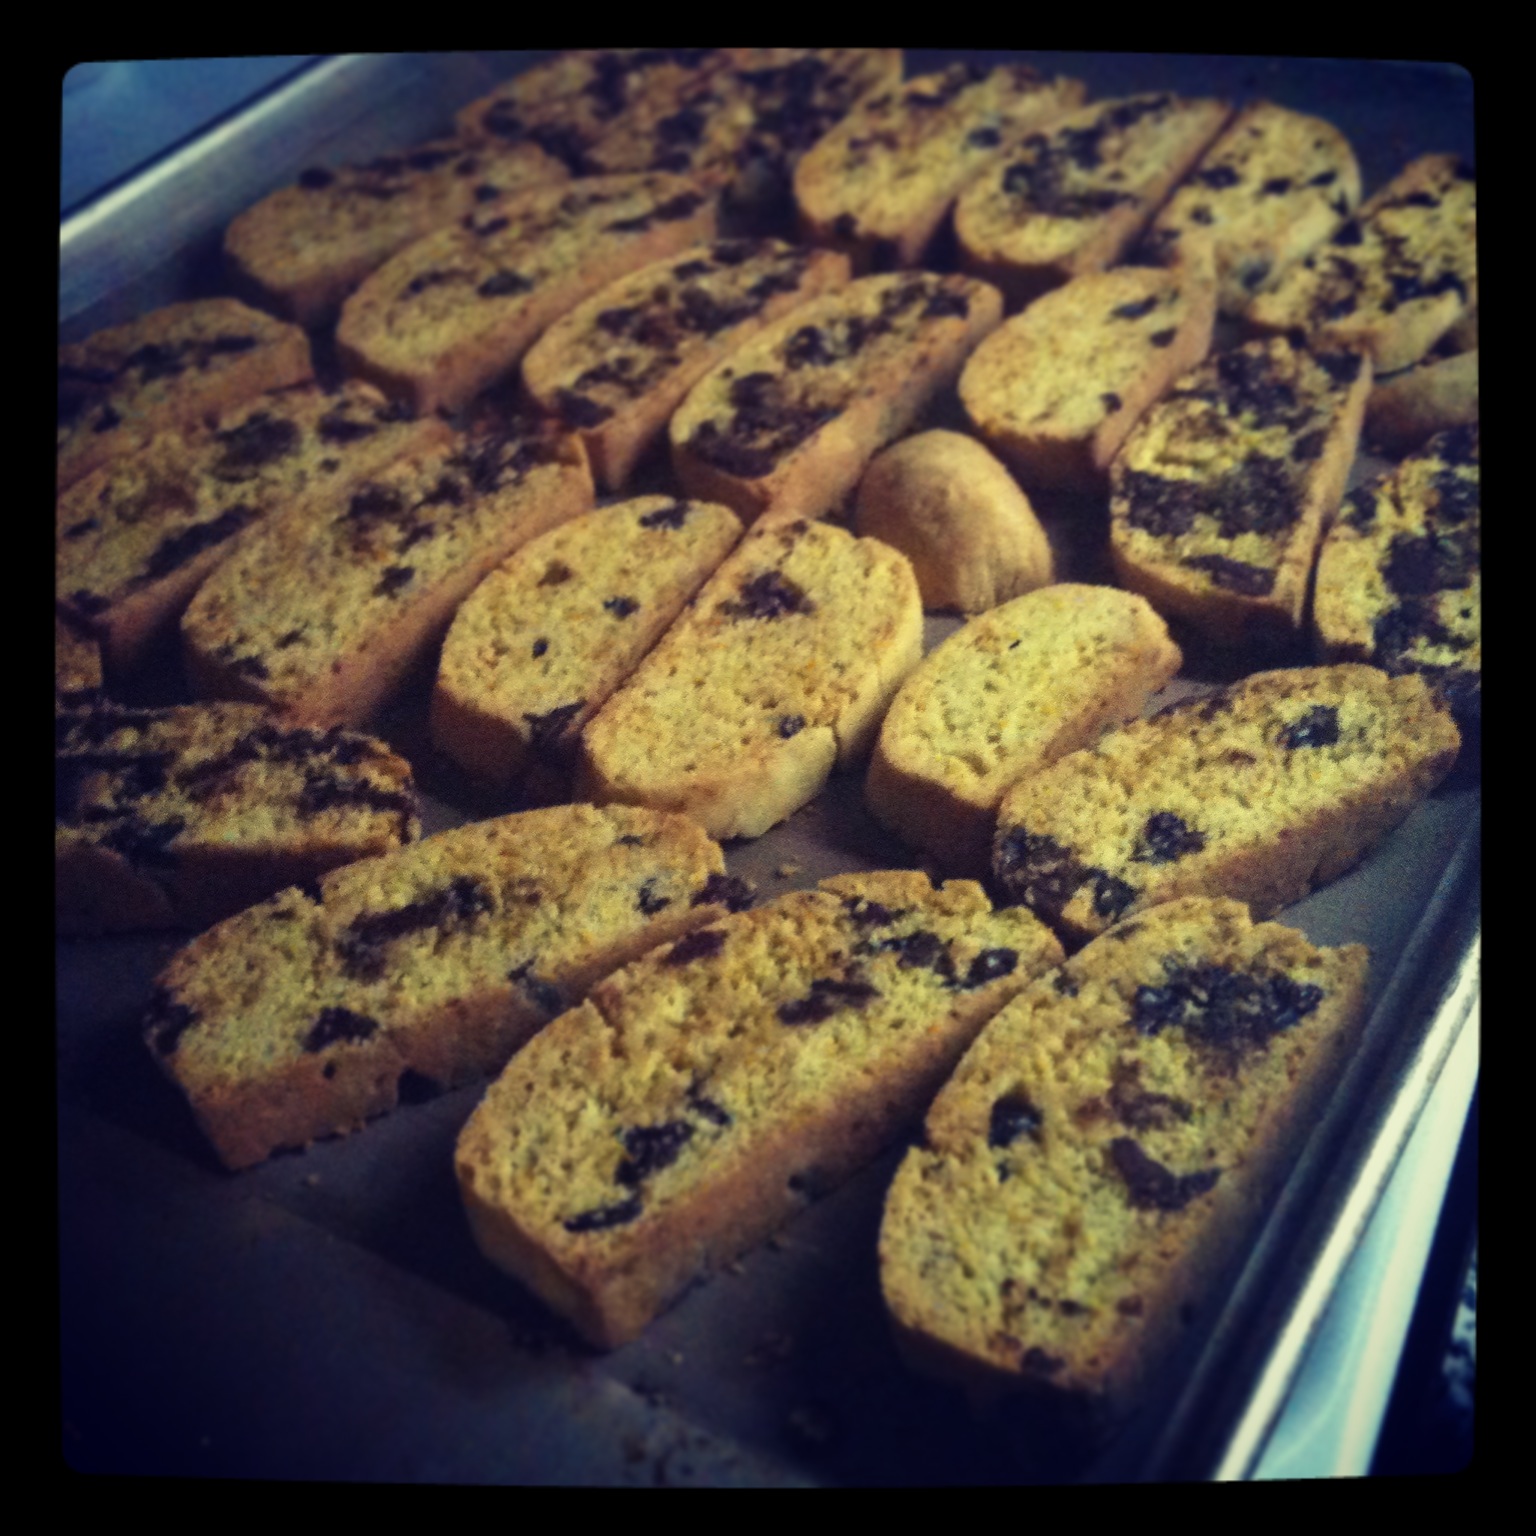 7. Turn each strip on its side and bake for another 15 minutes each at same temperature. Take care in the last five minutes on the second side not to dry them out by leaving them “toast” too long. I found it only took 7 minutes on each side in my stove to get a great crunch that won’t break teeth if you’re not a hot beverage drinker. If you are, I recommend the full 15 on the first side and 10 minutes on other side, and leaving them out in the open air to cool completely to get the true hard-as-a-rock biscotti effect.
8. If the flat sides are rough from the knife, once the biscotti is completely cooled, you can micro-plane them smooth before dipping one side into, or drizzling with, melted chocolate.
Flavour Variations:
* 2 Tbsp Orange Zest + 1/2 Tea Vanilla Extract + 3 oz Dark Chocolate Chips
* 2 Tbsp Orange Zest + 2 Tbsp Espresso Powder + 1/2 Tea Ground Cinnamon
* 3-4 Tea Orange Juice + 1/4 Tea Almond Extract + 1 C Powder Sugar (Icing)
* 3-4 Tea Eggnog + 1/4 Tea Vanilla Extract + 1 C Powder Sugar (Icing)
* 3-4 Tea Lemon Juice + 1/4 Tea Vanilla Extract + 1 C Powder Sugar (Icing)