DIY Butter Making

I am really into making various dairy products from one carton of dairy. Given the rising prices (two increases this year alone!) of dairy across the board, it made sense to me to start making my own butter, cream cheese, and soft mozza cheese. All of these are staples in our fridge.

First up, buttah! Made in my KitchenAid mixer. Just like the pioneers did. Ahem. 🙂

The process of making butter is simply whisking (or churning) the cream long enough with enough force to separate the cream’s fat solids from the whey liquid.

And before you ask, yes I lightly salted the butter. Tastes so good. Can’t wait it use it. *swoon*

In a nutshell, this is what I did:
1. Ran 1 cup of 35% whipping cream in my mixer machine with the whisk attachment on a very high speed for about 8 mins. I scrapped the bowl down once before finishing up.
2. I dumped the butter mix into a mesh strainer over a bowl. I pushed the butter down into the mesh but quickly realised I should have put a cheese cloth between the butter and the strainer, so I gloved up and started squeezing it in my hands.
3. While still holding the butter lump in my hand, I moved it around in a bowl of cold filtered water to clean out that last of the whey liquids before squeezing it dry again. I had to be gentle because the butter was so soft at this stage. It kept trying to ooze out between my fingers, so I wrapped the lump of gold up in some Bounty. That helped.
4. While holding the butter in my gloved hand, I shook some salt on the blob and on my glove, and then proceeded to massage/knead the two together. I did a quick taste test, and then wrapped it in plastic film.
5. I formed it into a small brick and tucked it in the fridge so it can firm up.

In the end, this is what I was left with:

It weights 74g, and it measures out to 5″ x 3 1/4″ x 1 1/4″. All from 1 cup of cream and a bit of salt + time. This is good. I will do this more in future.

We don’t normally use a lot of butter day to day, so there is always the worry that our butter would go rancid in the fridge before we get around to using it up since I don’t do a lot of baking anymore. This will be a good money saver (hella expensive even for the low-end store butters) and a very real time saver (I typically wait for butter to go on sale, buy a few bricks, and store it in the freezer. I would then have to wait for it to thaw in the fridge over night, and then again on the counter as it comes up to room temp to use it.)

I can make a small batch in about 10 mins, and have it ready to use in a few more mins should I need it to be soft, or butter in 30 mins should it need to be firm. I hate that I didn’t try this years ago. Grr.

And now I finally have some pretty handmade butter to put in my late MIL’s cute glass butter dish with this cute cow embedded in the design.

DIY Coffee Syrups

I love coffee. I love flavoured coffee. I also love saving loads of money by making these dead easy coffee syrups at home for pennies. I kid you not. Pennies.

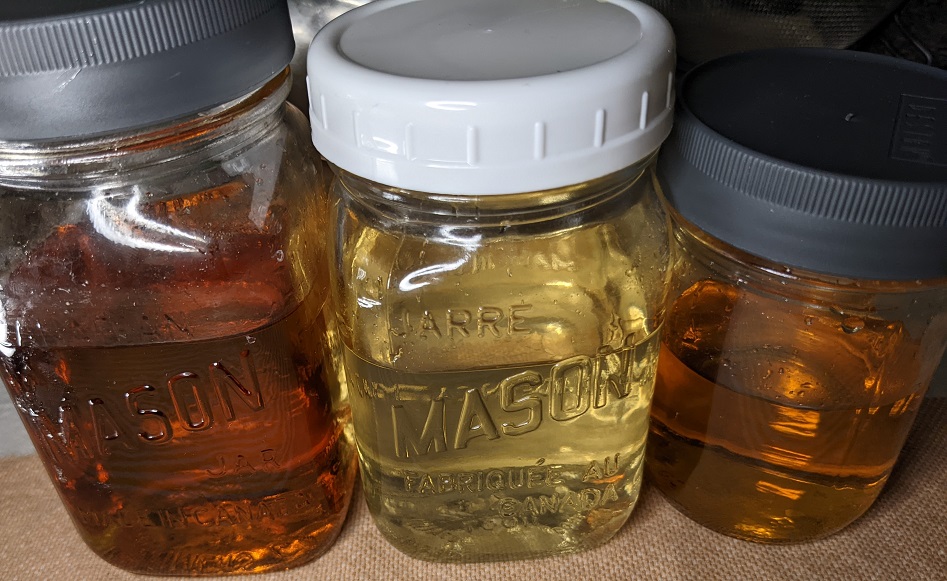
Syrup batches I made this week: Caramel, Hazelnut, and Vanilla

Here are but a few of my faves, and a few new-to-me kinds I recommend making at home yourself. And they all have the same two starter ingredients: water + sugar (or sweetener of choice) in a 1:1 ratio to form a simple sugar base. Here we go.

Bar Cart Simple Syrup:
1C Water : 1C Sugar (any)

Bring water and sugar to a boil on med-high heat, stirring constantly until the sugar is fully dissolved. Once at the boiling point, drop heat to a simmer and let it low boil 10 mins. Cool completely off the burner. It will thicken up if you chill it in a storage jar.

Caramel Syrup:
1C Water : 1C White Sugar

Over a less than medium heat, stir the sugar often and alone in a bare pan, until it hits a lumpy liquid stage. Heat up the water in the microwave so it’s hot, but not boiling.

CAREFULLY dribble the hot water into the sugar a bit at a time, whisking when it’s safe to have you hand near the pot. The water + sugar will cause a steam reaction initially that will burn your hand if you pour it all in at once. Resist that urge.

Keep stirring the mixture until all of the sugar is smoothed out (don’t worry if some of it hardens – that will melt eventually as you continue stirring).

If you need more control of the sugar from hardening or burning, you can slip the pot halfway off the burner as you stir, returning the pot fully to the burner when you feel the sugar is melting needs more heat to finish.

Cool completely off the burner. It will thicken up if you chill it in a storage jar.

Hazelnut Syrup:
1C Water : 1C Sugar (not brown sugar; it will overwhelm the final flavour)
1 tea Hazelnut Extract

I went to many stores, but Michael’s was the only one that had this extract product.

Like the above two recipes, dissolve the sugar in the water fully, bring to a gentle boil, drop heat and let it simmer 10 mins before adding the extract off the heat and cooling completely. Store in a jar in the fridge to thicken it, or on the counter to use as is.

Brown Sugar Syrup:
1C Water : 1C Brown Sugar
3-4 drops or 1/4 tea Vanilla Extract

This syrup was the hottest new thing last year at Starfakes, and it looks like they are going to make it a big player in the summer coffee drinks game this year, too. Add this to some whipped cold milk foam, and pair them with some cold coffee, and you will have the summer heat licked before it starts.

Make the same as any of the previous syrups: bring to boil, drop to simmer for 10 mins. Cool completely. Jar and store in fridge for thicker or on the counter.

Mint Syrup:
1/2C Water : 1/2C Sugar (any)
2-3 Drops Mint Extract

This is a great version of the bar cart simple syrup for sweetening your summer drinks. Make the same as any of the previous syrups: bring to boil, drop to simmer for 10 mins. Cool completely. Jar and store in fridge for thicker or on the counter.

Coffee Syrup:
1C Water : 1C Sugar
3 Tbsp Instant Espresso or Instant Coffee Powder

Make the same as any of the previous syrups: bring to boil, drop to simmer for 6 mins. Skim off the foam as it simmers or strain into a cheese cloth when off the heat. Cool completely. Jar and store in fridge for thicker or on the counter.

Coffee Go Boom

(Sad Face emoji)

I was reaching backwards to for the glass jar I kept my coffee grinds in that has a glass topper that has a rubber gasket seal to keep it all fresh, but I noticed a few weeks back it was starting to feel loose but it still held up if I pushed down on it to ensure it was fully sealed closed.

The other day I was listening to a podcast with my headphones on, running around the kitchen, and forgot to push the topper down before I picked it out by the lid to bring it across the floor to the other counter.

Fatal mistake. I paid the price for that. F**k.

And if that wasn’t bad enough… and it is, I was in bare feet at the time. I had to gingerly back out of the kitchen scanning the floor for shiny glass fragment before putting each foot down.

I have never been so happy to have such a small kitchen (7.5′ x 7.5′) in my life!

Bulgar Corn Salad

I love this salad. I discovered it a few weeks back while cleaning out my fridge at the end of a week eating all of the bbq food we smoked a few weekends ago. I also had a bit of Italian dressing kicking around in my fridge door, so I added it to the veg and grains to provide some moisture. Great decision. Tasty.

Corn Salad:
3-4 Corn, cooked and cut off the cob
1 Shallot, thin slices
1/4 Red Pepper, small dice
6″ Cucumber section, hauled out and fine dice
1 Celery Rib, fine dice
1/2 Roma Tomato, seeded and diced
1/4 C (or less) Italian Dressing
S & P to taste
Pinch Smoked Paprika (optional)

The above alone would be lovely with some blue cheese or feta crumble on top, too. But, as I said, I morphed this into a grain salad using what was leftover for a lunch.

Bulgar Corn Salad:
Corn Salad (above recipe)
1-2 Leaf Green leaves, torn up small
1/4 C Bulgar, cooked and cold
Drizzles of more Italian Seasoning (if needed to moisturize everything)
Small pinch Salt (if needed to wake up all of the flavours)

I love this salad. This is one I will keep going back to during all of the good weather months. Without a doubt.

Better Weed Killer

It’s that time of the year. It’s finally killing season!

And by killing, I mean killing pesky garden & grass weeds, of course. I’m not a monster, but I hate dandelion weeds pushing out grass, plants and flowers that I am taking care of. Since I didn’t plant these weeds, I figure I don’t have to put up with their bullshit. Here is how I do it without using hard chemicals that bug my lungs and nose. And it’s cheap!

Better Weed Killer:
4C Distilled Vinegar
1/4C Salt (any)
1 1/2 teaspoons Dish Soap (any, but I always use blue Dawn)

Dissolve the salt in the vinegar fully before adding the dish soap. Pour directly on the weed at the base so it has a chance to go right down to the root. Feel free to give it a second go if I doesn’t wilt and die in an hour or so.

Shawarma Salad

I love me a great rice bowl. I also love me a great entre salad. So, I combined the two into a shawarma ‘on the rocks’ salad. I cut out the pita (or naan if you’re used to eating donairs), and I didn’t miss it one little bit.

This salad starts on a bed of greens (arugula this time) and it’s topped with some spicy rice (optional if you simply use more greens instead), shawarma style chicken, diced tomatoes, pickled red onions, and some spicy cream sauce of choice. (I’m still in love with the sriracha ranch sauce I bought a few weeks ago, so that’s what I used. It was quite good and quite filling.

Shawarma Chicken:
1 Chicken Breast (makes enough for two servs)
1 Garlic, minced
1/2 Lime, juice + rind
1/4 Lemon, juice
1 tbsp Yogurt, thick + plain
1 tbsp Oregano, dry
1/2 tea each S & P

Cut up meat into 1″ cubes. Toss them with the dry and wet ingredients in a glass bowl. Mix it up well to fully coat the meat. Throw in the spent lime rind. Cover and chill 30-45 mins.

Discard the lime rind and skewer the meat chunks as the oven or grill heats up. (You will need 4 small skewers, or 3 long ones.) Cook each side 3 mins on the grill, or oven cook for 12 mins, turning once halfway. Cook to the full 165F degrees.

Tea Sandwiches

I’m already thinking about cold tea sandwiches during the hot months, and we barely got out of a surprise frost day yesterday. (snort) But, yeah… cute, tasty tea sandwiches are lovely any time, but I really want to eat them this week. I might have to make some this weekend.

L – R: Deconstructed BLT, Radish Crown over cream cheese, Cheese & Sausage with a spicy mayo, and the classic Cuke in butter.

These tiny sandwiches are very tasty, but they are also very artistic when you them all laid out perfectly on a platter. I cannot resist these babies. I want them. I want them right now!

Steak Entree Salad

We had some leftover steak that needed to be used up tonight, and some other veg that was on the cusp, so in a big entree salad they went after I reheated the meat. I topped it with this groovy dressing I found at Walmart. Very tasty. It made a believer out of the husband who isn’t into salad.

Steak Entree Salad:
3-4 oz Steak, cooked / cut on bias 1/4″ slices
3 C Leaf Green
Salt
1/4 Pepper: Green & Red, diced
1/2 Roma Tomato, diced
Pickled Red Onions (for colour, texture, and tart taste)
Any dressing (mine is creamy and zippy, but balsamic glaze would be great, too)

Wash the greens, spin dry, and toss lightly with salt. Divide greens into two large plates or bowls, top with diced veg and picked onions. Add small drizzles of the dressing and top with the rested sliced up steak.

Note: Warm pan friend mushrooms would be lovely in this salad, too.

51 More 30-Min Meal Ideas

If you’re like me, you think about food a lot. Recipes, especially. But for all of the recipes I have, I still struggle with easy dinner ideas every single night. I’m just as burnt out like the rest of you from trying to figure out meal ideas. So, here are 51 more that may be new to you ideas to keep in your back pocket.

Some of these look so delicious. I can’t wait to try a few of them this week.