Air Fryer Chocolate Croissants

Made these tonight. Brilliant hack to get the materials assembled quickly, too. I watched a video online that illustrated if you buy store grade puff pastry, roll it out a bit, and crush up a Flaky chocolate bar to sprinkle over the middle of it, you two can cut up the triangles and roll the croissants in no time at all.

I baked five in the air fryer as a test of temps and times, and while I was doing there, three were sitting on the counter the whole time. What I didn’t realise was how much bigger they would be once I baked them because they had 20 mins to proof. Nice.

I used a liner in the basket and sprayed a bit of oil down for the bottoms to brown, and added a bit to the tops while using a pastry brush to make sure I got good coverage.

I baked them at 350* for 12 mins, jacked up the heat to 400* and baked them another 6 mins to get them to an internal temp of 205* – 210*. (This ensures the middles don’t come out undercooked.) But I think the next time I do these, I will bake them at 325* for 15 mins and then play with the temp for a bit of browning. I think I went too far with this batch.

Don’t overdo the time and temp because you will burn the chocolate as you attempt to brown the outside. The goal is to cook the croissants about 170*, and then go after the colour.

Air Fryer Intro

So, I bought an air fryer.

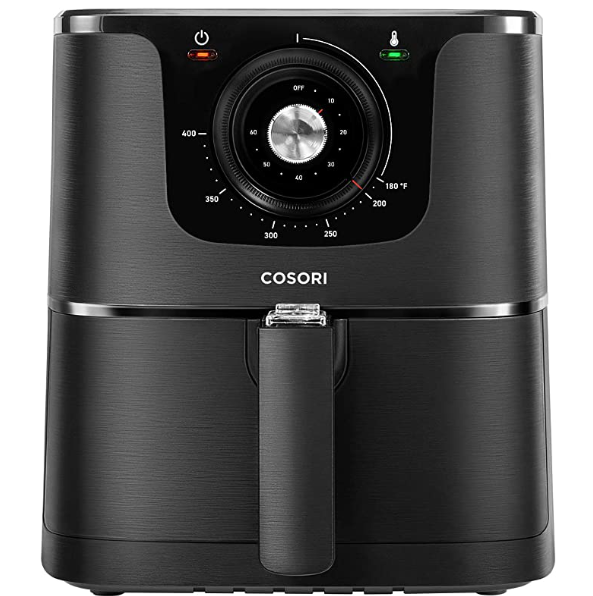
I picked up a 5.8Qt basket style Cosori Air Fryer from Amazon.ca, and so far, I’m liking what it can do. I’ve only figured out three things (four if you include ice cream making) things you can’t do with an air fryer (cook pasta noodles, make rice, and pop popcorn properly), so the world is still my oyster. 🙂

I resisted getting another air fryer for years but after I realised they had changed so much, I was open to the idea of getting one. This time, instead of someone else picking a hot new small kitchen appliance for me as a gift, I wanted to do some research, set a criteria, and find a machine that satisfied my budget of the $100-150 mark. And I did it.

I was looking for a small in height, but big in capacity, machine that allows me to do loads of different food types and to do a lot of each in one go. I love to cook once, and eat at least three times.

I was also looking for something with easy dials I could move with my hands versus pushing buttons. Pushing buttons all day at work has me longing for the old days of dials for some reason. And I wanted a basket versus a toaster oven style. I wanted to shake up my food at the half way mark, not take a whole tray out and flip food. I also carefully looked at the clean up for both styles out there, and for me, the basket was a no-brainer. This machine is very easy to clean. And I have loads of accessories kicking around I can use in the basket when it comes to food types like baking an egg in a silicone muffin cup as I roast tater tots in the basket around it.

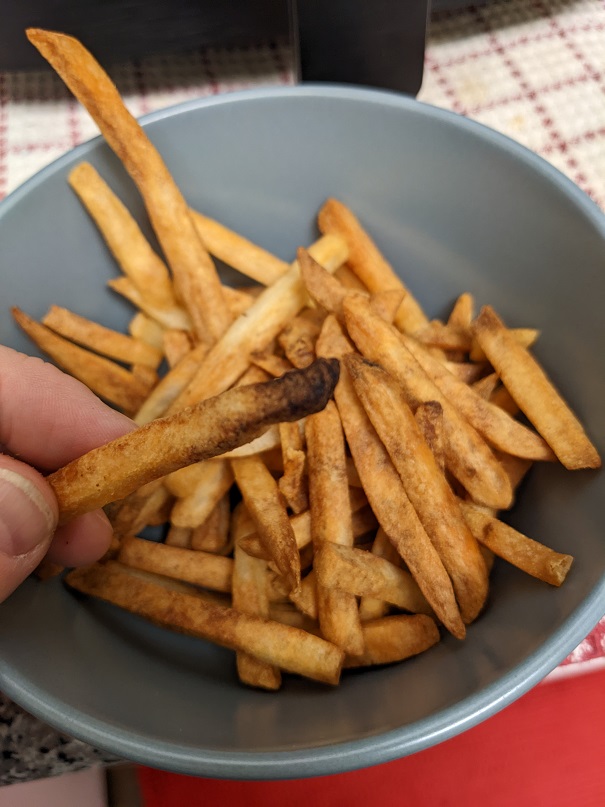
First night I had it, I made toast first (to check out any hot spots, and to rid me of that new machine smell. After that, of course I made frozen French fries in it. D-uh! I managed to burn AND dehydrate them because I’m not a big fan of cooking or baking fries, so I got the temp and time all wrong. Hee.

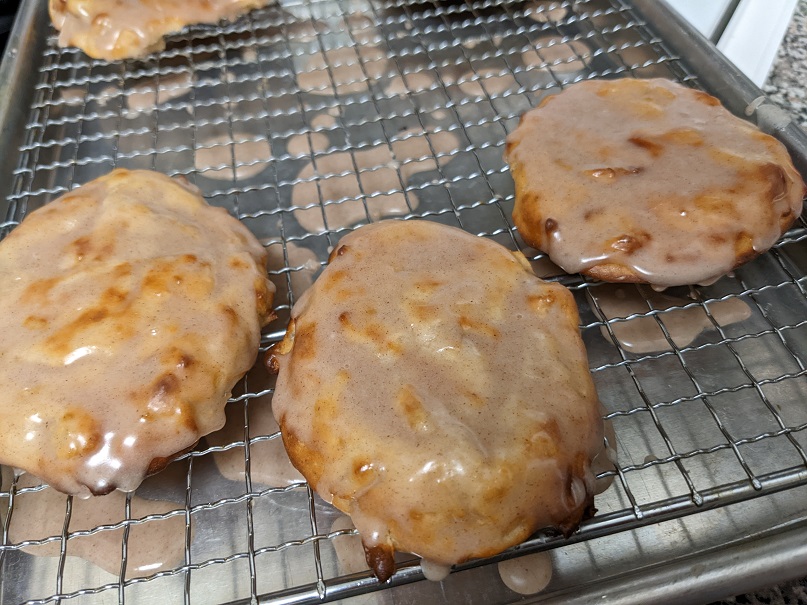
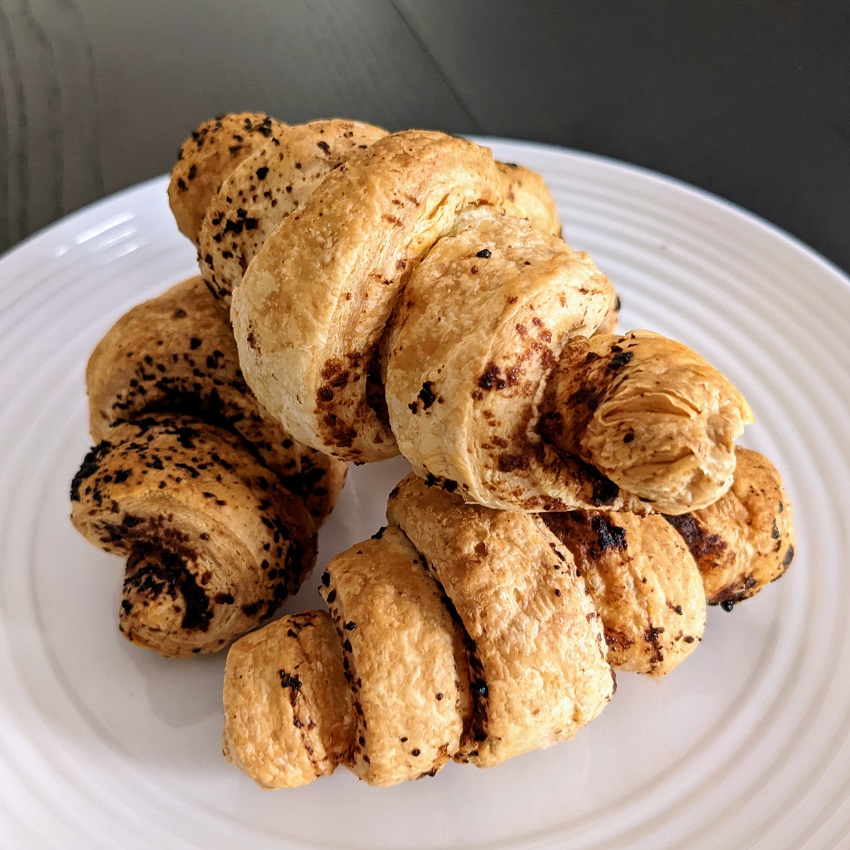
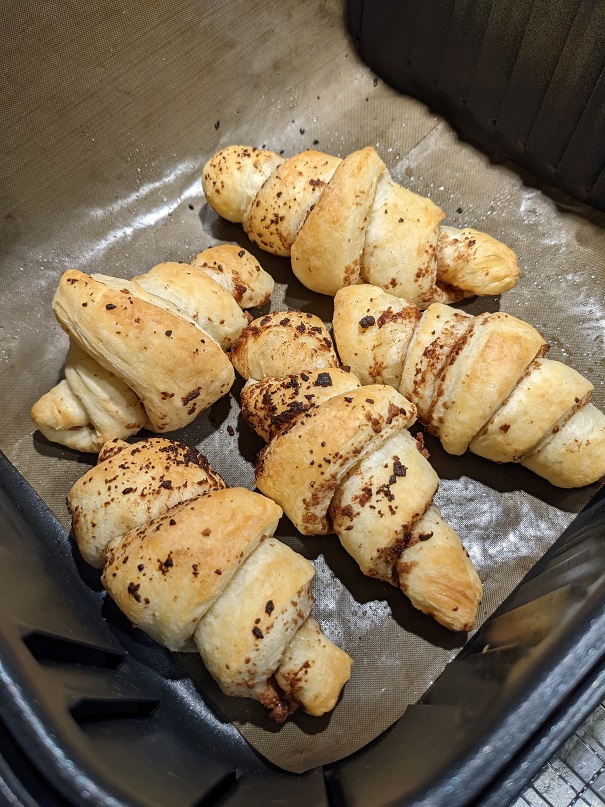
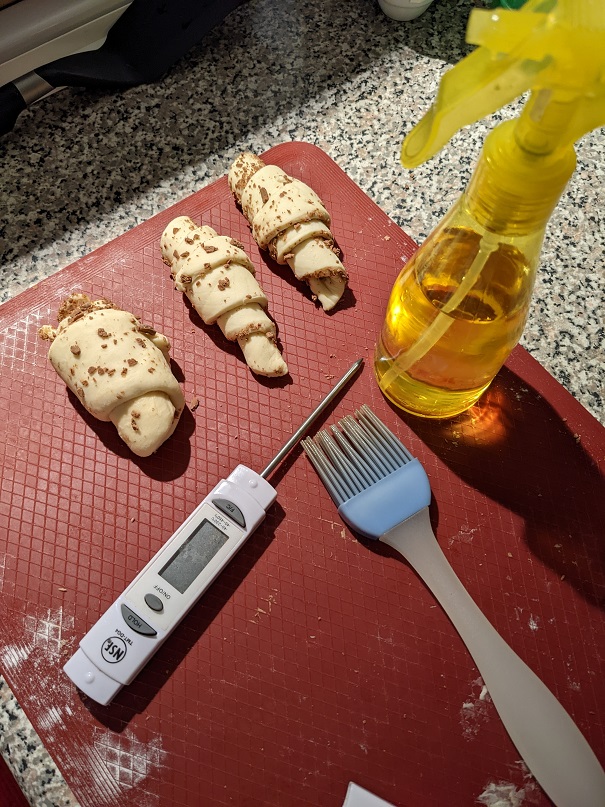
And then I tried my hand at the only recipe in the manual that interested me: apple fritters. There weren’t bad, but they could be so much better! The don’t store well, so if you make these, share them with others as soon as you pour your glaze over top. Tasty. the texture needs work, but the flavours are good enough.

I’ve had this fryer for just shy of two weeks, and I tend to do things like grilled cheese sandwiches (a fave in this house), roasted tots using smoked baked potatoes the next day (amazing), and muffins using a mix and some add-ins (dead easy). I also tried to cook dumplings in it but I overshot the temp and time, and it came out like so frail Pavlova cookies. Ugh.

A couple of days ago I tried my hand at jammy and hard boiled eggs. The first attempt didn’t produce fully cooked yet jammy eggs, and the hard version had brow spots on the egg white after the shell was cracked open. I am not deterred. I will crack this mystery. (See what I did there? Oh, you did? I’ll show myself out now.)

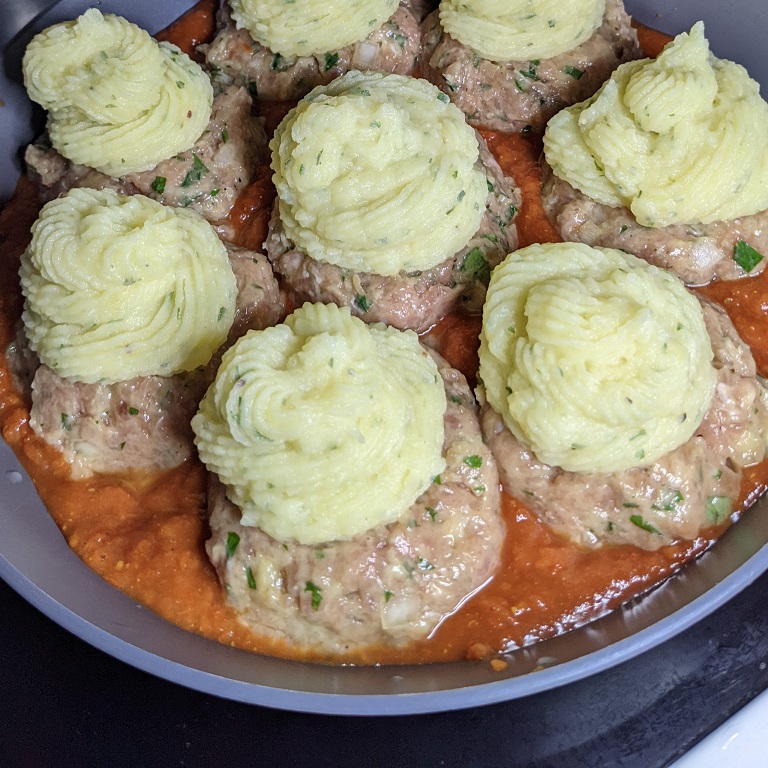
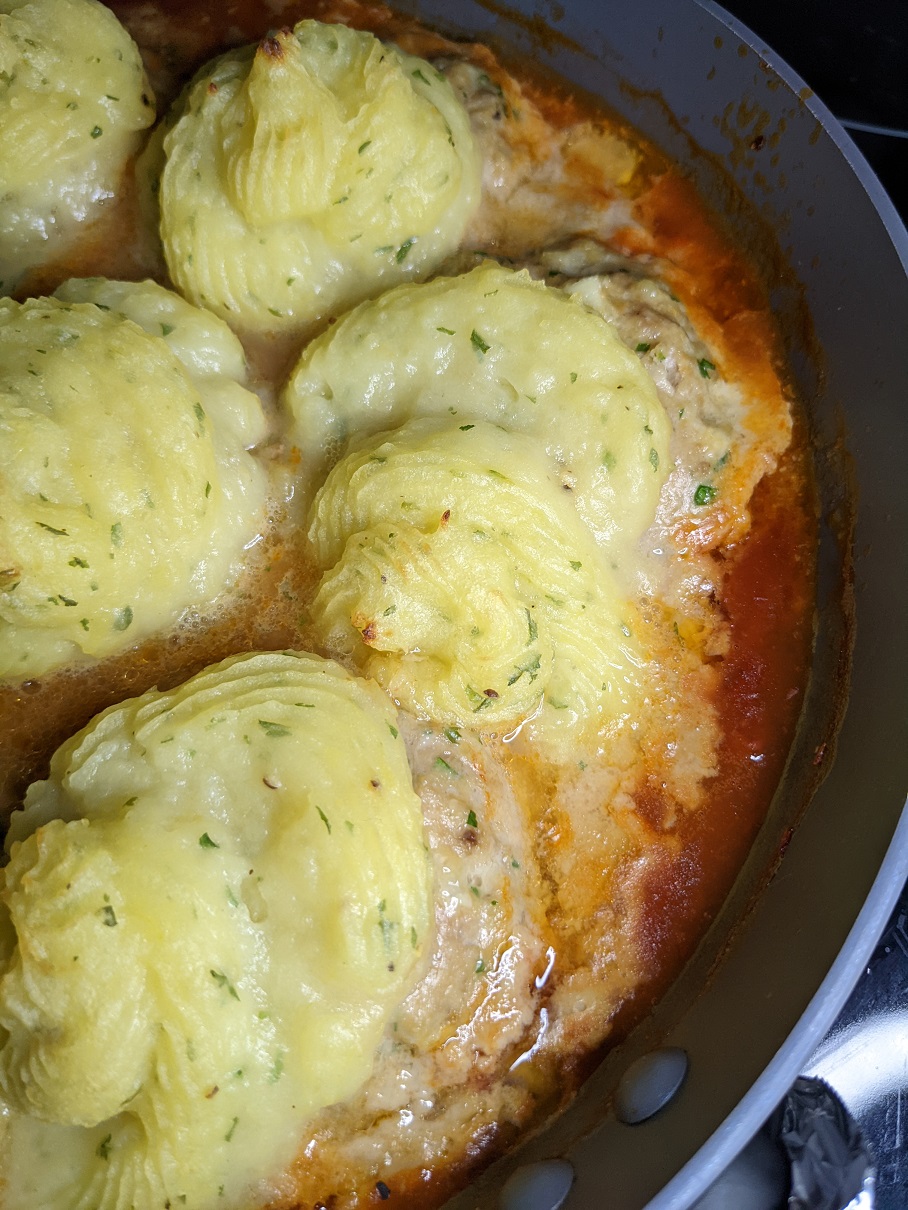
Today I made enchiladas after I roasted a jalapeno, a Shepard’s pepper, and a yellow pepper to make a very good salsa. I used the salsa to hold the filling together and then I smeared a bit on each tortilla before laying down the filling and cheese. I will do a post on this separately soon.

Tilapia & Chopped Corn Salad

As the last breath of summer days gasp out (for me, at least), I’m still obsessed with my corn salad. Today I made what might be the last one of the season (we’ll see), and I paired it with some delicate tilapia white fish. Perfectly seasoned and cooked, it flaked into lovely chunks easily before I tossed it with my beloved chopped corn salad for a nice summer lunch with the husband.

I swear, this is going to be the last meal I request on my deathbed. 🙂

Bacon Corn Salad

This is some bbq chicken, peppers and corn salad I made a few weeks. It was delicious. I can’t stop making each of these things. But that corn salad…? I couldn’t not put bacon in it, so that’s what I did. 🙂 (See below pix for that version.)

Grilled Bacon Corn Salad:
2-3 Bacon Strips, 1/2″ cuts
2 Smoked corn cobbs in the husks, cooled enough to hold
1/4 Red Onion (can be raw or pickled – I use what I have on hand)
1 Jalapeno, seeded, fine diced
1/4 Smoked Sweet Pepper, fine diced
2 tbsp BBQ Dry Rub (of choice)

3-4 tbsp Italian Dressing
1 small bunch Parsley, chopped
Parm grated or Queso crumbled

In a pan or on a griddle, heat up bit of oil and lay the bacon over it to render out the fat. Add the veg and shuffle it around so nothing sticks to the surface and it gets cooked evenly. Add the dry rub and keep cooking the mix until the bacon gets crispy and the veg softens, about 5-8 mins.

Off the heat, dump it into a big bowl and roll it around with the dressing and parsley. Plate with the cheese of choice on top. Serve room temp or warm.

If making ahead of time, lay the corn salad in one even layer on a big sheet pan to rapid cool for up to 20 mins before storing in the fridge.


Meat & Potato Bombs

I lost the YouTube video link, but thankfully I scribbled down some notes as I watched it. I didn’t think much of the recipe’s concept, but I do love piping mash potatoes, so I gave this one a whirl.

And we are glad I did. We loved it. I have plans to turn this into a Shepards Pie meal. I also want to try stuffing an egg yolk under the mash next time.

This recipe is good for 8 bombs, but you can easily cut it in half for a lovely dinner for two, or for a solo dinner + a lunch for the next day.

Meat & Potato Bombs:
400 g Ground Meat (of choice – I used turkey. It might have been chicken. I forget.)
1/2 Yellow Onion, diced or grated
2 Garlic Cloves, minced or grated
1 tbsp AP Flour
3 tbsp Neutral Oil
1 Yolk
S&P
Parsley, chopped

Mix this by hand to form the patties. Place on a small sheet tray or a big plate and wrap to chill 30 mins. In the meantime, work on the mash. Preheat oven to 350*.

2 Medium Sized Yukon Potatoes (you can use Russet instead), 1″ x 1″ cubes
1 tbsp Salt

From cold water, bring the potatoes in water to a boil with the salt in. Let it boil until the edges of each cube look slightly fuzzy. It should be about 10 mins or so. Drain and process the potatoes into a medium size bowl using a ricer. This tool gives the smoothest mash needed for piping.

40 g Butter
1/2 C Milk
50 g Cheddar Cheese, grated
Pinches of Salt & Nutmeg (if you like it; I don’t)

Warm up this in a small sauce pan as soon as you drain the potatoes and start ricing. At the same time, warm up some pasta sauce. (Jarred is fine, or make a fast pasta sauce using the following.)

Take the bombs out of the fridge. After all the ricing is done, add the dairy mixture. Fold in gently.

100 g Passata Sauce
30 g Olive Oil
1/4 tea Italian Seasonings (rubbed between your fingers first)
S&P

Lay a scant bit of pasta sauce on bottom of a small baking dish or a skillet that is oven proof. Set it aside. Place the bombs over the pasta sauce. Use a finger to indent the middle of the bombs a bit.

Set up a piping bag with a star tip inserted in the bottom hole. Spoon mash into the bag and pipe it over the bombs starting in the middle, moving out to the edge while circling it into a hive like shape.

Spoon the rest of the pasta sauce between the bombs. Cover the pan’s handle with a sheet of tin foil if it’s plastic in nature to protect it. Otherwise, pop the dish or skillet into the oven.

Bake for 30 mins. Longer if you want more colour on the tips of the mash potatoes.

Serve with a side of your choice.

Eggplant Parm For One

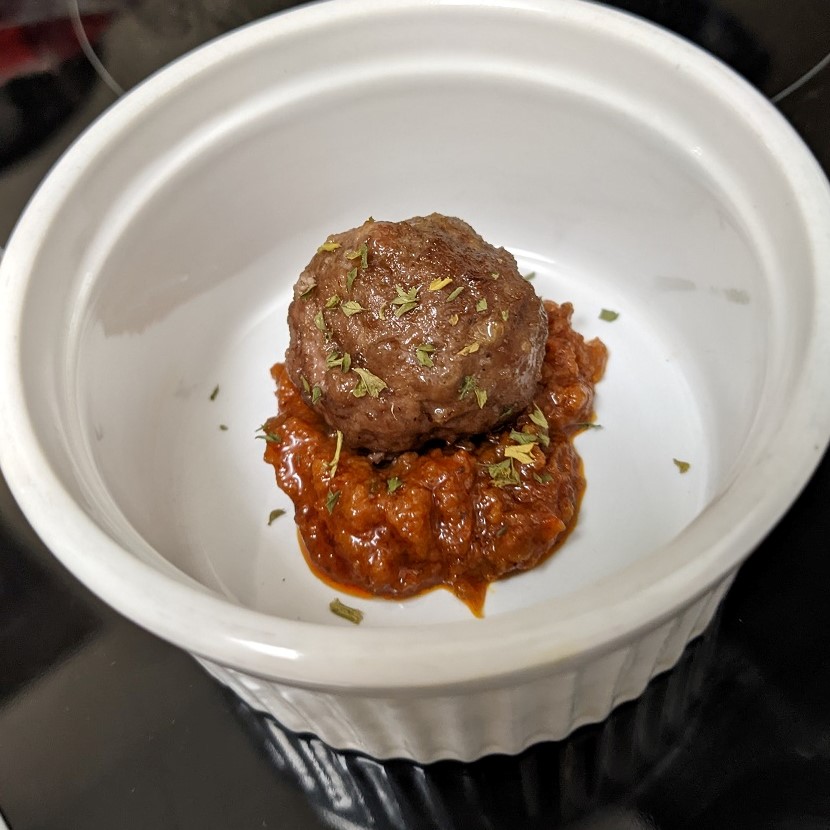
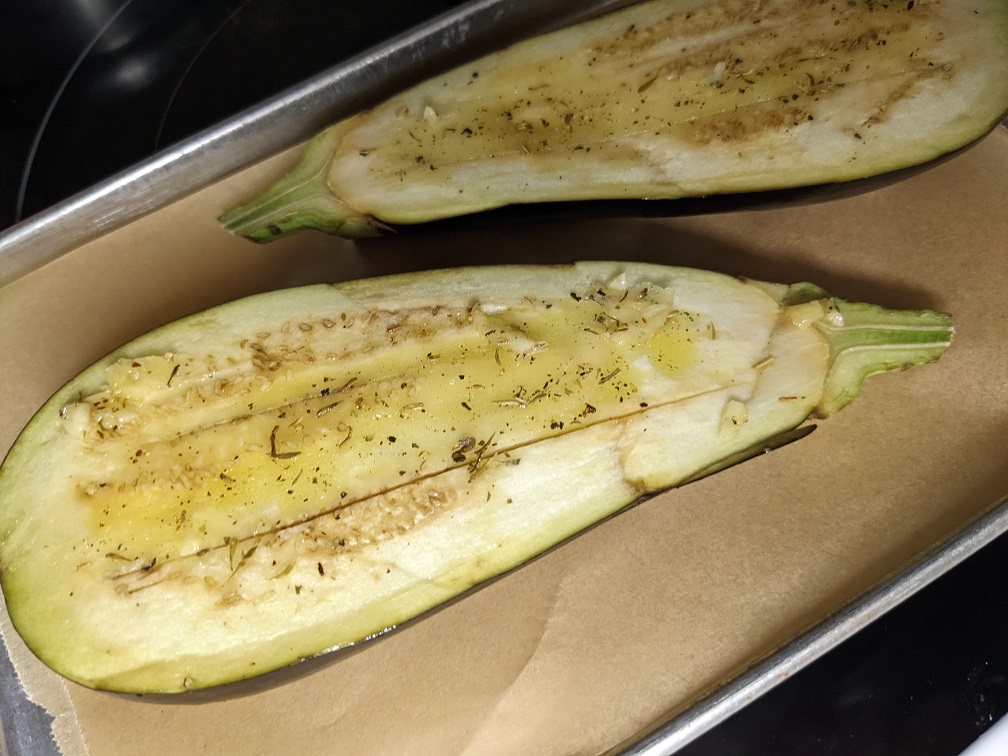
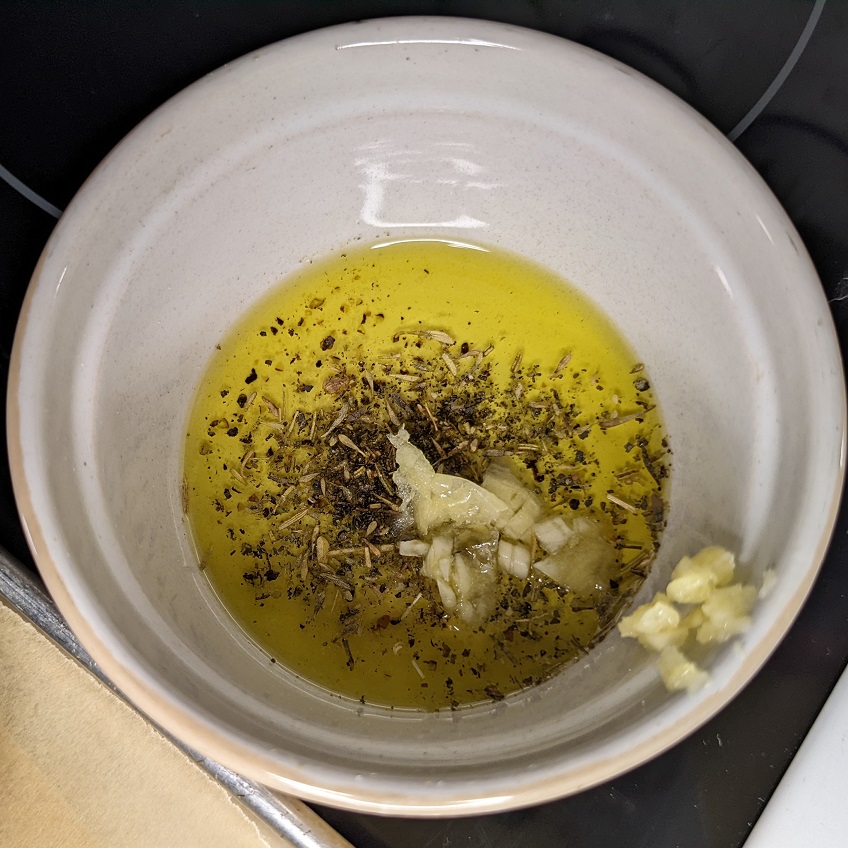
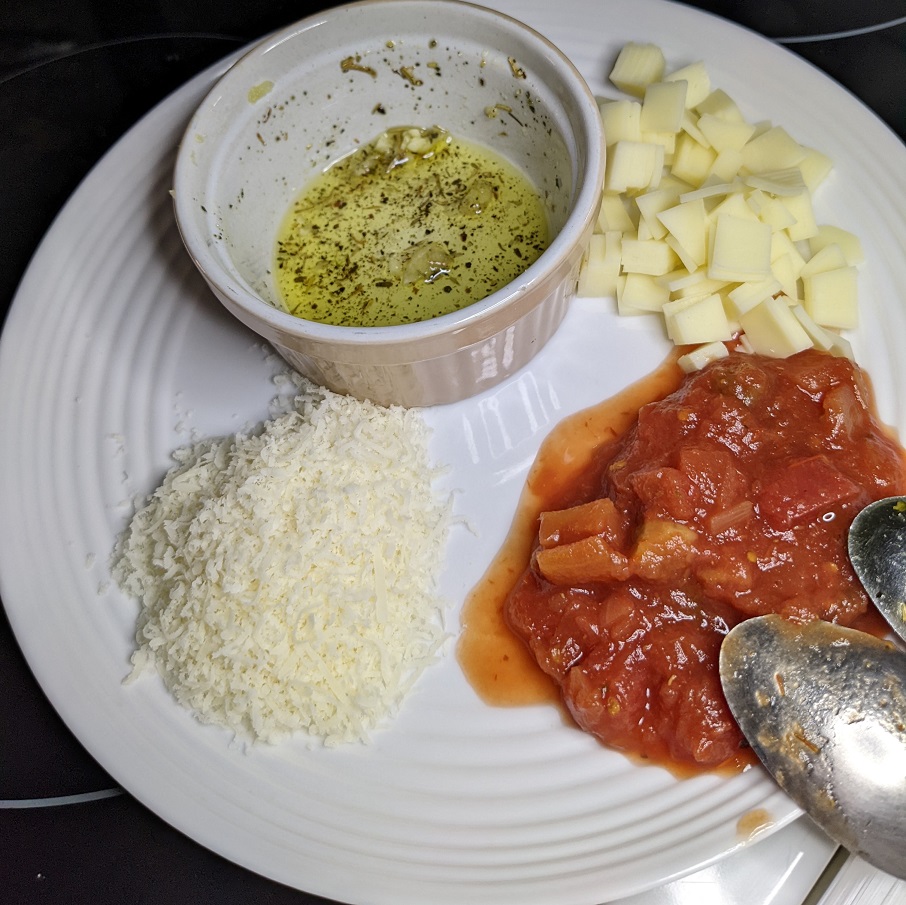
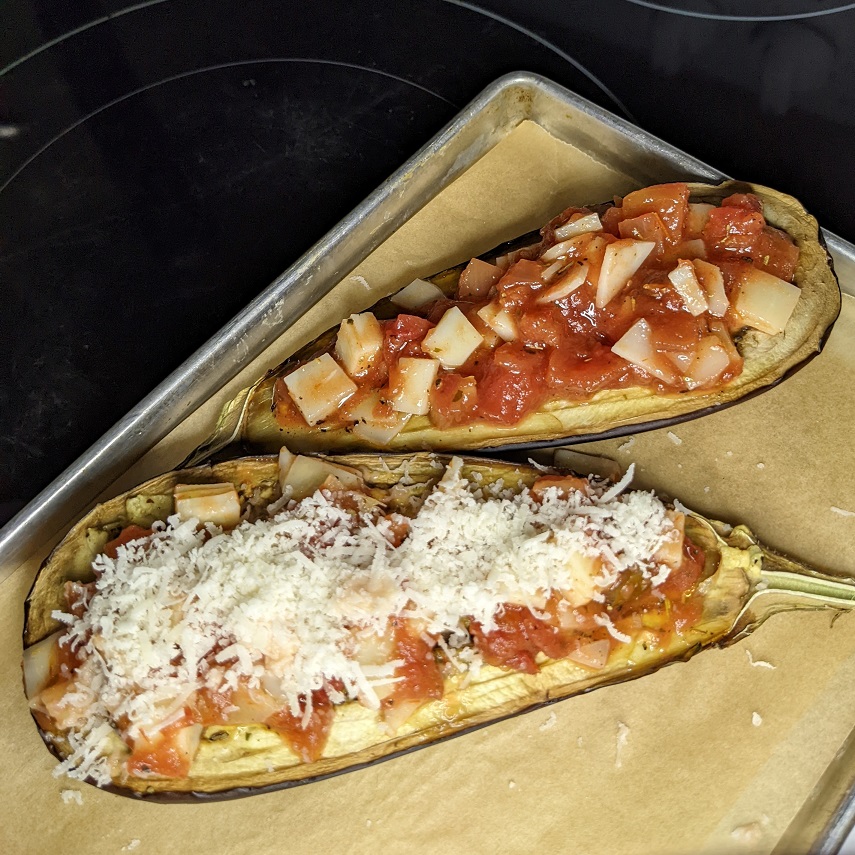
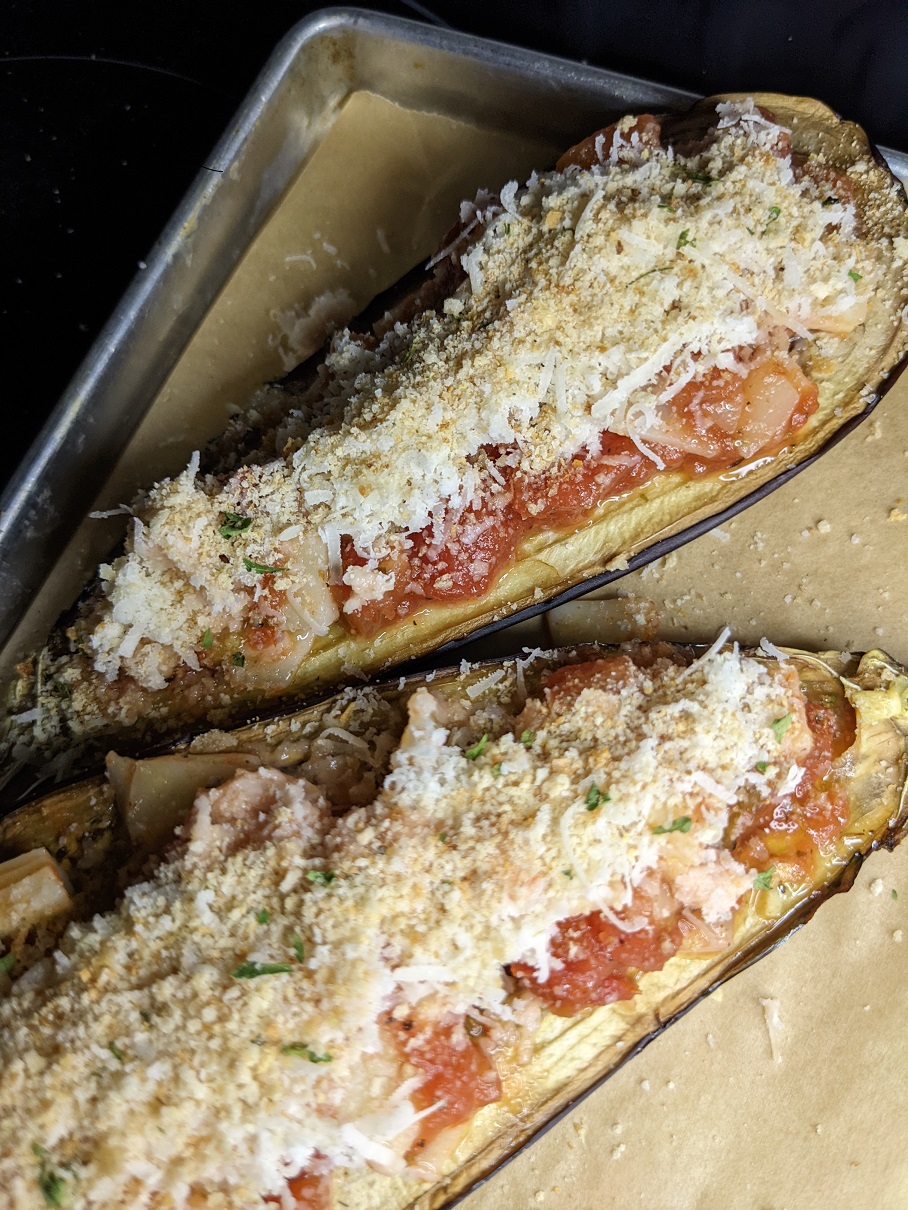
Made this for today’s solo lunch. I love eggplant parm. I often do it over pasta or on a bun, but this is the first time I left the starch vehicle out. Just the filling, kids! I highly recommend to using Balsamic drizzle over top if you have it on hand.

Eggplant Parm For One:
1 mini Eggplant, halved, scored down the middle twice on each side

2 tbsp Olive Oil
2 Garlic Clove, minced
1/2 tea Italian Seasons
S&P

Brush the eggplants with half of this mixture before placing on a parchment lined sheet tray and popping in a preheated 400* oven to bake for 25 mins.

3 tbsp Salsa
2 slices Provolone Cheese, cut into small squares
1/4 C Parm, grated
1/8 C Breadcrumbs

Mix salsa with the provolone in the leftover oil mixture. Top the baked eggplant halves with this mixture. Top with the parm cheese, and then with the breadcrumbs.

Pop back into the oven for another 8-10 mins, or until browned to your liking.

Toppers: Basil that’s been cut julienne and Balsamic drizzle (or a small bit of salt).

Enjoy!

Creamy Iced Coffee

This is a recipe I found over at the Oikos website, but it’s not accessible anymore. This is a transcription. This recipe produces a drink as tasty as all the other coffee recipes at the base level, but the beauty of using plain Greek yogurt in this blended drink will have a lovely creamy texture. One I find myself thinking about a lot. Try it.

1/4 Espresso Shot (or 2 tbsp Instant Coffee + 2 tbsp hot water, stirred and cooled down)
3/4 C Milk (I use chocolate if I have it, but white is fine)
4-6 Ice Cubes
1 tbsp Plain Greek Yogurt
1 tea Maple Syrup (not table syrup for pancakes)

Blend in a good blender for 30 seconds. Enjoy.

DIY Butter Making

I am really into making various dairy products from one carton of dairy. Given the rising prices (two increases this year alone!) of dairy across the board, it made sense to me to start making my own butter, cream cheese, and soft mozza cheese. All of these are staples in our fridge.

First up, buttah! Made in my KitchenAid mixer. Just like the pioneers did. Ahem. 🙂

The process of making butter is simply whisking (or churning) the cream long enough with enough force to separate the cream’s fat solids from the whey liquid.

And before you ask, yes I lightly salted the butter. Tastes so good. Can’t wait it use it. *swoon*

In a nutshell, this is what I did:
1. Ran 1 cup of 35% whipping cream in my mixer machine with the whisk attachment on a very high speed for about 8 mins. I scrapped the bowl down once before finishing up.
2. I dumped the butter mix into a mesh strainer over a bowl. I pushed the butter down into the mesh but quickly realised I should have put a cheese cloth between the butter and the strainer, so I gloved up and started squeezing it in my hands.
3. While still holding the butter lump in my hand, I moved it around in a bowl of cold filtered water to clean out that last of the whey liquids before squeezing it dry again. I had to be gentle because the butter was so soft at this stage. It kept trying to ooze out between my fingers, so I wrapped the lump of gold up in some Bounty. That helped.
4. While holding the butter in my gloved hand, I shook some salt on the blob and on my glove, and then proceeded to massage/knead the two together. I did a quick taste test, and then wrapped it in plastic film.
5. I formed it into a small brick and tucked it in the fridge so it can firm up.

In the end, this is what I was left with:

It weights 74g, and it measures out to 5″ x 3 1/4″ x 1 1/4″. All from 1 cup of cream and a bit of salt + time. This is good. I will do this more in future.

We don’t normally use a lot of butter day to day, so there is always the worry that our butter would go rancid in the fridge before we get around to using it up since I don’t do a lot of baking anymore. This will be a good money saver (hella expensive even for the low-end store butters) and a very real time saver (I typically wait for butter to go on sale, buy a few bricks, and store it in the freezer. I would then have to wait for it to thaw in the fridge over night, and then again on the counter as it comes up to room temp to use it.)

I can make a small batch in about 10 mins, and have it ready to use in a few more mins should I need it to be soft, or butter in 30 mins should it need to be firm. I hate that I didn’t try this years ago. Grr.

And now I finally have some pretty handmade butter to put in my late MIL’s cute glass butter dish with this cute cow embedded in the design.

DIY Coffee Syrups

I love coffee. I love flavoured coffee. I also love saving loads of money by making these dead easy coffee syrups at home for pennies. I kid you not. Pennies.

Syrup batches I made this week: Caramel, Hazelnut, and Vanilla

Here are but a few of my faves, and a few new-to-me kinds I recommend making at home yourself. And they all have the same two starter ingredients: water + sugar (or sweetener of choice) in a 1:1 ratio to form a simple sugar base. Here we go.

Bar Cart Simple Syrup:
1C Water : 1C Sugar (any)

Bring water and sugar to a boil on med-high heat, stirring constantly until the sugar is fully dissolved. Once at the boiling point, drop heat to a simmer and let it low boil 10 mins. Cool completely off the burner. It will thicken up if you chill it in a storage jar.

Caramel Syrup:
1C Water : 1C White Sugar

Over a less than medium heat, stir the sugar often and alone in a bare pan, until it hits a lumpy liquid stage. Heat up the water in the microwave so it’s hot, but not boiling.

CAREFULLY dribble the hot water into the sugar a bit at a time, whisking when it’s safe to have you hand near the pot. The water + sugar will cause a steam reaction initially that will burn your hand if you pour it all in at once. Resist that urge.

Keep stirring the mixture until all of the sugar is smoothed out (don’t worry if some of it hardens – that will melt eventually as you continue stirring).

If you need more control of the sugar from hardening or burning, you can slip the pot halfway off the burner as you stir, returning the pot fully to the burner when you feel the sugar is melting needs more heat to finish.

Cool completely off the burner. It will thicken up if you chill it in a storage jar.

Hazelnut Syrup:
1C Water : 1C Sugar (not brown sugar; it will overwhelm the final flavour)
1 tea Hazelnut Extract

I went to many stores, but Michael’s was the only one that had this extract product.

Like the above two recipes, dissolve the sugar in the water fully, bring to a gentle boil, drop heat and let it simmer 10 mins before adding the extract off the heat and cooling completely. Store in a jar in the fridge to thicken it, or on the counter to use as is.

Brown Sugar Syrup:
1C Water : 1C Brown Sugar
3-4 drops or 1/4 tea Vanilla Extract

This syrup was the hottest new thing last year at Starfakes, and it looks like they are going to make it a big player in the summer coffee drinks game this year, too. Add this to some whipped cold milk foam, and pair them with some cold coffee, and you will have the summer heat licked before it starts.

Make the same as any of the previous syrups: bring to boil, drop to simmer for 10 mins. Cool completely. Jar and store in fridge for thicker or on the counter.

Mint Syrup:
1/2C Water : 1/2C Sugar (any)
2-3 Drops Mint Extract

This is a great version of the bar cart simple syrup for sweetening your summer drinks. Make the same as any of the previous syrups: bring to boil, drop to simmer for 10 mins. Cool completely. Jar and store in fridge for thicker or on the counter.

Coffee Syrup:
1C Water : 1C Sugar
3 Tbsp Instant Espresso or Instant Coffee Powder

Make the same as any of the previous syrups: bring to boil, drop to simmer for 6 mins. Skim off the foam as it simmers or strain into a cheese cloth when off the heat. Cool completely. Jar and store in fridge for thicker or on the counter.