Auntie Stacey’s Taco Bowls

l love any recipe that cleans out my fridge. This is one I keep returning to over and over again. I know it seems like a lot of prep, but it’s fast, easy prep. Nothing too complicated or even expensive. Give it a go when you’re craving Mexican rice bowls but don’t want to leave the house or even pay $15 for one serving.

Auntie Stacey’s Mexican Spice Blend:
2 tea each: Onion Powder / Garlic Powder / Ground Cumin
1 tea ea: Black Pepper / Seasoning Salt
1/4 tea Ground Red Hot Chili Pepper Flakes

Auntie Stacey’s Mexican Rice Bowl:
1 cup Jasmine Rice, rinsed twice + 1 1/2 cup water
Pinch Salt
2 tea Mexican Spice Blend
1″ x 2″ knob of Unsalted Butter, cubed
1/4 cup Red Pepper, diced
3 fistfuls Frozen Corn
1/3 cup Pinto Beans, canned/rinsed

Basic Mexican Ground Beef:
1 tbsp Oil
1/4 small Onion, diced
1 lbs Ground Meat of choice
1 tbsp Mexican Spice Blend

Topping Selections:
1/2 Roma Tomato, diced
1/3 cup Marble Cheese, grated
1/4 cup Sour Cream
1/2 cup Leaf Green, 1″ x1″ torn pieces
Pickled Jalapeno Rings (optional)
Pickled Red Onion Slices (optional)
Salsa of choice (optional)

And if you have any leftover ingredients like the cheese, the meat and the rice blend,  mix them together and stuff them into some steamed bell pepper halves. Top with a bit more cheese grate if you have it.

A Burger For The Ages

I don’t make a lot of burgers by hand at home. When we do burgers, it’s typically store bought pre-formed and frozen for convenience only. The husband takes them to work fully cooked on the smoke bbq and cooled down, with a slice of cheese and anything else he wants to add to it on the fly.

I was cleaning out the two freezers last night (the one attached to the fridge, and our cube stand up mini freezer) and found some portioned ground pork in ziplock bags. I pulled them out thinking I can use it for a dinner this week. Not specifically anything like burgers, but sometimes I like to form them into a meatloaf or meatballs before even thinking about burgers.

Tonight I made burgers for a change of pace. And now my husband is demanding to be kept in the style to which he quickly became accustomed to (as of tonight). *sigh* Ok, fine. Here is what I made him:

Creole Burgers:
14 oz Ground Pork
3 tea Creole Dry Rub
I Egg
3/4 C Breadcrumbs (of your choice, though I used Italian flavoured)
1/4 C Parmesan Cheese, grated up

Don’t overwork the meat mixture as you combine everything. I measured out meat for three patties at 4.6/4.7/4.7 oz each. Each was hefty and fantastic. It was a tasty burger on its own that could forgo a bun if need be. But, of course we topped it with sauces, veg and lettuce from our herb garden.

I was spoiled Beyond when this truck showed up at my workplace.

I was, I suppose, trying to give that Beyond Meat burger I had earlier this week a run for its money. I think this burger is just as tasty as the meatless one. Similar flavour palette, same texture, same satisfying feeling in our tummies.

Try this burger recipe and tell me what you think.

Auntie Stacey’s Moussaka

moussaka-4Today it’s raining, so today is a great day for us to get real about, of all things, Moussaka.

Moo-saka, as most would say, or Moo-ss-ah-kah, as the Greek people pronounce it, is comfort food at its simplest, finest, and tastiest. This is a casserole dish my husband will unabashedly ask for a third helping of. It is that good. Oh, yes it is.

Traditionally this classic casserole is made with eggplant, but since only one of us likes eggplant, I have taken to making substitutions for him. I love him that much. Oh, yes I do. My version swaps out the eggplant for strips of zucchini and roasted red peppers.

I have been in Greek restaurants in a few parts of Canada that serve this dish with thicker generous layers, and whipped potatoes on top, but I don’t feel any of that’s right. This is a peasant’s dish, therefore it should be kept it as simple and bare bones as possible, and layered with Bechamel sauce up on top just like the Greek peasants did it when it was first invented. This is a great dish for the Spring/Summer time when you don’t want to eat a lot but you do want to eat well. This will do the trick. Every time.

Give this one a whirl, and if you are from different regions near Greece, feel free to add something that is familiar to you in place of the eggplant and let me know how that turns out. Here is the basic recipe I use.

Auntie Stacey’s Moussaka:
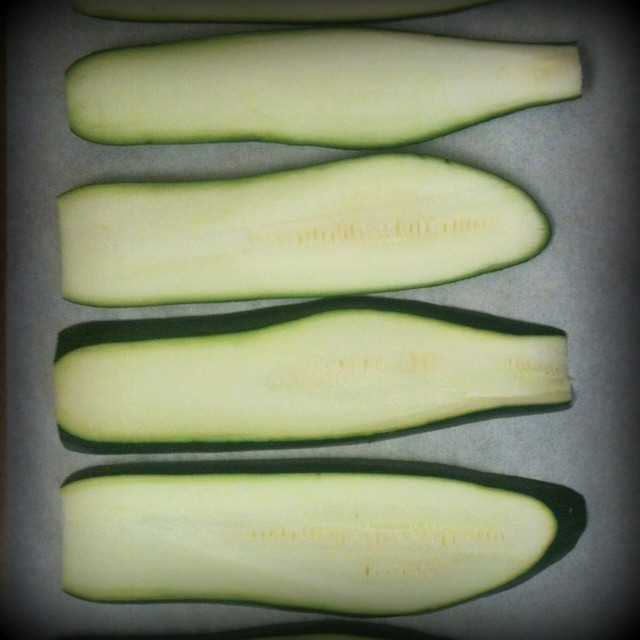
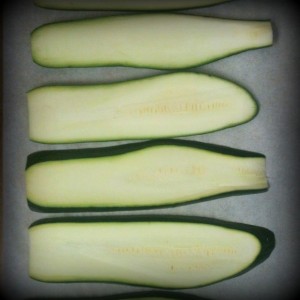
2 Zucchinis – sliced lengthwise 1/4″ thick
Salt – sprinkle over both sides of the zucchini slices, set aside for 10 minutes
Black Pepper – freshly cracked
10 oz Roasted Red Peppers – sop up excess brine with paper towels

1 Tbsp Oil
3 Cloves Garlic – minced (or whole if you only want to flavour the oil)
1/2 Yellow Onion, chopped finely
1/2 Lbs Ground Lamb (or veal, beef, or pork , or a combination of a few)
8 oz Tomato Puree
1/4 C White Wine
1/2 Tea Dry Basil
1 Tea Oregano
Small Bay Leaf
S&P – roughly 1/2 Tea each

2 Tbsp Butter
2 Tbsp Flour
1/2 C Milk
S&P – small pinches
1/4 Tea Nutmeg – grated (optional)

1/4 C Cheese – grated (I used Parmesan)
1/8 C Breadcrumbs

Preheat oven to 500 degrees while heating up a large skillet. When the skillet is hot enough, add 1 Tbsp of oil to warm up. Add the garlic to the pan (I drop the cloves in and heat them up for about a minute or so to flavour the oil, then I discard them), and after a minute I add the chopped onion. Cook the onion until they are translucent and smell fragrant.

Add the meat to the pan and start to break it up into small grinds while tilling it over in the pan for about 5 minutes. Wash and dry the zucchini at this point and start slicing it up lengthwise into one quarter inch pieces. The idea is to have them cover the whole bottom of the baking dish in the assembly stage of this casserole.

When the meat is browned all over, add the tomato puree and white wine. Stir to incorporate it all with the meat before adding the seasonings. Cook another two minutes and remove from the heat, discard the bay leaf, and let it rest while broiling the zucchini slices.

Wide Zuke Strips
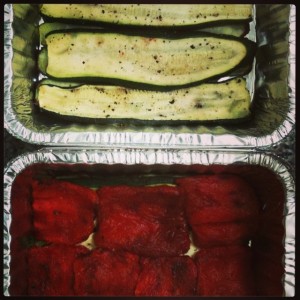
Place the slices on a lined baking sheet and broil each side of the slices about 3-5 minutes. Set them aside once wilted and browned enough to cook a bit while bringing the oven down to 350 degrees.Bechamel Sauce
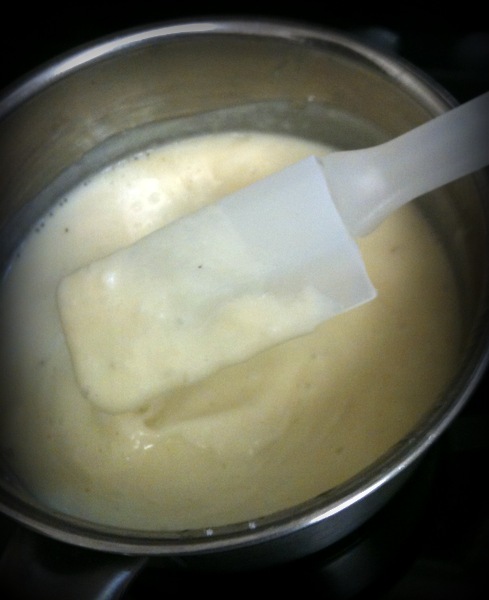
In a small sauce pan, heat up the milk and butter to start the Bechamel sauce. Once the butter is melted completely, add the flour and seasonings and stir constantly until it comes together in a thick white sauce. Remove from the heat immediately at this point to rest a minute or two while assembling the layers casserole like so:

Layer 1: Zucchini slices
Layer 2: Roasted Red peppers
Layer 3: Meat mixture
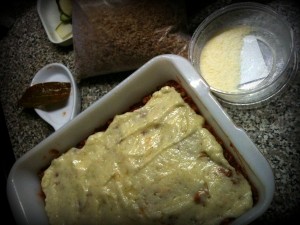
Layer 4: Bechamel sauce
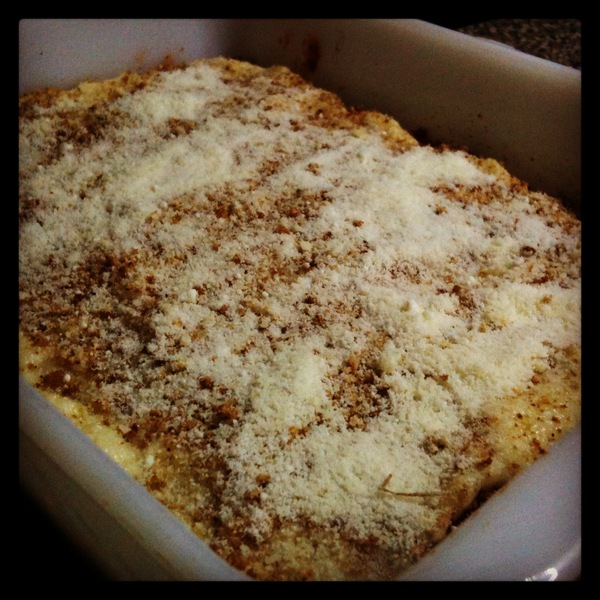
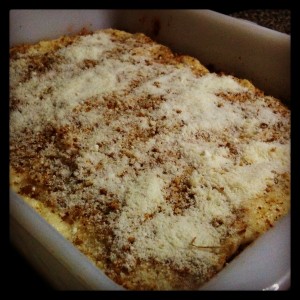
Layer 5: Breadcrumbs
Layer 6: Parmesan cheese – ground or very fine grate

Bottom Two Layers Meat Sauce Middle Layer Bechamel Middle Layer Top Two LayersMoussaka-3a
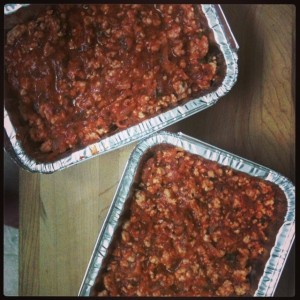
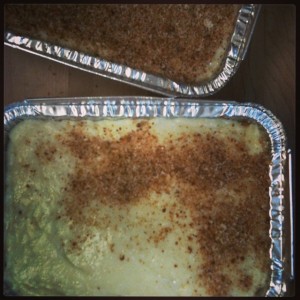
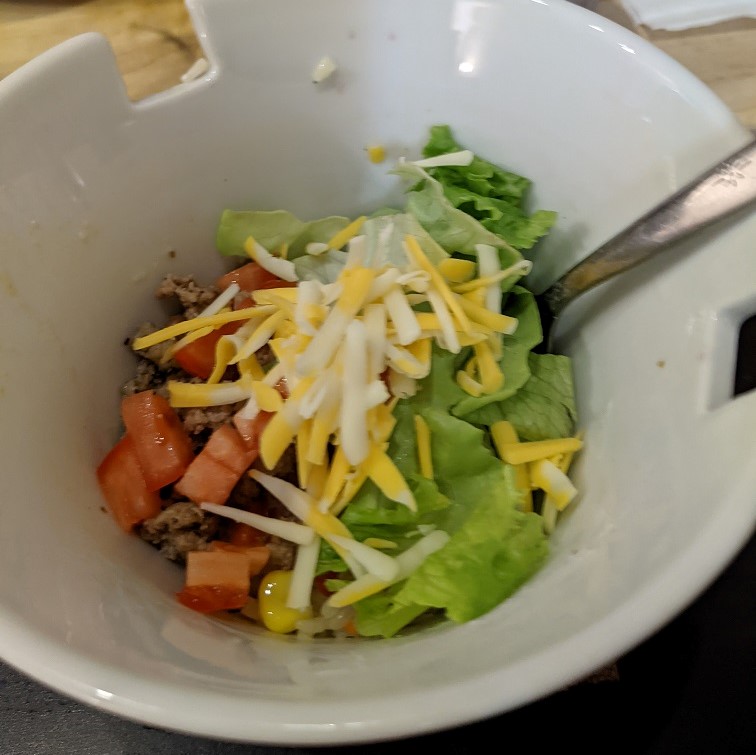
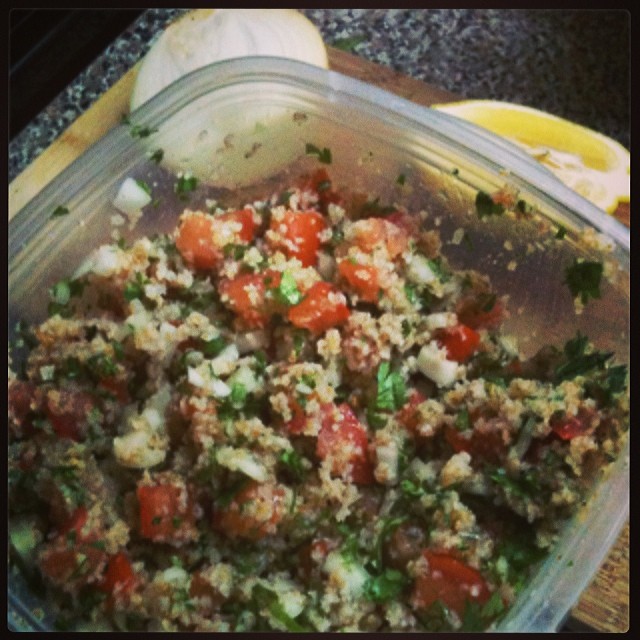
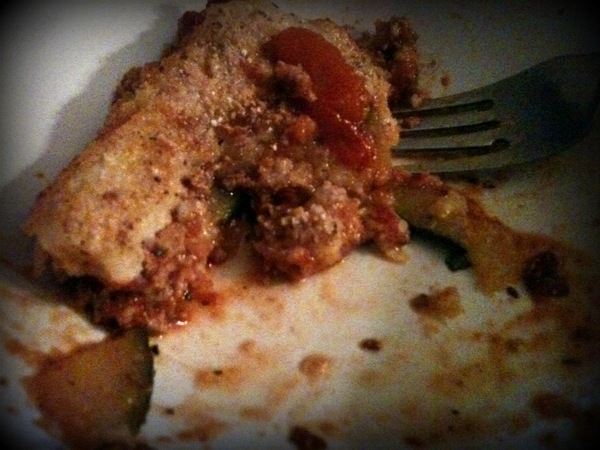
Once assembled, bake for 30 minutes uncovered. Let it rest 5 minutes before serving with a lovely side salad and small hunks of bread with some heated up oil on the side. Or let it cool down as much as it will in a holding time of no more than 30 minutes before storing it the freezer for the future.

Finito
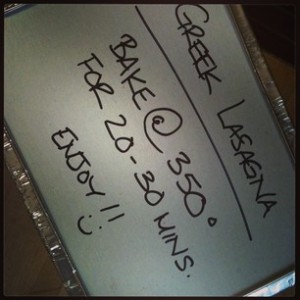
[ This two container batch is for my MIL who is 87, a diabetic, never eaten Greek food in her life, and is suspicious of anything she’s never heard of before hence labelling them as Greek lasagnas. It’s a close cousin of Italian lasagna, but without the pasta layers. ]

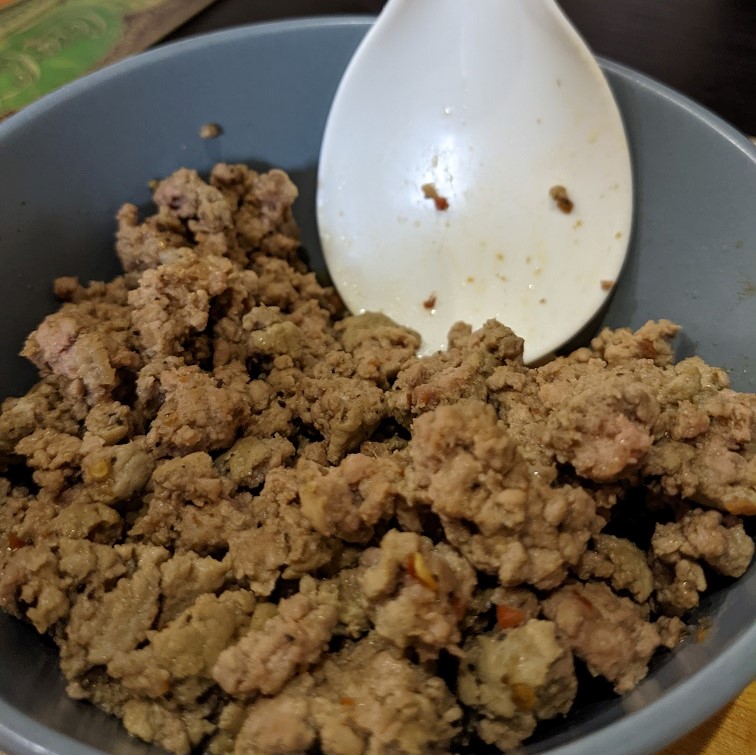
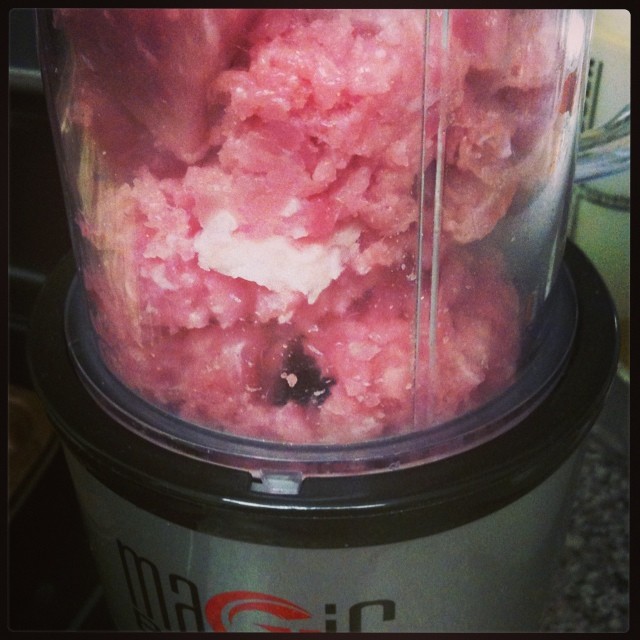
Note: I often grind meat in my food processor or Magic Bullet if I have a great piece of meat already on hand at home to use up, or I cannot find any good already ground meat I’m after at the grocery store. I cut the meat of choice up into 1 inch cubes, and I process them in a few small batches.grindingmeat

Auntie Stacey’s Tabbouleh

tabbouleh[ Click to embiggen ]

Tabbouleh is a great salad for the summer months when the heat is intense and the stove is ignored in our house. I really love eating it at room temperature, too. I’m weird like that. It makes a wonderful addition to salad bars, so keep this in mind for your next brunch. It’ll be a lovely unexpected surprise for your vegetarian guests. We all get stumped when planning meals for those who have specific eating habits, right? It’s all ok because tabbouleh is here to save the day, and your dinner parties!

Years ago I worked with a chef named Sami. Sami is from Lebanon. Sami’s mother taught him how to cook as a little boy. Many of the recipes she taught him he still uses today at work and at home. He used to make the best tabbouleh I have ever eaten, so one day I begged him to teach me the ways of his magical salad. Surprisingly, he was happy to pass it along to me, imparting some great home cooking philosophy along the way.

Here is a version of his mother’s tabbouleh based on my calculations and ingredient choices. He never gave me increments, just suggestions and steps. His feeling is that tabbouleh should be a free flowing salad that has some basics for structure but lots of freedom for using the freshest ingredients you can get your hands on, so feel free to look at this recipe as I do – as a guideline.

Auntie Stacey’s Tabbouleh:
1/2 C Bulgur
1 C Water, boiled
1 Tea Salt

1/2 Yellow Onion, medium sized, chopped to small dice
1 C Water, very hot
1 C Water, very cold

2 Tomatoes, medium Hot House (or 1 C chopped Grape Tomatoes)
1/4 C Herb of choice, fresh, washed and chopped up, packed down *

1/2 Tea Pepper, fresh cracked
1-2 Tea Lemon or Lime Juice, freshly squeezed
1/4 C Olive Oil

* Note: I have made this salad over the years using the following herbs: parsley (flat or curly – doesn’t much matter except for presentation aesthetics), mint (lovey when in season and the herb Sami liked to add a sprinkling of along with the parsley when it was in season), and cilantro (I love cilantro so I tend to use this a lot). This will be the first year I’m growing sorrel, and with its lemony tinged taste, I will be trying that in this salad as soon as I can, so I’ll report back at a later date about how well it worked, or didn’t.

Bring the water in a small sauce pot to a simmer and place the bulgur, salt, and any aromatics (bay leaf, star of anise, etc) into the boiling water, Lid the pot and set a timer for 12 minutes to cook. In the meantime, prep all the other ingredients.

In a bowl, place very hot water from the tap over the small diced onion bits and let it sit for 5-10 minutes to take the sting off. Afterward, drain the hot water and cover with very cold tap water. Let it rest the same amount of time before draining and dumping the onion into a large container. Set this aside.

While the onion is bathing in the hot and cold baths, wash and chop up the fresh herb and measure it out to a packed 1/4 cup. Top the onion with it. Cut and seed the tomatoes. Dice them to a small but not too small size. Top the herbs and onions with the diced tomatoes. Crack the pepper over top and pour the juice of half a lemon (about 1-2 teaspoons) and olive oil over that.

When the bulgur is finished cooking, fluff it up and dump it over the other ingredients in the large container. Using a spatula or gloved hands, till all of the ingredients well in the container, until everything is sure to be covered by the citrus juice and cracked pepper. Taste the overall flavour, and adjust the amount of salt and pepper as desired at this point.

Cover and chill this salad for at least 24 hours before serving. It will be hard (I know!), but the ingredients need time to rest and marry with each other. Trust me, the wait will be worth the time and resistance.

Auntie Stacey’s Waffle Mix

waffles

These are some yummy waffles I make most Sunday mornings for the husband (below). He loves them! And I find kids really love these waffles, too. A lot. I know one little boy who ate so many, even the adults were stunned. I, of course, sent him home with leftover waffles in his pants and jacket pockets. You know, for the road trip home. That 17 minute ride can be soooo long when all you’re thinking about is your next waffle fix. 😉

FYI: Sometimes I sub out the milk for water or whatever juice we have on hand each Sunday morning. We can taste the fruit in the waffles, and they even seem a bit more moist. Plus, you can’t beat an orange hued waffle. Oh, and we also use this batter to make our pancakes when we’re not in the mood for waffles.

You can also use this batter to dip your Texas Toast in if you’re in the mood for french toast hot off the griddle. Just mix it up the night before, cover it and refrigerate, until you need it the next morning. It may need to be thinned out a touch more after a night of chilling. I add a few dribbles of water when I do.

Waffle Mix in a Bag:
2 cups all-purpose flour
5 teaspoons baking powder
4 tablespoons granulated sugar
1 teaspoon salt

2 eggs
1/2 cup vegetable oil
2 cups milk
1 teaspoon vanilla extract

Combine contents of jar with eggs, oil and milk. Pour dry mix into a large bowl. Add eggs, oil and milk. Stir until well combined, but no more than that. Don’t over mix.

Allow the bowl of batter to sit in the refrigerator for 5 minutes to thicken up as the baking soda does its thing.

The pancakes can be frozen after frying. Store each separately in plastic wrap and place in a large freezer-safe plastic bag. Reheat in microwave.

Dilled Mushroom Stroganoff

PickleJuice PickleJuice2

This is a recipe I’m working on currently. I love it as is because it’s so quick, easy and flavourful without a lot of ingredients needed, but I still want to tweak it to see if I can make it better in the future to suit my moods. But, for now, this is the basic idea. Try it at home and let me know what you think.

The twist to this classic is that instead of wine (we don’t drink it here), I use dill pickle juice.

I know, right?!

At work I’m fortunate enough to have access to pails upon pails of pickles where the brine is left behind after we slice up the pickles for garnishing. I took a half pail home one night and as you can see in the above pic, it filled up a lot of my mason jars quite nicely. I am currently dreaming up uses for all of that delicious dill pickle brine. If you have any ideas, please leave them for me in the comments!!

Auntie Stacey’s Dilled Mushroom Stroganoff:
1 C Mushrooms, thinly sliced and washed
1/2 C Red Onions, thinly sliced
1 Tea Bacon Fat
1 Tbsp Oil

1/2 C Pasta

1/2 Tea Paprika
S&P, to taste
1 Tea Basil, dried (or 1 Tbsp fresh, chopped)
3/4 C Dill Pickle Juice

1/2 C Full Fat Sour Cream (or plain cream cheese if you prefer)

Put a pot of water on the stove to boil for the pasta. In the meantime, heat up a large frying pan. Wash and sliced up the mushrooms, and then sliced up the onions. When the frying pan is hot enough, add the bacon fat. Let that melt before adding the oil. When those two are hot enough, place the onions into the pan and let them soften a minute or two before adding the sliced mushroom. Toss them around in the fats to coat before reducing the heat to med-low and cover the pan with a lid to slowly cook the veg down.

Salt the pasta pot and add the noodles. As the noodles cook, add the paprika, basil and S&P seasonings, as well as the pickle brine juice, to the onions and mushrooms. Again, toss to coat all the vegetables completely. Return the lid to the frying pan to cook till the pasta is done. At that point, add the sour cream to the pan. Stir the cream into the brined vegetables fast so it doesn’t scald or burn. Take both the pot and pan off the burners, and turn off the stove burners.

Drain the pasta a large bowl and top with the stroganoff, stirring to incorporate both into one before plating, or simply add the cooked pasta to bowls and top with heaping spoonfuls of the stroganoff. Top each bowl with a bit more basil if using fresh leaves.

Korean Beef & Noodles

Korean_Beef_Udon_Noodles_001

[ Placeholder picture from “You Gotta Eat Here!” until I get a chance to snap my own. ]

Following the same theme as the last post about watching “YGEH!” and foods features in some of their segments, here is my version of their Korean Beef & Noodles that I made for the husband and myself the other night. I forgot the sugar, and it was sorely missed. The sauce is too acidic without it for my liking. Though, having said that, I’m not a fan of sugar in savoury sauces, so I will probably scale the sugar back to 1 – 2 tablespoons when I make this again. And I will make this again. It’s fast, it’s cheap and it’s easy. This is exactly the kind of dish I love to make after a long day at work, and dinner needs to hit the table in under 40 minutes. (I let meat rest for 30 mins to come up to room temperature before I cook it.)

I think the meat cost me $2.50, the noodles were $1.25 a pack, and the rest of the ingredients added up to, maybe, $2.00? Again, dirt cheap to make. And fast. And packed with flavour. Feel free to add more vegetables if you like to bulk this dish out. I know that’s what I’m planning to do.

Korean Beef & Noodles:
Sauce
1 TBSP Garlic, minced
1/2 T Ginger, fresh (I used 1/4 T ground)
1/4 C Brown Sugar (I’ll use 1-2 TBSP max)
1/4 C Soy Sauce
3-4 TBSP Sesame Oil
1/4 T Red Chili Flakes

2 TBSP Oil (any nut based oil will work fine)
1/2 C Beef, cut into strips
1 Portabello Mushroom, sliced
1 Carrot, grated
2 Green Onions, rough chopped
S & P
1 Pkg Udon Noodles
Sesame Seeds

1. Mince the garlic and chop or grate the ginger. Place in a large bowl. Over that, pour the sugar, soy sauce, sesame oil and red pepper flakes. Whisk up and set aside.

2. Heat up a pan, and then add the nut based oil to it. When the oil is hot enough, drop in the beef and Portobello slices, and ladle about 1 cup of the sauce over top. Toss and stir to coat the sauce over everything in the pan, and then let everything cook long enough to brown the meat and slightly soften the mushroom. (About 3 minutes.)

3. Add the uncooked udon noodles to the pan, along with the salt + pepper. Stir to coat the noodles before grating the carrot over the pan and adding the rest of the sauce. Cook this all together over med-high heat for another 3 minutes or so (the noodles don’t take long to heat through, so take care not to burn the sticky sauce by leaving them in the pan too long).

4. Plate the mixture into serving dishes, and top each serving with the green onions and sprinkles of sesame seeds.

Lobster Mac & Cheese

LobsterMac&Cheese-3[ Click to embiggen picture of Lobster Mac & Cheese ]

We’re not the kind of people who love to go out to eat much anymore, nor are we the kind that dress up to go out for wine and fine food. Having said that, we are the kind of people who will watch tv shows like “You Gotta Eat Here!” and find new things to cook at home using ingredients neither of us have ever tasted or used, including some more pricey items like good cheeses or truffles. From time to time, mind you. We aren’t the Rockefellers. 🙂

I have been clearing out a backlog of food shows lately and came across one featuring lobster mac & cheese. My husband always stops wherever he is, whatever he’s doing, when his two favourite foods in the whole world are mentioned: lobster, and mac & cheese. So, of course I had to watch the “YGEH!” Déja-Bu segment over and over till I figured out how to make our own version at home, at our own stove, with the ingredients I know I could get my hands on easily. I even studied the recipe published on the tv show’s website.

I scaled down the increments from the originating recipe because I don’t like lobster (that was strictly for the husband), and it’s just the two of us feasting. Two bowls were more than enough for one night. I stored the rest of my Mornay sauce in the fridge to make another bigger batch of baked mac & cheese tomorrow or Monday night. Probably with some chicken and vegetables thrown into it for good measure instead of the lobster.

LobsterMac&Cheese-4

[ The basic Mac & Cheese using just the Mornay sauce, onions and cilantro. ]

Here’s what I came up with. Play along at home if you like this recipe.

Lobster Mac & Cheese:
(Béchamel + cheese = Mornay Sauce)
1/4 C white or cooking onions, diced
2 oz butter
4 TBSP flour
1 lemongrass stalk (or three lemon rind peels)

3 C whole milk
S & P
2 oz gruyere + 1/8 C parmesan cheeses

2 C cooked pasta
1 TBSP butter
2 oz lobster meat (I used lobster flavoured white/pollack meat)
Drizzles of truffle oil (completely optional if feel you want the full Monty)

1. Start the pasta water so it boils while working on the other ingredients. Whack the lemongrass stalk along the length with the back of a big knife (or, if using a lemon instead, peel three strips of rind off) and set aside.

2. Melt the butter in a stock or sauce pan that can hold up to 5 cups of liquid easily. While that’s melting, dice up the onions. When the butter is bubbling, add the onion dice to the pot and let it cook for 3 minutes before adding the flour. Stir the mixture till it balls up and leaves the side of the pot to form the roux. Pour in 1 cup of milk at a time, whisking the roux into the liquid. Let the milk and roux heat through and thicken up, stirring occasionally so the milk doesn’t scald and burn at the bottom of the pan.

3. Add the pasta to the heavily salted pot when the water hits the boiling stage. Give the noodles a quick stir so they don’t stick or clump to each other as they cook for 8 minutes.

4. When the milk mixture is thickened enough to coat a spoon or spatula, remove the pot from the heat and start to ladle it into another bowl or pot with a mesh strainer sitting over the opening to catch the lemongrass or peels and the onions. Place this strained Bechamel back onto the burner and add the cheeses to the pot. When the cheese is fully melted, a few scoops of this Mornay sauce can then be used in a small to medium sauce pan along with two scoops of cooked pasta. Toss to coat the pasta fully.

5. Let the pasta and sauce simmer on med-low heat while melting butter in another small sauce pan. Add the lobster meat when the butter if fully melted. Toss to coat all of the meat; let it heat through (about 3 minutes).

6. Plate the pasta and sauce, and place the lobster meat over top of it, arranging the meat chunks in a pleasing arrangement on top of the noodles. Pour the butter drippings from the pan over top of the lobster, and sprinkle some rough chopped fresh herbs over that and top it all with drizzles of the truffle oil if using. Serve immediately.

Auntie Stacey’s Butter Chicken

ButterChicken-PanOne of my favourite uses for boneless chicken is Butter Chicken. If done right, this dish can satisfy, comfort, inspire, delight and sting. It’s magical. Truly.

The secret to a dish like this is making it spicy and creamy enough to stand up to the fragrant nutty smelling jasmine rice it’s going to sit upon. When butter chicken and jasmine rice meet, my body and soul are nourished in a way I can’t quite describe.

It’s…

Magical.

So, for people who have never tried butter chicken (criminal!!), this is my version. Give it a go! 🙂

Auntie Stacey’s Butter Chicken: (Yields 8-10 servings)

JASMINE RICE:
1/2 C (per person) Jasmine Rice
1/2 C Water (per portion per person)
1/4 C Water (additional)

Place the jasmine rice in your cooking pot and run water over top up to three times to remove as much of the starch as possible (optional – sometimes I don’t even bother because I like starchy rice). With your hand, swish the rice around till the water goes cloudy, then drain it. Repeat this step two more times  before measuring out your cooking water.

With the rice and cooking water in the pot, heat the pot till the water starts to gently boil. At that point, drop the heat down to the lowest setting, lid the rice pot and set the timer for 15 minutes.

After the timer goes off, lift the lid and place a small wash cloth the opening of the pot and then replace the lid before moving the rice off the burner. Set the timer for a final five minutes. The cloth is used to absorb most of the remaining moisture so the rice doesn’t remain mushy, but rather finishes in an almost dry and fluffy state.

If the rice finishes before the butter chicken is made, it can stay in the pot off the burner till it’s needed for plating.

BUTTER CHICKEN:
20 oz Boneless Chicken
6 C Water
2 Tbsp Chicken Stock Powder

Dissolve the chicken stock powder in hot water in a large pot on the stove. Add the chicken when the water comes to a boil. Cook the chicken until it reaches a temperature of 160 degrees. Remove the meat and set aside to cool until the meat no longer lets off a visible steam so you can cube it into bite sizes or pull it apart by hand or in a large mixer using the paddle attachment. (The chicken can be made up to two days prior if timing is too tight to make it all in on go.)

1 Tbsp Butter
1 Tbsp Vegetable Oil
1/4 C Yellow Onion, fine diced

Heat up your pan, and when hot, add the oil. Heat the butter until it foams up and then add the oil and heat through until a drop of water crackles when it hits the fats. Add the onion and saute until it becomes translucent.

Note: I don’t like the stench of garlic on our breath, but if you like it, feel free to add some in the pan when you cook your onions. I would think one minced clove would do the trick.

14 oz Tomato Puree (Passata Sauce)
1/2 C Diced Tomatoes (or stewed from a jar)
1/2 Tsp Black Pepper, freshly cracked
1/2 Tsp Sea Salt
1 Bay Leaf

Add these five ingredients to the pan and heat through while you mix all of the dry spices together in a small bowl. After that, start pulling the chicken apart in to bite size chunks.

1/2 Tsp Cayenne Pepper (or more if you really like heat)
1/2 Tsp Ground Coriander (or dried basil if coriander isn’t on hand)
1 Tsp Cumin
1 1/2 – 2 Tsp Garam Masala
1/4 Tsp Cardamom (found in Indian grocery stores)

Add the chicken to the pan and heat that up in the tomato sauce and then add the spices. After you add the spices, stir really well the evenly distribute the flavours.

1/2 C Thick Yogurt (or full fat sour cream)

Stir in the dairy to the pan to turn the tomato sauce into a creamy base that coats all of the chicken. Keep stirring until it’s combined fully. At this point, taste the sauce before you can finish the dish with a bit of salt (if needed). Now is the time for the final taste tweaks!

Add some freshly parsley or cilantro leaves to give the final sauce and chicken another flavour, colour, and texture.

Plate your jasmine rice into large shallow dishes (something with a small wall would be fine), and top the rice with one or two heaping scoops of your butter chicken. Serve this with toasted flat or naan breads in case it’s too spicy for some.

Alt Plating Ideas: Steamed cauliflower for the warm naan, dry parsley for the cilantro (since only half of any given population like this herb), and mashed potatoes for the rice.